Showing posts with label Entrée. Show all posts

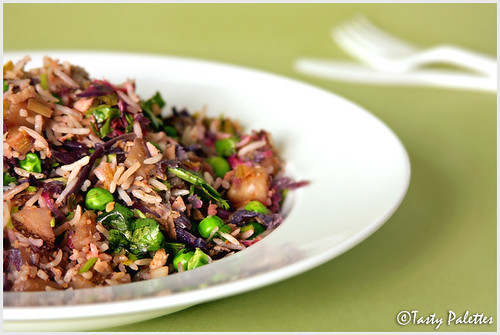
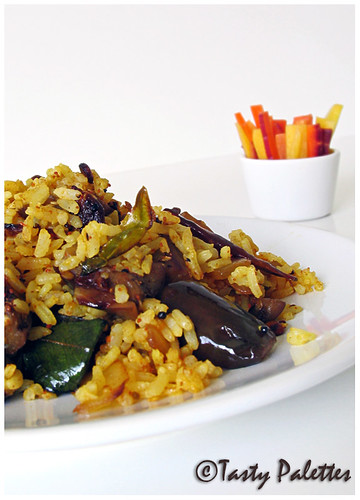
Pavakkai Sadam – Spiced Bittergourd Rice

There are few standard bittergourd recipes that we enjoy year round. Pitlai is a family favourite, followed by oven baked chips. This time G asked for something different. ‘Why don’t you just do a sauté or a simple curry?’, he asked. Very well. The recipe he was mentioning was an old one that my mom makes often. The gourd is cooked and lightly seasoned with mustard seeds, urad dal and chana dal.

When I set to prepare the curry, I thought why not make this into a mixed rice. I haven’t seen bittergourd rice around, so why not extend this curry idea into rice? So I concocted a little spice mixture and prepared this curry. We Loved it (yes, with a capital L). This is definitely a keeper.

One technique that I adopted from the curry is to cook the bittergourd in tamarind water to tame its bitterness. Also, 6 red chillies may sound hot, but it is needed to compensate for the bitterness, along with tamarind and jaggery. Enjoy this slightly bitter and lightly spiced rice with cool raita.

Pavakkai Sadam – Spiced Bittergourd Rice
(serves 2)

Rice – 1 cup
Bittergourd – 8, about 6 inches long
Turmeric powder – 1 tsp, divided
Tamarind paste – 1 tbsp, divided
Mustard seeds – 1 tsp
Curry leaves – a few
Jaggery – 1 to 2 tsp
Salt
Oil

Spice Mixture

Urad dal – 1 tbsp
Bengal gram – 1 tbsp
Coriander seeds – 1 tbsp
Dried red chillies – 6 to 8
Cardamom – 1
Clove – 1
Cinnamon – ½ inch piece

Method

Cook rice with 3 cups of water and ¼ tsp of turmeric powder. Adding turmeric powder gives a golden hue to the finished recipe, which may otherwise be a dull brown. The rice grains should be separate after cooking. Fluff and cool. Cut the bittergourd into half moon rings. If the seeds are very tough and mature, scrape and discard. Otherwise retain the seeds; they add a mild crunch to the rice.

In a wide, deep skillet, roast the ingredients for the spice mixture in a tsp of oil. Cool and grind to a fine powder. In the same skillet, boil bittergourd in 2 cups of water along with salt, turmeric powder and ½ tbsp of tamarind paste. When the gourd has turned soft (but not mushy), drain and discard the liquid.

Return the skillet back to heat. In a tbsp of oil, splutter mustard seeds and roast curry leaves. Add the cooked bittergourd, along with ½ tsp of turmeric powder, jaggery and rest of the tamarind paste. On a medium fire, gently roast the gourd. When they start to caramelize, add the spice powder, rice and salt. Mix thoroughly and heat through. If the rice seem very dry, drizzle a tsp of oil. Check for seasoning and serve hot with raita and chips.

Pavakkai sadam with cucumber+tomato+cilantro raita

Indian Spiced Millet And Black Bean Timbale

Its no secret that even an ordinary dish can look extra ordinary with proper plating. You don’t have to go to great heights to achieve restaurant-like perfection. With a little creativity and attention to detail, this can be a snap.

Like I did with this timbale. Creamy millet imitating mashed potatoes, black beans dressed with Indian spices instead of the usual Mexican flavour, and a little raw vegetable for crunch and colour are stacked, rather than being scooped onto a plate. It may look fancy, but is really simple. Of course, this is just an idea, rather than a recipe. You can change the grain, bean and the vegetables per your liking. The medley of different flavours and textures was gratifying. All-in-all, this recipe is definitely a keeper. “It tastes like pongal” G said, after the first bite. I took that as a compliment, knowing how much he loves pongal.

Creamy Millet and Black Bean Timbale
(serves 2)

Ingredients

Millet Layer

Oil – 1 tsp
Onion – ½ cup, fine dice
Garlic – 1 clove, minced
Green chilli – 1, slit
Millet – 2/3 cup
Water – 2 cups
Salt
Yogurt – ½ cup
Water – ½ - 1 cup, or as needed
Cilantro – 1 tbsp, chopped finely

Bean Layer

Black beans – 2 cups, cooked and slightly mashed
Zest and juice of half a lime
Ground coriander – 1 tsp
Red pepper flakes – a pinch
Salt

Tomato and/or red bell pepper – 2 cups, small dice
Scallions, cilantro or green garlic – 2 stalks, sliced thin

Method

In a thick bottomed pan, heat oil, toast cumin seeds, followed by onion, garlic, and green chilli. Once the onion starts to soften, add millet, water and salt. Cover and cook for 25-30 minutes. Alternately, pressure cook for three whistles. The grain should be soft and mushy. Let cool slightly, add yogurt and ½ cup of water. The mixture should have the consistency of pudding. Add more water, if necessary. In another bowl, toss all the ingredients listed under bean layer and set aside.

To assemble, oil the insides of a mold ring, or an empty can with both the top and bottom off. Fill half the mold with millet. With wet finger tips, slightly push the mixture to form a solid layer. Top with tomato/bell pepper mixture. Finally scoop the black beans. Gently remove the mold, garnish with a herb of your choice.

If you don’t have a ring mold or an empty can, use a ramekin, build the layers backwards, unmold and serve. If layering is not your thing, don’t worry. Fill any bowl of your choice with the millet mixture in, unmold onto a serving plate, scoop beans and vegetables on top and enjoy. Your kitchen, your rules!

Timbale sprinkled with green garlic; enjoyed with tangerine soda

This is my entry to My Legume Love Affair, eighth helping. After visiting other blogs, this event is back at home this month.

Goodness Stacked – Easy Eggplant Bake

G and I love a good eggplant dish at any meal, any day of the week. I can’t remember a single grocery trip that we spotted, but skipped buying Indian eggplants. If its in the store, its in our shopping cart. We have some favourite eggplant recipes, and eggplant-parmesan is way up the list. There is a restaurant that serves it just the way we like it. But after I happened to know how much calories it packed, I always make it at home. One time, I accidentally (ahem, lazily) made up an easy method, with fantastic results. Now I make this much often.

These stacks are baked in a ramekin and are done in just 20 minutes. Not to mention, they make for an elegant presentation. Or you can bake them in a casserole for family style meal. Just remember to bake longer.

Easy Eggplant Bake
(serves 2 as main course, 4 as side dish)

Ingredients

Large eggplants – 2, sliced into ¼ inch thick rounds
Juice of a lemon
Oil

Parmesan cheese - optional for vegan version

Sauce

Tomato puree – 1 28 oz can
Red onion/shallot – ¼ cup
Garlic – 1 clove, minced
Red pepper flakes – 1 tsp
Fresh herb (thyme, oregano, rosemary, parsley or cilantro) – 1-2 tbsp, chopped
Oil – a splash
Salt

Method

Preheat oven at 375F. Heat a large skillet, lightly coat the bottom with oil. Toast eggplant slices in batches, laying them in a single layer on the pan. When you take the slices off the pan, hit with a quick squirt of lemon juice.

Meanwhile, heat oil in a sauce pan, sauté onion and garlic until soft. Add tomato puree, red pepper flakes, salt and ½ cup of water. Boil for 12-15 minutes the sauce comes together. Stir in herbs and take off the heat.

Lightly coat 6 ramekins (or a casserole) with oil. Spoon a tbsp of sauce in the bottom. Divide eggplant slices among the ramekins. If needed, apply a little pressure to fit. Spoon remaining sauce, transfer ramekins onto a baking sheet, and bake for 20 minutes. Allow to cool for 5 minutes, flip the stack onto a plate and serve with shredded parmesan cheese, if desired. Boil some whole wheat noodles and serve as a main dish. Or load up your plate with eggplants and a couple of crusty toasts.

For making this a vegan delight, loose the cheese and enjoy with a drizzle of balsamic vinegar and olive oil. The eggplants soak up the tomato juices, and the tomato itself condenses leaving an intense flavor explosion in your mouth. We totally loved it.

This is my entry to Vaishali’s new event It’s A Vegan World. Each month features a world cuisine and this month, its Italian.

Sweet Potato Gnocchi

My yoga master once said that we all go through energy blocks twice a year. Once around the beginning of the year and once around your birthday. You either feel sluggish, lacking energy, or downright fall sick. Surprisingly, I have noticed this to be true during more than one instance (or that my mind is playing tricks on me). Last year this time, I felt the same energy slump; 'Burn out’ as one of my blogger friends put it. I was uninspired for the better part of last month, and I am slowly reeling out of it. A clear day with plentiful sunshine and a shopping spree for new props was just the motivation I needed. I hope this vim continues for rest of the year.

To break free from the monotonous mood, I set to make ‘pillows of heaven’. No, not idly, its gnocchi this time. I have been wanting to try making it with sweet potato, rather than the usual potato. I had no recipe in mind, just mixing a little of this and that. And as the dough came together, so did the clouds. ‘Oh snap’, I thought, ‘there goes the photo shoot’. A little upset, I proceeded with the rest of the procedure. As I sat down by the French window making gnocchi, sheets of rain had started pouring down, tapping the glass door. That moment was so therapeutic that I forgot about the passing time. There is something mesmerizing about rainfall; bringing time to stand still.

But a meal had to be served, and I hastened to the kitchen. Once the dumplings are shaped, the rest is a breeze. Cook ‘em in pot of boiling water and serve with pesto or vinaigrette. The gnocchi was delicious. The texture was just right, neither too soft nor tough. I served mine with a pecan salad inspired from this recipe. I also managed to click few shots bent in awkward positions.

I made a double batch and froze the rest, but I could barely resist using them within a week. This time I pan fried the cooked gnocchi in a little butter and sage, and tossed them with a generous helping of roasted winter vegetables. Funny that my mind associated sweet potato gnocchi with rain even this time.

Sweet Potato Gnocchi
(serves 4)

Ingredients

Sweet Potato – 4, small, yielding about 3 cups of pulp
Flour – about 2¼ cups, plus more for dusting
Egg – 1
Salt
Pepper

Method

Microwave or steam the sweet potatoes. Peel and mash the pulp in a bowl. Add egg, salt, pepper and 2 cups of flour and start mixing lightly with a fork. Add more flour if needed. When finished the dough will be slightly sticky, but workable. Avoid over-working the dough, else you will end up with tough dumplings.

Transfer the dough to a well-floured working surface. Divide the dough into 4, and roll them into long ropes, about ½ inch thick. Transfer to a plate and refrigerate for 30 minutes. While the dough rests, clear the working area.

Take the dough ropes from the fridge, and cut 1 inch pieces with a floured knife. Gnocchi is good to go just like this. If you want ridges, coat a fork lightly with flour, and press against the little dough pieces, like the ones here. But if you want the classic rolled, ridged shape, take the fork and lightly coat with flour. Take one piece and press and stretch the dough against the fork using your fingers, like the letter ‘C’. Now, roll the backside of the flour slightly toward the end of the fork. With practice, the backside of gnocchi will lift as you press and stretch the front end. Gently lift the dough from the fork and transfer to a large plate or a baking sheet liberally sprinkled with flour. Make sure the gnocchi is well coated with flour, as they tend to stick together.

When ready to serve, bring a large pot of water to a boil. Gently shake excess flour off the dumplings and add to the pot of water. They are cooked when they float to the top. Drain, and serve immediately.

Serve tossed in your favourite cream sauce, pesto, vinaigrette or with roasted vegetables.

Pecan salad

Pecan – 1 cup, lightly roasted
Salad greens – about 4 cups (more if you like)

Vinaigrette

Lemon juice – ¼ cup
Garlic – 1 clove, minced
Cumin powder – 1 tsp
Parsley or cilantro – ¼ cup, chopped
Olive oil – 2 to 4 tbsp
Salt
Red pepper flakes – a pinch

Method

Whisk all of the ingredients to make the vinaigrette. The hot gnocchi instantly absorbs the flavours of the dressing. Toss with pecans, salad greens, and gnocchi, and serve with a crack of black pepper.

Even if you are cooking for one or two, go ahead and make the whole deal. Gnocchi is time consuming and requires patience. And, if you are going to dirty a bunch of dishes, you might as well double the batch, right? Cook and clean once, but enjoy twice. Cook as much gnocchi as you want. Spread the uncooked gnocchi on a floured plate or sheet and slide into the freezer. Once they are completely frozen, transfer them to a freezer safe bag and store. When ready, directly transfer the gnocchi from the freezer to the pot of boiling water.

This goes to Aparna of My Diverse Kitchen, who is hosting Food In Color – Orange.

Pecan, Squash and Cranberries Speckled Wild Rice

I stumbled upon this recipe one afternoon, by chance. Basmati rice, leftover cranberry-pecan topping from breakfast oatmeal, and some odd vegetables lying in the fridge were thrown together in a skillet. I served it over acorn squash baked in its shell. We absolutely loved the lunch, which was very filling, but took little time to fix. Next time around, I tweaked the recipe a bit. Wild rice mix was used instead of Basmati; the squash was cubed, roasted and added to the mix. I took this to our friend’s place for Thanksgiving dinner and got rave reviews. Best compliment was from their two year old. She just couldn’t get enough of it.

Pecan, Squash and Cranberries Speckled Wild Rice
(serves 2)

Ingredients

Wild rice mix – 1 cup
1 small butternut or acorn squash, peeled and cubed – about 2 cups
Pecan halves – 2/3 cup
Onion or shallot – ½ cup, chopped
Garlic – 1 clove, finely chopped
Carrot – 2, small, sliced at an angle
Celery – 1 or 2 stalks, chopped
Fresh thyme – 1 tbsp, chopped
Dried cranberries – ½ cup
Red pepper flakes – a pinch
Butter and/or oil – 1 tbsp
Salt
Pepper

Method

Cook wild rice either on stovetop or using a pressure cooker. If using a pressure cooker, use 1¼ cups water and cook for 2 whistles. If cooking on stove top, use 2¼ cups of water and cook covered for 45-50 minutes. The rice should be cooked, but firm.

Cook squash by any of the following methods. Steam for 15 minutes. Or boil in water for 10 minutes. You can also roast the squash in a 450F for 20-25 minutes. Roasting is my favourite, as it gives the squash a deeper flavor due to caramelization. It is also the most time consuming method. For convenience, you can roast the squash 2 or 3 days ahead, refrigerate and use when needed.

Meanwhile heat a large, wide skillet over low-medium heat. Gently toast the pecan halves until aromatic. Keep a close watch on the nuts. They go from lightly toasted to burnt in less than a minute. Transfer nuts to the board, cool, chop and reserve.

Crank the flame to medium-high, heat butter and/or oil, and sauté onions and garlic until soft. Add celery, carrot and red pepper flakes, and stir-fry briskly for a couple of minutes. Then add cooked rice, squash, thyme, cranberries and pecans. Season to taste, toss to combine. This rice tastes great whether served warm or at room temperature. I have also noticed that the flavour develops as it sits. So make this ahead, and serve slightly warmed.

This is my entry to Monthly Mingle – Healthy Family Dinners hosted by Michelle of What's Cooking Blog. MM is Meeta's brainchild.

I am pleased to announce that The Daily Tiffin has been nominated for Annual Food Blog awards by The Well Fed Network under Best Food Blog – Group category. We are, expectantly, very excited with the nomination. The DT team brings informative articles on family, kids, health, fitness, etc., month after month. If you have enjoyed your visits there, please help us win by casting your vote here.

Winter Comforts: Spicy Dal With Roasted Vegetables

Ah, winter, waiting to arrive in just days time. The sign of its onset is already evident here and there. This is a great time to be in the desert Southwest. The days are cool and evenings are cooler, but not cold. We hardly stay indoors these days. The drive around the block, a walk in the park, is all I yearn for during these nights.

‘Do you think we need a jacket?’
‘We’ll carry and keep it in the car; just in case’

Its that pleasant here. I see a lot of people still cruising around in their city shorts, taking in this wonderful weather, as much as they can. So, to my friend who bragged about fishing on a July afternoon on a mild 80F degree day, I say ‘Touche’. And, for those who were nice to me during summer, please visit us and enjoy the beautiful desert evenings.

To add to the beauty, it rained the whole of this week. The air was crisp, and was, for a change, humid. When I opened the curtains in the morning and saw the pouring rains, I craved for a bowl of steamy hot soup. Not just any soup, but the thick, creamy, hearty kind. With no particular idea on mind, I chopped the vegetables and tossed in the oven. Not wanting to cut any more vegetables, I chose a lentil base for the soup. The soup was everything I craved for and more. All that was left behind were empty bowls, full stomachs and content smiles.

Roasted Vegetables With Roasted Garlic
(4 servings)

Ingredients

Sweet potato – 3, small
Potato – 4
Carrot - 2
Parsnip - 2
Bell pepper – 2
Garlic – 1 head
Fresh thyme – 2 tbsp
Salt
Pepper
A splash of olive oil

Method

Cut all the vegetables into big chunks. Set bell peppers aside. Mix rest of the vegetables with thyme, salt, pepper and olive oil. Spread on a baking sheet covered with foil.

Cut the whole head of garlic into two halves, horizontally. Season with salt, pepper and olive oil. Wrap the halves in separate pieces of foil. Keep the prepared garlic head nestled among the vegetables.

Bake at 450F for 30 minutes, turning once in between. Add the reserved bell peppers, toss and bake for another 10 minutes. The vegetables should be caramelized around the edges. Let cool slightly.

Squeeze the some or all of the roasted garlic over the vegetables, per your liking. Refrigerate the rest in an airtight container for about 10 days.

Serve the roasted vegetables as such, or with any other carbohydrate like lentils, rice, quinoa, pasta, etc. Even if there are only two of you, make a whole batch, or even double it. The vegetables refrigerate well and leftovers come very handy.

Spicy Dal

Ingredients
(serves 2)

A mix of toor, moong and masoor dal – 2/3 cup
Turmeric powder – ½ tsp
Ginger – 1 tbsp, chopped
Green chillies – 2, slit
Salt

Ghee – 1 tsp (Use oil for a vegan version)
Cumin powder – 1 tsp
Red chilli powder – 1 tsp

Method

Wash all the lentils together. Pressure cook dal with 4 cups of water, minced ginger and green chillies for 4 or 5 whistles. Let the pressure die down. Take the cooked dal from the cooker, add salt and whisk vigorously until it becomes soupy. Add more water if required.

Heat ghee over medium heat. Take off the flame and add cumin powder, followed by chilli powder. Whisk immediately taking care not to burn the spices and add to the dal. Serve dal as such or mix about 2 cups of roasted vegetables.

This is my second entry of My Legume Love Affair, Sixth Helping - Hot & Spicy.

This has been an active week in the blogging front. Well, I wanted to post my entries to MLLA before I take a short break. I will not be around for 2 weeks starting next Monday. So if your mails go unanswered, please be patient. I am hoping to schedule few posts while I am gone, if time permits.

Pasta e Ceci (Pasta With Chickpeas)

When I am short on time, but still want a wholesome dinner, this is my absolute favourite. Pasta with ground chickpea sauce is not only creamy, but very filling. This thick and hearty sauce is rich in fiber and protein, and that makes me feel at ease for not including vegetables in a meal, as I normally do. With common pantry ingredients, this dish comes together in a snap. Or if you are like me, you will always have soaked legumes on hand.

Pasta e Ceci (Pasta With Chickpeas)
(serves 2)

Ingredients

Chickpeas – 1½ cups, cooked or 1 16-ounce can
Onion – 1, chopped
Garlic – 2 cloves, chopped
Tomatoes – 3, chopped or 1 small can of chopped tomatoes
Fresh rosemary – 1 tbsp, chopped
Red pepper flakes – 2-4 tsp
Short Pasta – ½ pound
Oil – 2 tsp
Salt
Pepper

Crumbly cheese such as queso fresco, feta or paneer – for garnish
Chopped parsley – for garnish

Method

Heat oil in a deep pot, sauté onion, and garlic until soft. Stir in rosemary, and cook for another minute. Stir in tomatoes, red pepper flakes and salt and cook until tomatoes are softened. Stir in 1 cup of chickpeas (reserve the rest for later), 1 cup if water and heat through. Remove from heat, and blend the mixture until smooth. A hand blender is very handy for this job. Return to heat, keep warm.

While you are preparing the sauce on one side, bring a pot of water to boil and cook pasta following package instructions. Pasta should be cooked, but still firm. Drain pasta and reserve 1 cup of cooking water.

Mix cooked pasta with the chickpea sauce, along with the reserved whole chickpeas. The pasta should be slightly soupy, as it will absorb more water. Add some of the reserved pasta water, until desired consistency is reached.

Serve with a garnish of crumbled cheese and fresh herbs. Omit cheese for a vegan version.

Artisan pasta with chickpeas

This is my entry to My Legume Love Affair, Sixth Helping: Hot & Spicy. If you have spicy legume dishes to share with us, send 'em to me before the end of this month.

The Colour Purple

Purple Kale

I asked What Could That Be? And, most of you answered it correctly. Its purple kale. For those who are not familiar with kale, it belongs to the same family as the green kale. The difference is, green kale grows as stalks, while the purple variety grow as heads, hence the name ‘flowering kale’. Some species of purple kale are also used as for ornamental purposes, but may not be edible. While I was editing the photo, it looked more like a coral than a green. Guess it was just me, because so many of you guessed it right. But now, if I squint my eyes, it looks like Tina Turner’s wig, Bee ;).

Purple kale is not regularly available in our neighborhood stores. When I found it in the local market, I jumped with joy. As usual, I had no idea what this would taste like. But the colour purple was too enticing. But I was in for a surprise, whilst I cooked it. Green kale is very tough, chewy and doesn’t have a signature aroma. If not cooked properly, it tastes more like an old shoe. On the other hand, purple kale was very aromatic and tender. Even while I was sautéing, I started munching from the pan, which I normally don’t do with green kale until it is thoroughly cooked.

I decided to pair this aromatic green with equally fragrant Basmati rice. The purple from the kale stained the rice, giving the pulao a mellow mauve color. I kept the spices to a minimum, letting kale take all the attention. I sautéed the whole head, used half in pulao and made enchiladas with the other. In both the dishes, I was thoroughly impressed with purple kale. If you get a chance to lay hand on this beauty, don’t miss.

Purple Kale Pulao

Purple Kale Pulao

Basmati rice – 1 cup
Purple kale – ½ head
Red onion – 1, sliced
Frozen green peas – ½ cup,
Potato – 1, cubed
Grated coconut – 2 tbsp
Ginger – 1 inch, minced
Garlic – 2 cloves, minced
Green chilli – 2, slit
Red pepper flakes – 1 tsp
Cilantro
Oil – 1 tbsp
Salt

Tempering

Oil – 1 tbsp
Cumin seeds – 1 tsp
Fennel seeds – ½ tsp
Cinnamon – 1 inch
Cloves – 2
Cardamom – 2
Bay leaf – 1
Star Anise – 1

Method

Cook basmati rice with 1 to 1¼ cup of water. Fluff and cool till the grains are separate. Heat a tbsp of oil and sauté kale till its soft. Remove and set aside.

In the same pan, heat another tbsp of oil and add spices for tempering given in the above said order. When the spices get slightly toasty, add onion, garlic, ginger, green chillies and potato. Sauté until onions and potatoes are soft. Now add the kale back, along with red pepper flakes, green peas, coconut and salt. Mix well and add rice. Gently mix the pulao and heat through. Check for seasoning and garnish with cilantro. Serve with raita of your choice.

Turnip

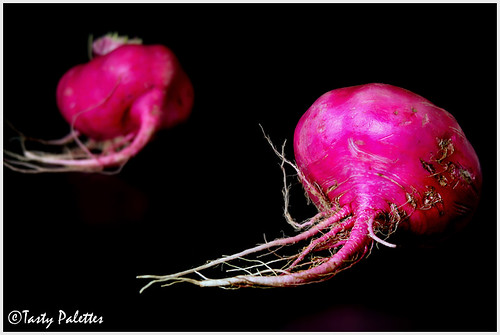
Talking about the colour purple, I also came across these beauties in our local market - Purple Turnips. The woman next to me said ‘They look like giant radishes’. I smiled to myself. Well, they do belong to the same family.

Turnip Sauté

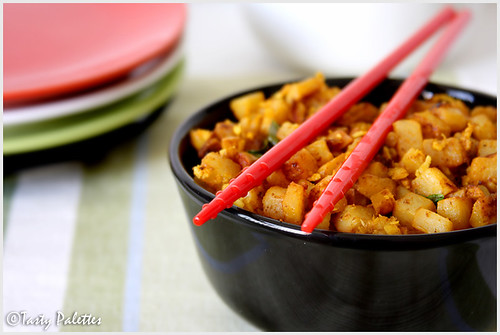
Turnips, known as ‘Nool Kol’ in Tamil and ‘Shalgam’ in Hindi, is well-known for its bitterness. I would say its texture is like that of a firm, but bitter white pumpkin. To overcome its bitterness, I boil it once in water, drain and boil again. But it still retains its bitterness to a certain extent. So, now-a-days, I cook turnip in tamarind water, drain and use it in any recipe. This way, it never tastes bitter.

This is how I served these purple beauties. I boiled the peeled, cubed turnip pieces in tamarind water; drained and sautéed them with salt and sambar powder; finished with a tbsp of grated coconut. We loved it.

Turnip Saute

I know any purple lover, including me, cannot help, but fall for both these purple beauties. Nature has a unique of expressing herself.

Millet With Root Vegetables Bake

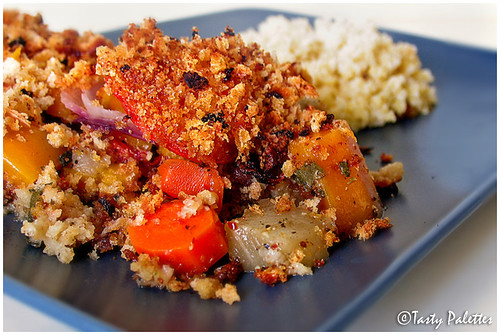
With root vegetables abundant during winter, I regularly bake ‘em and serve with a side of grains. Needless to say, this recipe is very easy and rustic. Cut the vegetables into big chunks, mix with seasoning and herbs, and slide into the oven. While the vegetables are baking, take care of the carb. Serve as a quick, but filling, lunch or supper, on weekdays. There are umpteen recipes for root vegetables bake. But there are few things I want to discuss about this combination.

Millet With Root Vegetables Bake

In addition to eating right, I monitor our sodium intake very seriously. According to American Heart Association, our daily sodium intake should be 2300 mg, which translates to a tsp of salt. While I am no where near the perfect number, I reduce sodium sensibly in my day-to-day cooking. To achieve this, I use a combination of salt substitute and salt free seasonings.

Salt free seasonings are pre-mixed herbs, that add flavour without sodium to the dish, hence no compromise in taste. There are many herb blends offered by different brands. Choose what appeals to you. My favourite choice is Mrs.Dash – Original Blend.

Another option is using salt substitute. Salt substitutes are essentially potassium chloride, as against to sodium chloride in table salt. It is particularly helpful for people with high blood pressure, who need to keep their sodium intake under control. But, I strongly recommend consulting your physician before including salt substitute in your diets. If your body cannot handle potassium, then this may prove to be fatal. I also find that salt substitutes have a slight after-taste, hence I use this in conjuction with table salt. The brand I use Morton salt substitute.

Ingredients

Potato – 1, peeled and cut into 1 inch cubes
Sweet Potato – 1, peeled and cut into 1 inch cubes
Carrot – 1, cut into 1 inch rings
Red onion – 1, small, sliced into thin rings
Tomato – 2, sliced into thin rings
Bread crumbs (preferably flavoured) – ¼ cup
Olive oil – 1 tbsp
Fresh herb (like Sage, rosemary or oregano) – 1 tbsp, chopped
Salt free seasoning (Mrs.Dash) – 1 tbsp
Pepper

Root Vegetables Bake

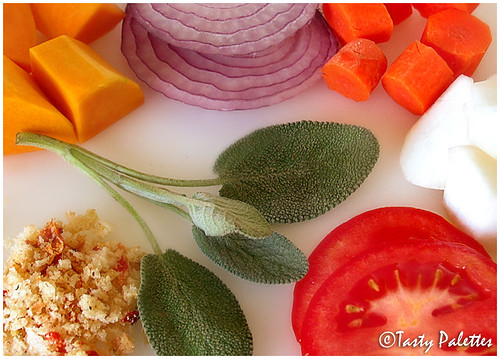
Clockwise from top left: Sweet potato, Red onions, Carrot, Potato, Tomato, Sage, Breadcrumbs. I used fresh breadcrumbs made from garlic and sun-dried tomato bread.

Method

Take potato, sweet potato and carrot in a bowl. Toss the vegetables with half of the oil, chopped herb, Mrs.Dash and pepper. In a separate bowl, mix breadcrumbs with the rest of the oil.

In a loaf pan, transfer the seasoned vegetables. Top it with a layer of onion, followed by a layer of tomato. Finally, spread breadcrumbs evenly, which provides texture and crunch. Bake for 35-40 minutes, until the vegetables are cooked through. Serve hot with your choice of carbohydrate like rice, quinoa, millet or couscous.

Millet

To make this a balanced meal, I include a side of carbohydrate, but this is optional. With any vegetable bake, quinoa was always my first choice, followed by brown rice. When I am short on time, I also make whole wheat couscous. But, after seeing this post of Indira’s, I was quite intrigued with what millet is. I was surprised with what found.

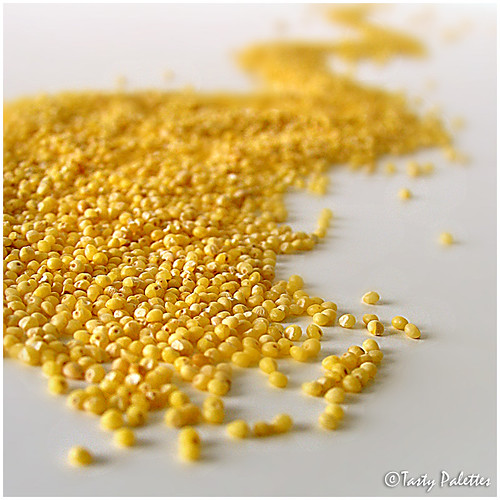
Foxtail Millet

Foxtail millet is one of those forgotten grains that were a part of our ancient Tamilian culture. Foxtail millet, called ‘Thinai’ in Tamil, is offered to Lord Muruga, the patron deity of Tamil Nadu. Millet flour was usually sold outside Murugan temples and I remember how I used to love eating this as a kid. The flour itself is slightly sweet and is normally eaten with honey. Farmers in ancient India, ate a handful of this flour for breakfast before a long day in the fields. Packing a mighty power punch, no glucose powder can come near this. I was delighted to rediscover this childhood favourite of mine. Our beloved Mathy of Virundhu has left a comment on Indira’s post, which explains the story behind millet and Lord Muruga. Leave it to her for story-telling :)

Cooking Millet

Millet – 1 cup
Water – 2 cups

Pressure cook millet with water for 2 whistles. Once the pressure is released, let the grains cool for about 5 minutes. Fluff with a fork and serve warm. If cooking on stove-top, bring water to a boil and add millet. Cook covered for about 25-30 minutes, without stirring in between. The grains will turn translucent and soft once cooked. Fluff and serve.

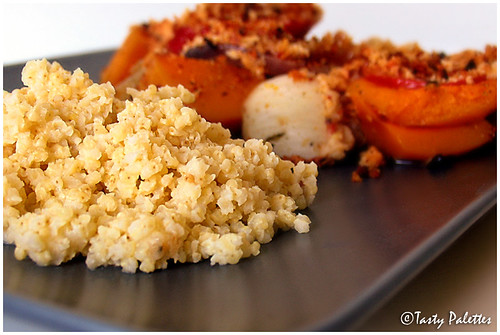
Millet With Root Vegetables Bake

Millet is slightly chewy and nutty, and is available in bulk bins at Whole Foods. Check out foxtail millet upma at Vindu.

Vegan Mushroom - Leek Quiche

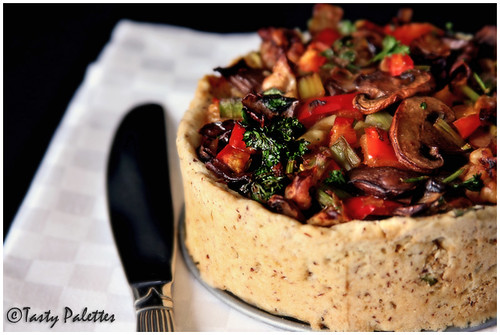
Leek-Tofu Quiche is one of my favourite quiches that I have made it many times now. Its tasty, healthy and best of all, versatile. Johanna of Green Gourmet Giraffe agrees with me on that. If there is anything I would want to change in this recipe, it is the egg. Since Radhika chose the Allium family for this month’s JFI, I took this opportunity to do just that.

I was aware that flax seeds can be used as an egg-replacer, but never tried it myself. A tbsp to muffins and cakes for a little crunch, was all I used them for. To my surprise, the flax mixture was as glutinous as eggs. Not to mention the nutty flavour it lent the crust. I am going to try this technique in few other recipes that I normally make with eggs. This is a formula to remember.

One egg = 1 tbsp of ground flax + 3 tbsp of hot water.

Amongst the Allium family, leeks are the most fragrant, in my opinion. They are mild, sweet and don’t overwhelm other ingredients. This time I paired leeks with mushrooms and red bell peppers. Otherwise, the filing remains the same as the original version.

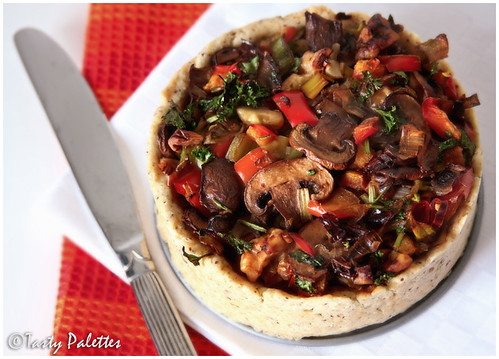
Vegan Leek-Mushroom Quiche

Ingredients

Crust

All purpose flour – 1 cup
Ground flax seeds – 1 tbsp
Hot water – 3 tbsp
Soymilk – ¼ cup
Rosemary – 1 tsp, chopped
Baking powder – ¼ tsp
Salt – ¼ tsp
Pepper
Olive oil – 2 tbsp

Filling

Leek – 2, cleaned and sliced
Mushrooms – 1 cup, sliced
Red bell pepper – ½, diced
Garlic – 2 cloves
Green chillies - 2
Sun-dried tomato – 6, reconstituted in hot water and chopped
Walnuts halves –1/3 cup, roasted and chopped
Lemon - 1
Cilantro – 2 tbsp, chopped
Parsley – 2 tbsp, chopped
Olive oil – 1 tbsp
Salt

Method

Preheat oven to 350F. Grease two 4.5 inch springform pans or one 9 inch pan with olive oil.

To make the crust, mix ground flax and 3 tbsp of hot water in a big bowl. Whisk vigorously for a minute. Microwave for 30 seconds and whisk again. Microwave for another 30 seconds and whisk again. The mixture should now be thick and gelatinous like egg. If you don’t have a microwave oven, do this on a stove-top. Simmer the mixture for 5 minutes for the desired result.

To this, add rest of the ingredients to make the crust. Press the dough on the bottom and sides of the pans. Prick the top few times with a fork and bake the crust for 8 minutes.

Make the filling by sautéing mushrooms in olive oil. When they are lightly browned, add leeks, red bell pepper, garlic, green chillies and salt, and sauté for another 3 minutes. Remove from heat and add sun-dried tomatoes, walnuts, cilantro, parsley and lemon juice. Spoon filling onto the crust and bake for 40 mins. Serve warm with a side salad.

Vegan Leek-Mushroom Quiche

Check out Nupur’s Vegan Cornbread made with flax seeds.

Marinated Cauliflower In Coconut-Chickpea Flour Gravy

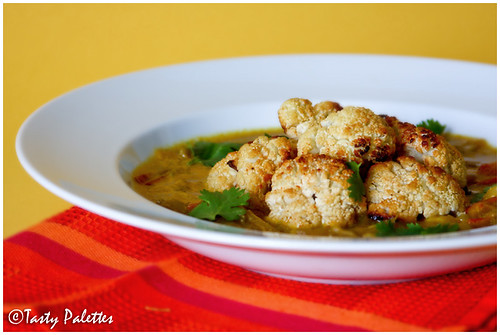
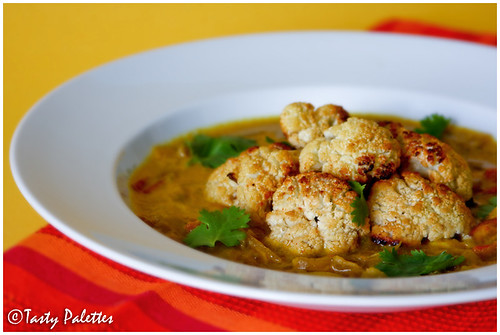
I was looking for an elegant one-plate dish, and came across this marinated chicken recipe. The gravy was what caught my attention, and I duly veganised it. Boy, the taste knocked my socks off. The gravy was smooth and creamy. I used homemade coconut milk, as I find the store bought ones to be excessively creamy. The chickpea flour, instead of the usual, but bland corn flour, added a subtle flavour. I am going to try this technique for other gravies too. There is nothing I would change in this recipe except, making a double batch next time.

Marinated Cauliflower In Coconut-Chickpea flour Gravy

Ingredients

Roasted Cauliflower

Cauliflower – 1, big, cut into large florets
Chilli powder – ½ tsp
Olive oil – 1 tbsp
Lemon juice – 1 tbsp
Salt

Coconut-Chickpea Flour Gravy

Onion - 2, small, sliced
Green chilli – 2, minced
Garlic – 4 cloves, minced
Tomato – 2, cubed
Coriander powder – 1 tbsp
Cumin powder – 1 tsp
Turmeric powder – 1 tsp
Chilli powder – ½ tsp
Cinnamon stick – 1 inch
Chickpea flour/besan – 3 tbsp
Coconut milk – 1 cup if homemade, 2/3 cup if store bought
Oil
Salt

Method

Soak cauliflower florets in salted hot water for 5 minutes. The florets not only get cleaned but softened. Drain well. Prepare the marinade by mixing oil, lemon juice, chilli powder and salt in a large bowl. Add the florets and coat well in the marinade. Leave it aside for 15 minutes.

If you are making coconut milk at home, soak 2/3 cup of grated coconut in 1 cup of warm water for 10 minutes. Put this in a blender and grind to a smooth mixture. Drain this mixture using a cheese cloth. Extract as much milk as possible. Discard the pulp and reserve the milk.

Preheat the oven to 400F. Line a baking sheet with foil. After the florets have marinated for 15 minutes, arrange each floret separately on the baking sheet. Bake for about 25-30 minutes, until the florets have cooked and browned toward the edges. Carefully remove the florets from the baking sheet and set aside.

For the gravy, heat oil in a sauce pan and sauté onions till light brown. Add green chilli and garlic and brown for additional couple of minutes. Stir in tomatoes, dry masalas (cumin, coriander, chilli, turmeric), cinnamon stick and salt. Cook on medium low heat, until tomatoes are soft and the spices are not raw, about 5 minutes.

Dissolve chickpea flour in 3 cups of water, without any lumps and add to the onion+tomato mixture. Bring this to a boil, reduce the heat and simmer for 15 minutes. The gravy will thicken as it boils. Stir in coconut milk and heat through.

Plate the gravy with roasted cauliflower florets on top. I served mine with brown rice.

Marinated Cauliflower In Coconut-Chickpea flour Gravy

Marinade cauliflower with 2 tbsp of yogurt instead of oil+lemon juice, for a vegetarian version. Recipe heavily adapted from Vij’s.

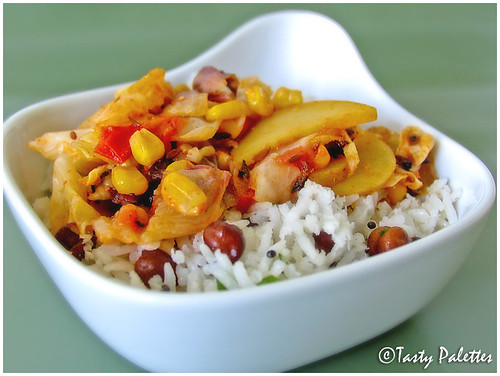
Mixed Vegetables with Coconut-Black Chickpea Rice

November is Vegan Month. Veganism is not just a diet, but a philosophy of cruelty-free lifestyle. For health/environmental/ethical reasons, some of us choose not to consume animal products. From eggs or dairy at the dinner table to fur or leather in the living rooms, there are so many don’ts in the life of a vegan.

I have almost been a vegan for about four months for health reasons. Almost, except for a cup of coffee everyday. I was energetic through out the day, without any afternoon energy slumps. Best of all, I felt good inside out. And then came the holiday season and a vacation. There ends my vegan story. But this month, Tasty Palettes is going vegan. I have decided to record few of the vegan recipes that I learnt and any new recipes I try as an aid for me and all those vegan out there.

I start with a delicious recipe from an equally delightful cookbook – Vij’s Elegant and Inspired Indian Cuisine. Written by a restaurateur, the recipes appeal to cooks, both novice and expert in Indian cuisine. I am very happy with every one of the recipes I have tried from it so far.

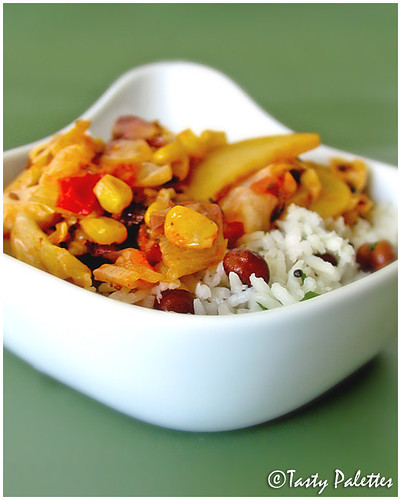
Mixed Vegetables with Coconut-Chickpea Rice

The vegetables called for, in this recipe were unique. Hearty potatoes, tart tomato and sweet delicious corn, served with coconut-chickpea rice, was delicious enough to make this over and over again. I have slightly adapted the recipe according to my liking. The recipe calls for red cabbage, though radicchio works equally well.

Ingredients

Rice

Black chickpeas – ½ cup
Grated coconut – 3 tbsp
Basmati rice – 1 cup
Mustard seeds – ½ tsp
Curry leaves – few
Oil – 1 tsp
Salt

Vegetables

Green cabbage – 1 cup, cut into thick long strips
Red cabbage – 1 cup, cut into thick long strips
Potato – 2, cut into thin half moons
Corn, fresh or frozen – 1 cup
Tomato – 1, finely chopped
Mustard seeds – ½ tsp
Cumin seeds – 1 tsp
Kalonji seeds – 1 tsp
Coriander powder – 1 tbsp
Red chilli powder – ½ tsp
Oil – 1 tsp
Lemon juice
Salt

Method

Soak chickpeas overnight in 2 cups of water and ¼ tsp of salt. Next morning, drain chickpeas and pressure cook until three whistles without adding water. Cook rice with a cup of water. Fluff and cool the rice till each grain is separate. In a kadai or skillet, heat oil, splutter mustard seeds. Add curry leaves and coconut and toast for a minute. Add the cooled rice, chickpeas and salt. Combine thoroughly. Keep warm.

For the vegetables, heat oil in a separate pan. Add mustard, kalonji and cumin seeds, and allow them to splutter. To this, add tomatoes, coriander powder, red chilli powder and salt. Sauté until tomatoes are pulpy. Add sliced potatoes, and cook for 4 minutes, sprinkling water if necessary. Finally add corn, green and red cabbage and stir for 2-3 minutes. The vegetables should be slightly cooked, but crunchy. Remove from heat and stir in lemon juice.

Place rice in a bowl and spoon the vegetables over top and serve.

Mixed Vegetables with Coconut-Chickpea Rice

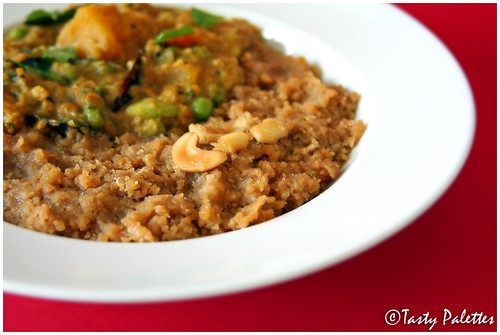
Thiruvadhirai Kali and Ezhukari kozhambu

If you are not able to read what the title says, don’t bother. Kali is rice cooked with jaggery and Ezhukari kozhambu, which is sambar with 7 vegetables. This is a classic combination made for the festival of Thiruvadhirai. Thiru + Adhirai is Thiruvadhirai, which is the birthday of Lord Shiva. Adhirai is, obviously his birth star, and hence the day is called Arudhra Dharisanam. I remember my Grandma pointing this star in the Northwest skies. It sparkles like a ruby, in bright red.

Facts apart, I love this festival, food being the primary reason. I am not a big fan of sweets, but ok with anything mildly sweet. Kali being rice cooked with jaggery is served with a savoury sambar. The sweet and spicy combination is like yin-yang for the taste buds, and I absolutely love it.

Thiruvathirai Kali

This kali is also made with a mixture of rice and dal. Since the kozhambu has dal in it, I don’t find it necessary. The measurements given below serves two people.

Ingredients

Raw rice – ½ cup
Water – 1¼ cup
Jaggery – 1 cup, grated
Coconut – ¼ cup, grated
Ground elaichi or cardamom – ½ tsp
Cashews – 10
Ghee – 2 tsp

Method

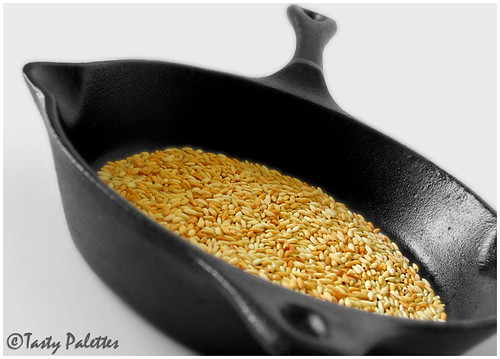
Roasted rice

Roast rice until red. Wash rice and grind into a coarse meal, like rava. Roast cashews in a tsp of ghee until golden brown. Set aside.

In a pan, heat water and dissolve jaggery. Once dissolved, add coconut, ground rice and a tsp of ghee. Mix well and transfer to another vessel. Pressure cook this for 2 whistles. When done, cool and fluff. Mix roasted cashew nuts and ground elaichi. Serve with kozhambu.

Thiruvadhirai Kali

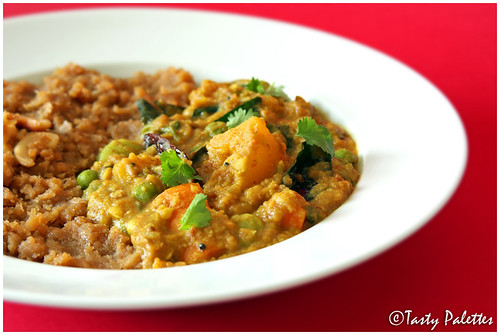
Ezhukari Kozhambu

Ezhukari kozhambu is supposed to be made with 7 vegetables, but you can add as many or as less as you want. This is more like sambar, but with lots of vegetables. In olden days, after the festivities are over, the ladies would mix left-over vegetables and sambar that was made earlier in the day. The resultant gravy is a delicious mixture of sweet root vegetables(plenty during the season) and spicy sambar.

My family calls this “Ericha Kuzhambu’, which loosely translates to sambar that is heated over and over again. This kuzhambu tastes better as it grows older, like wine. Well not that old, but 2 or 3 days. When this gravy is heated again and again, the vegetables almost melt mixing with spices. What is left is a divine concoction that goes well with almost everything, dosa and curd rice, in particular. If you are worried about nutrition depletion due to over heating, please look away. This is beyond all of that.

Ingredients

Mixed vegetables – 3 cups, cubed
Tamarind paste – 2 tbsp
Turmeric powder – 1 tsp
Asafoetida – a pinch
Toor dal – ¼ cup
Mustard seeds – 1 tsp
Curry leaves – 10
Cilantro – few springs, chopped
Oil – 1 tbsp
Salt

Spice mixture

Coriander seeds – 3 tbsp
Chana dal – 1 tbsp
Fenugreek seeds – ¼ tsp
Red chillies - 8

Roast all of the above in a tsp of oil and grind to a fine paste.

Method

Vegetables that can be used are Red pumpkin, White pumpkin, eggplant, sweet potato, potato, lima beans, peas, plantain, yam, elephant yam, colocasia, green beans, runner beans, cluster beans, chayote squash(chow chow), green chillies, snake gourd.

Pressure cook dal with a pinch of turmeric powder. In a big pot, mix vegetables, tamarind paste, turmeric powder, salt with enough water and boil until the vegetables have cooked and tamarind doesn’t smell raw. Combine the ground paste and cooked dal and bring it to a boil. Allow this to boil on a low flame for 5 minutes. Adjust seasoning as required. In a small pan, heat oil, splutter mustard seeds and throw some curry leaves. Add this to sambar, along with cilantro and asafoetida. Serve with kali.

Ezhukari Kozhambu

This is my second entry for RCI – Tamil Festivals, hosted by Viji.

Paruppu Usili and Morkuzhambu

When Cynthia asked “What are some of the foods/dishes you prepare today the same way you liked them while growing up?”, I would say all of my mom’s classic recipes. Particularly paruppu usili and mor kuzhambu. Usili is a time consuming dish and was always prepared for a special Sunday lunch. But there are some recipes that are worth the extra time and effort to recreate our childhood memory. And this classic combo is one of 'em.

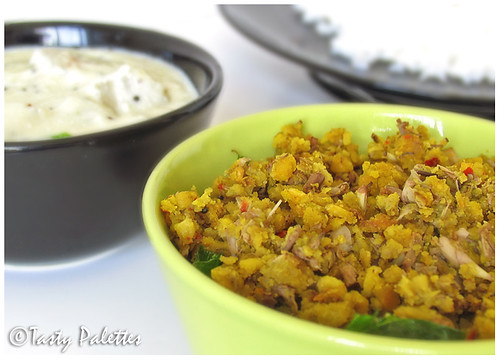
Vazhaippoo Paruppu Usili – Banana Flower and Dal Sauté

Banana flower is the classic ingredient used in a usili. Though the dish is time consuming, if prepared in stages, as given below, it can be put together in no time. This is my entry for JFI – Banana, hosted by Mandira of Ahaar. JFI is the brainchild of Indira.

Ingredients

Banana Flower – 1, prepared as instructed below
Toor dal – ½ cup
Chana dal – ½ cup
Dried red chillies – 6
Turmeric powder – ½ + ½ tsp
Asafoetida – a pinch
Mustard seeds – 1 tsp
Curry leaves – few
Oil
Salt

Method

Banana Flower

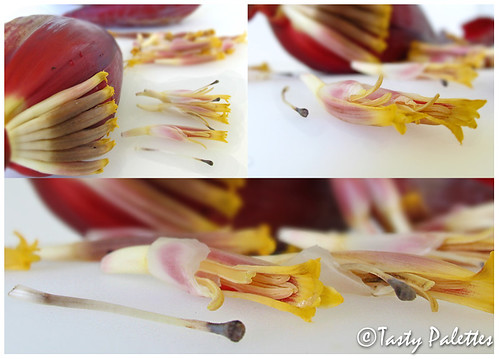
Banana flowers are made of layers of bracts which enclose tiny rows of florets. Remove the outer 2 or 3 tough outer layers exposing the florets. Remove the florets, keep aside. Proceed removing each layer, pulling flowers, until you reach the core. The core, which is slightly bitter, can be eaten raw, or chopped finely and added to the recipe.

In a big bowl, mix ¼ cup of buttermilk with enough water to immerse the chopped banana florets. Take each banana floret and remove the stamen, which is woodsy and has a black tip. The stamens of florets in the inner layers are not developed much and are difficult to remove. Leave them be. Chop the florets prepared thusly and add to the bowl with buttermilk water. This will stop the discolouration of the florets and reduce the bitterness. The flower can be prepared to this stage up to 4 days in advance.

Soak toor and chana dal for an hour. Drain water completely and grind to a coarse mixture along with red chillies, asafoetida, turmeric and salt. Steam this coarse mix for about 10 minutes in a pressure cooker. This can be done using idli plates or a wide vessel. Just remember to oil the plates. When they are done, crumble them by hand. This lentil mixture can be made ahead and frozen for up to 3 months.

Drain the chopped banana flower, cook with salt, turmeric powder and ¼ cup of water. Cook until they are just tender and not mushy. Other vegetables that can be used in place of banana flower are green beans, cluster beans, gherkins (tindora), carrot etc. Mix the cooked vegetable with dal mixture.

In a wok, heat oil, splutter mustard seeds. Add curry leaves and vegetable + dal mix. Sauté until moisture leaves. Serve with rice and mor kuzhambu, with a tsp of sesame oil.

Mor Kuzhambu - Spiced Yogurt

This yogurt based creamy gravy goes perfectly well with the dry, lentil based usili. Use sour buttermilk to get the desired tangy taste. If the buttermilk is not tangy, mix in 2 tbsp of sour cream. Other vegetables that can be used are carrot, drumstick, chow chow (chayote squash) etc. Vegetables like eggplant, okra should be pan-fried and added to the kuzhambu.

Ingredients

Thick buttermilk – 3 cups
White pumpkin – 1 cup, cubed
Grated coconut – 2 tbsps
Ginger – 1 inch piece
Green chillies – 2 or 3
Chana dal – 1 tbsp
Raw rice – 1 tbsp
Mustard seeds – ½ tsp
Curry leaves - few
Carom seeds/Ajwain/Omam or Cumin seeds – ½ tsp
Coconut oil - 2 tsp
Salt
Oil

Method

Soak chana dal and rice for 10 minutes. Grind the soaked dal with green chillies, ginger and coconut to a fine paste. Mix this with buttermilk, carom seeds and salt. Cook white pumpkin with salt and add to the buttermilk gravy.

Put this on a low flame and heat through, taking care not to let it boil. Heat coconut oil, and splutter mustard seeds and toast curry leaves. Add to the kuzhambu and serve.

Paruppu Usili and Mor Kuzhambu

I like to mix usili with rice with a tsp of sesame oil and mor kuzhambu on the side, while G likes to mix kuzhambu with rice and usili on side. It is darn tasty eaten either way.

“Hot Tamale” Burgers and Cream Style Corn

I know I know. Summer is almost gone and am still cooking burgers. But, in the city where I live, summer is still teasing, with temp in high 90s. Also, the burgers were so flavourful, I had to share with you all.

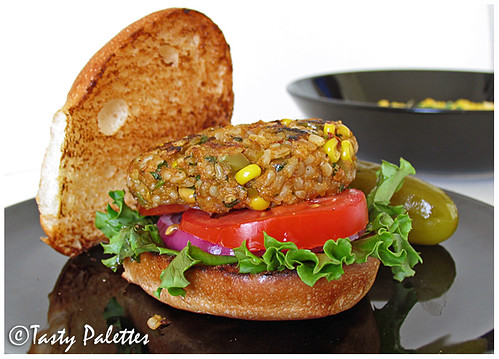
"Hot Tamale" Burgers

This is a recipe I strictly followed from Vegetarian Times. The temptation was too much when I saw these burgers adoring the cover. Boy, am I glad that I tried these dainties. They were tasty, filling and most of all didn’t make me feel guilty eating them. With brown rice and vegetables, there is nothing to worry about.

The recipe calls for cornmeal that goes into tamales and hence the name. Each and every ingredient is carefully chosen to emphasise the South-Western flavours. They were so delicious, that I ate some of the rice mixture even before making the patties.

Chipotle in Adobo sauce is available in most of the super-markets in International foods aisle. Chipotle is smoked jalapeno chilli that is preserved in adobo sauce, which is generally a mixture of tomato puree, vinegar, salt and spices. There can be other ingredients as found here.

Ingredients

Brown rice – ½ cup
Onion – 1, small, finely chopped
Bell pepper – 1, small, finely chopped
Fresh corn kernels – ½ cup
Chipotle in adobo sauce – 1 with 2 tsp of sauce
Cornmeal – ½ cup
Garlic – 2 cloves, minced
Cumin powder – 1 tsp
Cilantro – ½ cup, finely chopped
Lime juice – 1 tbsp
Lime zest – ¾ tsp
Salt
Oil

Method

Cook brown rice until tender. I pressure cooked it with ¾ cup of water until 3 whistles.

In a large skillet, heat a tbsp of oil and sauté onion, bell pepper, corn, chipotle, adobo sauce, garlic, cumin and salt. Cover and cook until the vegetables are tender.

In a bowl, whisk cornmeal and 1/3 cup water without any lumps. Add this to the vegetables in the skillet and mix well. Cover and cook for 10 more minutes, until the whole mixture comes together.

Switch off the flame and stir in cilantro, lime juice and zest. Let cool and make 4 burger patties. Refrigerate for 30 minutes. In the meantime, prepare Cream Style Corn.

Heat oil in a flat bottomed pan, and cook the burger patties until they are brown. If you have access to the grill, grill the patties for 7 minutes per side. Serve on a bun with lettuce, tomato and onion. Or serve on a tortilla to maintain the South-Western style.

Cream Style Corn

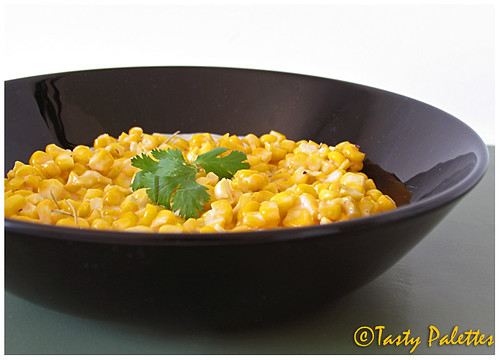
Burgers can make you thirsty and I had a perfect accompaniment for that - Cream Style Corn. The recipe is simple as simple can be and totally relies on the quality of the ingredients. So I recommend using fresh ingredients possible. Of course, frozen corn and dried rosemary shouldn’t hurt too.

Cream Styled Corn

Ingredients

Fresh corn kernels – 1½ cup
Cream – 1/3 cup
Milk – 1/3 cup
Fresh rosemary – 2 sprigs, chopped
Salt
Pepper
Butter – 1 tsp

Method

Melt the butter in a skillet and fry rosemary, until it releases aroma. Add corn and sauté for about 3 minutes. The kernels have to become a tad softer and not mushy. Add milk, cream and salt, and bring it to a boil on a low flame. Put off the flame and season with pepper.

Do I have to say we were two happy diners?

Curried Eggplant Rice

When I am uncertain about what to cook for lunch, I bank on mixed rice. Scour your refrigerator for any vegetable, sauté them with appropriate spices, mix with rice and serve with raita and chips. Lunch is taken care of. This is one such recipe I came up with and liked so much, that it goes to my cooking repertoire.

Ingredients

Basmati rice – 1 cup
Indian eggplant – 6 or 7
Onion – 1, chopped
Mustard seeds – ½ tsp
Chana dal – 1 tbsp
Urad dal – 1 tbsp
Curry leaves
Red chillies – 2, broken
Turmeric powder – ¼ tsp
MTR Curry powder or a combination of garam masala, coriander powder and cumin powder – 2 tsp
Salt
Oil

Method

Cook rice in a pressure cooker or on stove top and cool separating each grain.

In a skillet, heat oil, splutter mustard seeds, and add chana dal, urad dal and red chillies. After dal gets brown, add curry leaves, onion and turmeric powder. Let onions turn soft and add chopped eggplants, salt, curry powder. Sauté until eggplant is cooked and roasted well. Mix the cooled rice and adjust seasoning as required. Serve with vegetable salad or raita.

Curried Eggplant Rice

Eggplant rice served with rainbow carrots that I picked from the local farmer’s market.

Roasted Vegetables with Polenta

When a big question mark of what’s for dinner hangs over my head, I usually turn to upma, pasta or polenta. Polenta is very easy to make and can be paired with vegetables in a variety of different ways. I like to have polenta by itself, with some herbs and parmesan cheese.

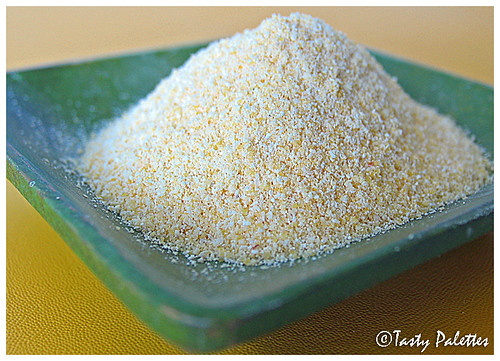
Cornmeal

Cornmeal, which is ground dried corn, is boiled in salted water, resulting in creamy and delicious polenta.

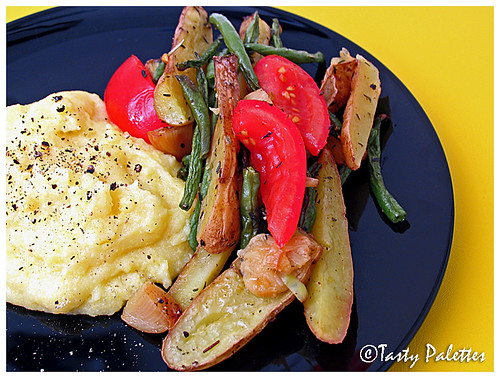
I usually serve polenta with roasted vegetables. Those odd vegetables lying in your crisper can be put to good use in this recipe. The roasted vegetable medley itself can be served as a warm salad too.

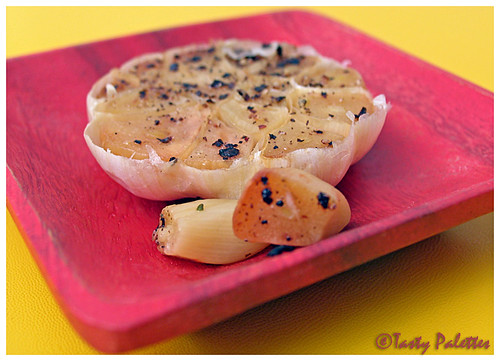
My favourite ingredient in this recipe is roasted garlic. Though I have given the recipe to prepare them beforehand, you can roast the garlic packets in the same pan where the vegetables are cooking. I always prepare extra bulb of roasted garlic and use them in other recipes. They stay good refrigerated for 2 weeks.

Ingredients

Polenta

Corn meal – 1 cup
Water – 4 cups
Butter – 1 tbsp
Salt – as needed

Vegetables

Fingerling potatoes or baby potatoes
French beans
Tomatoes
Roasted garlic
Olive oil
Salt
Pepper
Dried thyme – 1 tbsp
Dried rosemary – 1 tsp

Roasted garlic

Halve a whole garlic bulb horizontally. Place each half in two pieces of aluminum foil, drizzle with oil, salt and pepper. Wrap the garlic halves and roast in a 475F oven for 20 minutes. When they are cool enough to handle, squeeze the bulb and collect the roasted cloves of garlic. Use as needed in the recipe.

Roasted Garlic

Method

Heat water to a rolling boil. Reduce the heat to medium, add salt to the water. Slowly pour the cornmeal to the boiling water while swiftly whisking with the other hand to avoid lumps. Keep stirring for another 10 minutes until the cornmeal is cooked and comes together. Take off from heat, add butter and mix thoroughly.

Preheat oven to 450F. Halve or quarter the potatoes depending on the size. Snip the ends off french beans. Quarter the tomatoes. Cherry tomatoes can be used whole.

In a large bowl, toss the potatoes and beans with olive oil, salt and pepper. Place on a baking sheet and roast for 15-20 minutes, until the potatoes are tender and the beans is beginning to crisp.

In the same bowl, toss tomatoes in the remaining olive oil with thyme and rosemary. Add to the potatoes and beans, shake the baking sheet to rotate the vegetables, and roast for 5 more minutes, until the tomatoes soften. Add roasted garlic cloves to the vegetables. Adjust seasoning, if needed.

Serve vegetables with polenta, with a drizzle of balsamic vinegar, if needed.

Polenta with Roasted Vegetables

Roasted Red Pepper Sauce over Tortellini

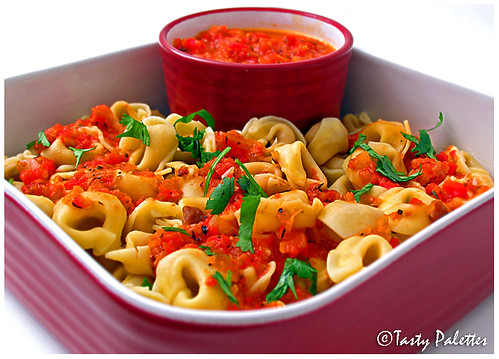
Tortellini are ring shaped pasta stuffed with various fillings such as meat or cheese. Originally from Bologna, Italy, legend has it when the gods walked the earth, an innkeeper was so enchanted with the beauty of Venus, he modeled the little tortellini after her navel.

Vegetarian frozen tortellini are usually stuffed with cheese and can be used in soups. Boiled in vegetable broth with salt and pepper is my favourite way of preparing them. But most of the times I prefer tortellini light, hence I buy dried ones stuffed with a variety of vegetables. Though they taste good with bare vegetable broth, I jazz them up with a special ‘something’ that adds a homemade touch to the otherwise ordinary store-bought dinner.

The sauce is easy to whip-up with just your pantry ingredients. Roasted red pepper gives it a sweet, smoky but scrumptious flavour. I have used sun dried tomato and oregano tortellini in this recipe.

Roasted Red Pepper Sauce over Tortellini

Ingredients

Tortellini – ½ lb dried or 1 lb frozen
Roasted red pepper – 4 (about ½ of a 12 oz jar)
Onion – 1, small
Garlic – 3 cloves
Chilli powder – ½ tsp
Sugar – 1 tsp
Herbs of your choice (Cilantro, basil, oregano, thyme or parsley)
Salt
Oil

Method

Cook tortellini according to package directions, drain and reserve. Puree the roasted red peppers until smooth.

In a pan, heat oil, sauté onion and garlic until soft. Add the pureed roasted pepper, chilli powder, sugar and salt, and heat through. Stir in the herb and pour the sauce over pasta. Toss gently to coat and serve.

This is my entry for Waiter There Is Something In My... Sauce hosted by Andrew Barrow of Spittoon Extra.

Wild Rice Pulao

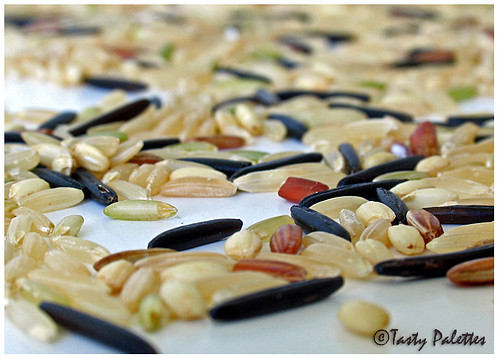
Wild Rice Medley

Wild rice has a signature flavour. It is nutty and pleasantly chewy when not overcooked. It is surprising to know that it is not actually a rice variety, rather the seed of a grass. It has more protein than white or brown rice and expensive too. Added to this, it takes longer to chew and hence the portion size is always smaller. They are great in salads too. More about wild rice here.

I have previously purchased wild rice in smaller quantities and was greatly impressed with its taste and texture. But when I wanted to make this for Nupur’s W of A-Z Indian Vegetables, I couldn’t find them. So I am using an organic rice medley which consists of wild rice, brown rice, sweet brown rice and heirloom red rice from Costco. I think this is the great way to start getting acquainted to both wild rice and brown rice, if you haven’t tried them yet.

Ingredients

Wild rice - 1 cup
Cumin seeds – 1 tsp
Fennel seeds – ½ tsp
Cinnamon – 1 inch
Bay leaf - 1
Onion – 1, medium sized
Green chillies – 2
Garlic – 2 cloves
Ginger – 4 inch piece, cut into big pieces
Mint – ¼ cup, finely chopped
Cilantro – ¼ cup, finely chopped
Oil
Salt

Method

Cook wild rice either in a sauce pan or pressure cooker. If cooking in a pan, boil 2 cups of water, add ¼ tsp of salt, rice and ginger. Reduce the heat to simmer, close the pan and cook for 30 minutes until done. After 25 minutes check for doneness, and add ½ cup of water if needed. If cooking using a pressure cooker, take 2 cups of water for 1 cup of rice and wait for 3 whistles. Allow to cool and fluff the rice with a fork. Adjust the rice-water ratio according to the hardness of your tap water. I cook white rice in 2:1 rice-water ratio due to the hardness of our water. Remove the ginger pieces from the rice.

In a skillet, heat oil, and splutter cumin and fennel seeds. Also add cinnamon and bay leaf and allow them to brown. Add onion, green chillies and garlic to the skillet and cook till onion turns translucent. Add mint and cilantro, stir well and add wild rice. Mix well, check for seasoning. This pulao pairs well with any vegetable gravy and raita or yogurt based gravy.

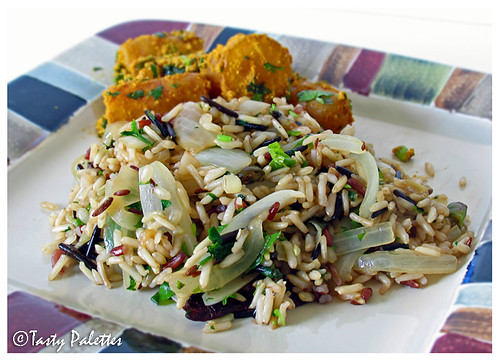
Wild Rice Pulao

Wild rice pulao and potatoes in yogurt sauce.

Check out how Indira serves her wild rice.