











Showing posts with label Greens. Show all posts

Purslane Kootu

A visit to the local farmer’s market is something I eagerly look forward to. Its either the motivation of laying hands on the freshest produce that I will serve my family; or the interaction with the person who devotedly grew it; or the knowledge I gain on growing/storing produce and herbs; or just the lively atmosphere and the music. The farmers are always eager to share recipes for vegetables or greens that I haven’t tried before. Sometimes they recommend their favourites, which I make sure to buy. Last fall, we feasted on a locally grown variety of apples, thanks to one such recommendations. Thin skinned, small and sweet, it was hard to believe that they were actually fruits and not candy. The farmer even complained that she had to stop her son from eating more than three a day.
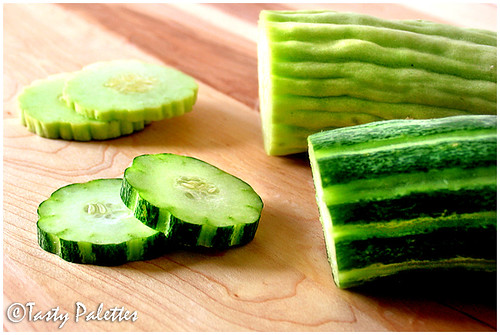
Armenian Cucumbers

Over the last few weeks, I was lucky to be introduced to new kinds of produce. Lets start with these Armenian cucumbers. Long, slender and slightly ribbed, they looked a cross between snake gourd and an English cucumber. Some were bright green, and others were lighter coloured. But they both taste sweet and crisp, and didn’t require peeling. Their taste and texture reminded me of a variety of cucumbers that are small, sweet and crisp and are usually sold at bus stands in India. I was happy to rediscover ‘em.
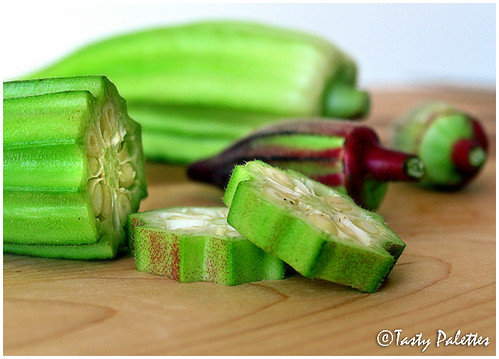
Giant Okras

Giant okra compared with regular ones

Next stop, okra. Not your everyday okra, but huge ones. When I saw them, my first thought was, why would anyone want to cook such mature okras. Surprisingly, these giants were still tender. The grower, Maya, explained to me that this was another kind of okra and taste the same as the regular ones. They did, in addition to being less slimy.
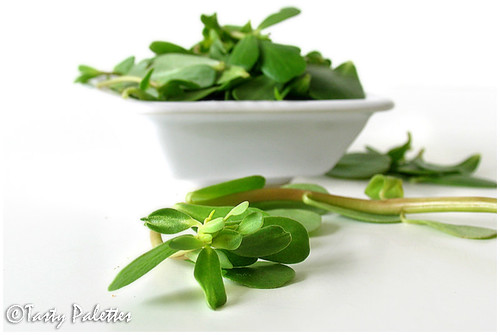
Purslane

Last, but not least, is Purslane or Verdolaga, known as 'Paruppu Keerai' in Tamil. An edible weed native to India, they can be cooked or eaten raw. I preferred cooking it, but there weren’t many recipes around. Cooking with dal was definitely a safe option. But noticing the delicate leaves, I want to give them an opportunity to shine on their own.

I turned to Pedatha, who has always inspired me in the past. In addition to recipes, what I look for in a cookbook are ideas and methods that I could adapt to my own liking. This book has it aplenty. A recipe that called for amaranth/spinach caught my eye, and I decided to adapt it. The kootu, as I like to call it, was divine. Once cooked, the leaves were unbelievably tasty, tender and not even slightly bitter. I am certain that we would enjoy this recipe over and over, for years to come.

I am sending this to JFI – Love, hosted by Jigyasa and Pratibha. This edition of Jihva is about honoring those individuals that inspired and enriched your culinary world. I find it only apt to pay my tribute to Pedatha, with one of her own recipes.
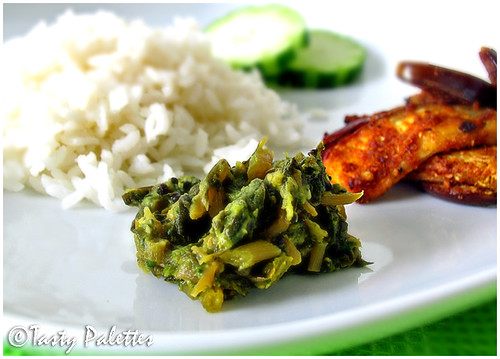
Purslane Kootu

Purslane kootu served with rice, Armenian cucumbers and eggplants sautéed with sambar powder

Purslane Kootu

Ingredients

Purslane – 3 bunches, chopped coarsely along with stems
Roasted gram – 2 tbsp, powdered
Ginger – 1 inch piece
Garlic – 2 cloves
Green chillies – 4
Cilantro – ½ cup, packed
Mustard seeds – 1 tsp
Urad dal – 2 tsp
Turmeric powder – ¼ tsp
Oil – 1 tbsp
Salt

Method

Grind ginger, garlic, green chillies and cilantro into a smooth paste with little water. In a pan heat oil, splutter mustard seeds and roast urad dal until golden brown. Add the greens, turmeric powder and cook covered until the greens are done. Add the ground paste and salt, and cook for additional two minutes. Remove from heat and add powdered gram. Serve with rice and vegetables.
A+Veggie+Venture+2008+Fresh+from+the+Farmers+Market+400.jpg

This icon, courtesy of Alanna at A Veggie Venture, celebrates farm produce and encourages bloggers to seek out locally grown produce. Remember Ms. Blush, the sweet tomato from last year? This being Earth Week, I found it apt to blog about local-grown produce. If you haven't gone local yet, here are 10 reasons why you should. 'Going Local' is one of the 51 things we can do to save the environment.

On a separate note, there seems to be a problem with my TOI feeds. While Sailu is working on the issue, feel free to subscribe my feeds in your reader.

The Colour Purple

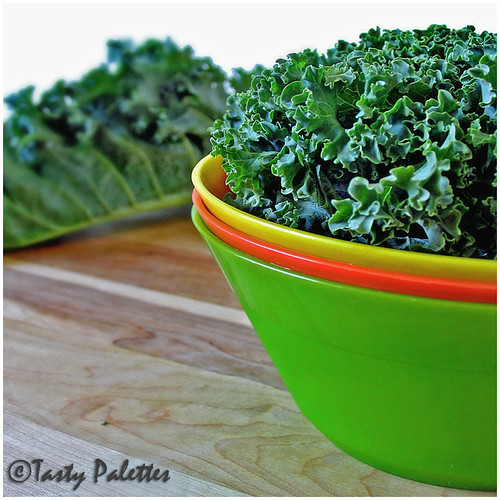
Purple Kale

I asked What Could That Be? And, most of you answered it correctly. Its purple kale. For those who are not familiar with kale, it belongs to the same family as the green kale. The difference is, green kale grows as stalks, while the purple variety grow as heads, hence the name ‘flowering kale’. Some species of purple kale are also used as for ornamental purposes, but may not be edible. While I was editing the photo, it looked more like a coral than a green. Guess it was just me, because so many of you guessed it right. But now, if I squint my eyes, it looks like Tina Turner’s wig, Bee ;).

Purple kale is not regularly available in our neighborhood stores. When I found it in the local market, I jumped with joy. As usual, I had no idea what this would taste like. But the colour purple was too enticing. But I was in for a surprise, whilst I cooked it. Green kale is very tough, chewy and doesn’t have a signature aroma. If not cooked properly, it tastes more like an old shoe. On the other hand, purple kale was very aromatic and tender. Even while I was sautéing, I started munching from the pan, which I normally don’t do with green kale until it is thoroughly cooked.

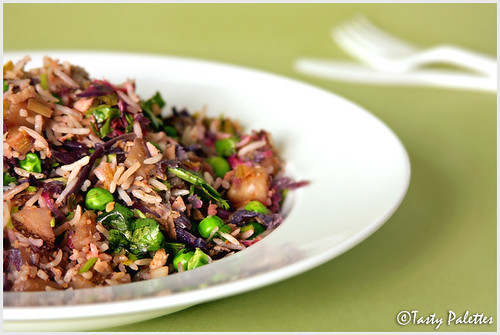
I decided to pair this aromatic green with equally fragrant Basmati rice. The purple from the kale stained the rice, giving the pulao a mellow mauve color. I kept the spices to a minimum, letting kale take all the attention. I sautéed the whole head, used half in pulao and made enchiladas with the other. In both the dishes, I was thoroughly impressed with purple kale. If you get a chance to lay hand on this beauty, don’t miss.

Purple Kale Pulao

Purple Kale Pulao

Basmati rice – 1 cup
Purple kale – ½ head
Red onion – 1, sliced
Frozen green peas – ½ cup,
Potato – 1, cubed
Grated coconut – 2 tbsp
Ginger – 1 inch, minced
Garlic – 2 cloves, minced
Green chilli – 2, slit
Red pepper flakes – 1 tsp
Cilantro
Oil – 1 tbsp
Salt

Tempering

Oil – 1 tbsp
Cumin seeds – 1 tsp
Fennel seeds – ½ tsp
Cinnamon – 1 inch
Cloves – 2
Cardamom – 2
Bay leaf – 1
Star Anise – 1

Method

Cook basmati rice with 1 to 1¼ cup of water. Fluff and cool till the grains are separate. Heat a tbsp of oil and sauté kale till its soft. Remove and set aside.

In the same pan, heat another tbsp of oil and add spices for tempering given in the above said order. When the spices get slightly toasty, add onion, garlic, ginger, green chillies and potato. Sauté until onions and potatoes are soft. Now add the kale back, along with red pepper flakes, green peas, coconut and salt. Mix well and add rice. Gently mix the pulao and heat through. Check for seasoning and garnish with cilantro. Serve with raita of your choice.

Turnip

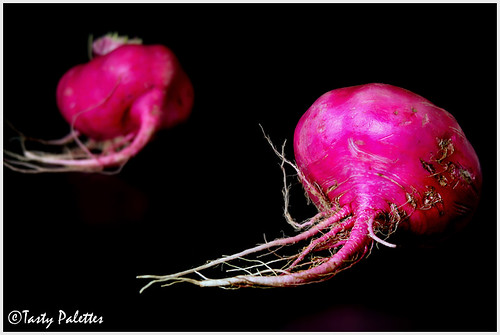
Talking about the colour purple, I also came across these beauties in our local market - Purple Turnips. The woman next to me said ‘They look like giant radishes’. I smiled to myself. Well, they do belong to the same family.

Turnip Sauté

Turnips, known as ‘Nool Kol’ in Tamil and ‘Shalgam’ in Hindi, is well-known for its bitterness. I would say its texture is like that of a firm, but bitter white pumpkin. To overcome its bitterness, I boil it once in water, drain and boil again. But it still retains its bitterness to a certain extent. So, now-a-days, I cook turnip in tamarind water, drain and use it in any recipe. This way, it never tastes bitter.

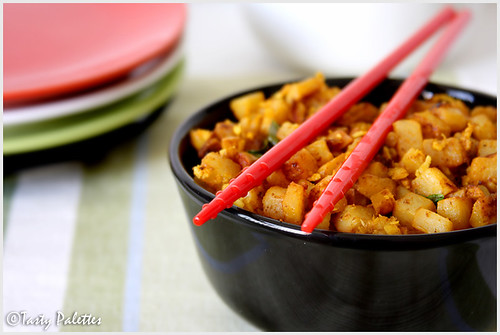
This is how I served these purple beauties. I boiled the peeled, cubed turnip pieces in tamarind water; drained and sautéed them with salt and sambar powder; finished with a tbsp of grated coconut. We loved it.

Turnip Saute

I know any purple lover, including me, cannot help, but fall for both these purple beauties. Nature has a unique of expressing herself.

Collard Greens Poricha Kootu – Dal With Collard Greens

Collard Greens With Dal

Cooking greens with dal is the safest thing to do when you are trying new greens. Lentils are quite forgiving, that they absorb the flaws of other ingredients (if any), in any recipe. They are creamy, comforting and can be prepared in countless number of ways with ingredients on hand. If you don’t like a particular green with dal, then you may never like the green at all. At least, I don’t (I have had really bad experiences with some unknown Asian greens).

After deciding that I and G like a specific green, I normally move on to using ‘em in other recipes. But with collard greens, I always come back to dal, particularly moong. The combination of creamy moong dal with hearty collard is a winner in our home.

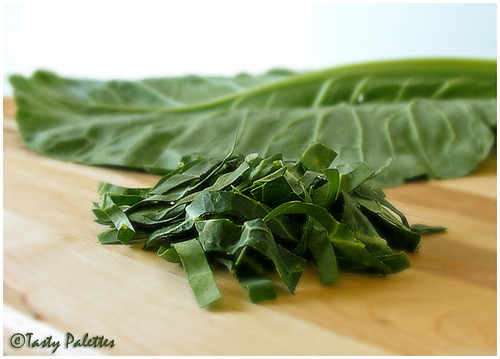
Collard Greens

I would say, collards are kale grown without the ruffles but with much pleasanter taste. After all, they belong to the same cabbage family. Collards are an excellent source of Calcium, Iron, Manganese and Dietary Fiber. They thrive in colder temperatures, so winter is the best time to buy ‘em.

Cooking collards on stove-top takes about 25 minutes, and they still retain their crunchiness. Since I make it with dal, I find pressure cooking the greens to be much faster and easier. The ingredients are barely chopped and thrown into the cooker and then blended finally to attain the desired consistency. If you don’t have a blender, finely chop the vegetables before cooking.

In the Northern hemisphere, unripe tomatoes are picked before the first frost. They are aplenty in our city these past few weeks. In a recent trip to the farmer’s market, I came back with these green beauties. After making salsa and fried green tomatoes, I added the last two to this dal. The tart unripe tomatoes added a totally new dimension that we absolutely loved. If you are not game for tart green tomatoes, then go with red tomatoes. They too contribute well with their sweet flavour and red colour.

Ingredients

Collard Greens – 4 leaves, chopped along with stems into big pieces
Moong dal – ½ cup
Green tomatoes or red tomatoes or a combination of both – 2, chopped into big pieces
Grated coconut – 2 tbsp
Green chillies – 2
Cumin seeds – 2 tsp
Mustard seeds – ½ tsp
Curry leaves – few
Turmeric powder – 1 tsp
Oil – 1 tsp
Salt

Method

In a pressure cooker, cook moong dal, collard greens, tomatoes (green and/or red), green chillies, cumin seeds and turmeric powder with 3 cups of water, for 3 whistles. Once the pressure subsides, remove the cooker lid, and let it cool a bit. Add coconut and salt to the cooked dal. Using a hand blender, lightly blend dal, till the greens and tomatoes are chopped into smaller pieces.

In a seasoning pan, heat oil, splutter mustard seeds and toast curry leaves. Add to the dal. Serve hot with any spicy sautéed vegetable and rice lightly drizzled with sesame oil.

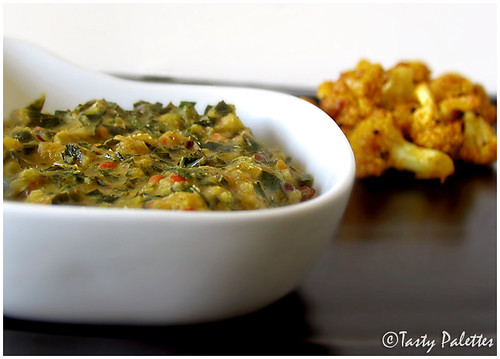
Collard Greens With Dal

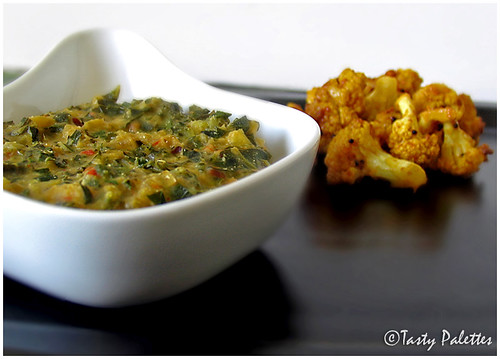
Collard greens kootu with cauliflower, pan-roasted with sambar powder

This is my final installment of 1-in-3 – Western Greens, Indian Style. This creamy comfort is on its way to My Legume Love Affair, hosted by Susan, The Well-Seasoned Cook. Her gifted hands delight the readers with not only delicious recipes, but also with well-written posts.

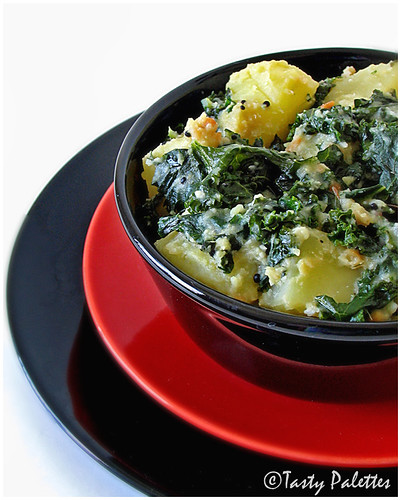
Indian Spiced Kale With Potatoes – Aloo Kale

Kale

Kale is one of the toughest greens I have come across, literally. A mere glance at those woodsy stems and chewy leaves isn’t exactly inspiring. But a closer look reveals much more. Kale boasts a nutritional value second only to spinach. Belonging to the Brassica family (cabbage, broccoli, cauliflower are also members of the same family), this hardy green is rich in anti-oxidants, which may protect against cancer. So a readily available green, with so many health benefits and a lot less calories, has to be included in one’s diet.

Cooking kale to my likeness didn’t turn out to be that easy. Many recipes required just sautéing the green with red pepper flakes and garlic. No, it has to be something more than that. A mighty green as this one should stand up to robust Indian spices. The answer was with Pedatha. A recipe with greens with potatoes was to be modified to suit kale.

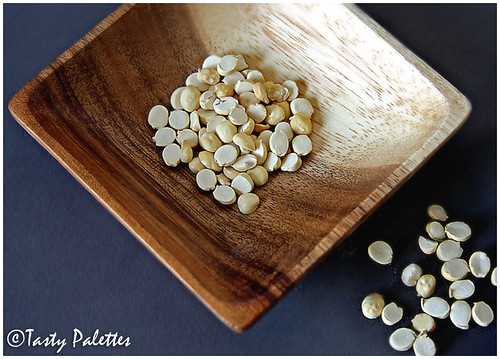
Before going to the recipe, I should talk about ‘Roasted Gram’ or pottu kadalai, as we call in Tamil. Bengal gram is obtained by skinning chickpeas/garbanzo. Bengal gram is then dry roasted and sold as ‘Roasted gram’ or ‘Roasted chana dal’. It is mainly used as a thickener in chutneys and curries. These buttery smooth lentils are great for snacking too.

Roasted Chana Dal

Pedatha, in many of her recipes, uses powdered roasted gram for a creamy texture. And, kale very well needs that. Thank you Pedatha, for your inspiration and ingenious ideas. The recipes I have tried and techniques I have adapted from this book, have never failed me. Thanks to Indira for bringing this book to our perusal. So, here it is, Aloo-Kale, the second installment of 1-in-3 - Western Greens Indian Style.

Ingredients

Kale – 1 bunch
Potatoes – 2
Roasted gram – 3 tbsp
Grated coconut – ¼ cup
Ginger – 1 inch piece
Garlic – 2 cloves
Turmeric – ¼ tsp
Mustard seeds – 1 tsp
Urad dal – 1 tbsp
Red chillies – 2
Curry leaves – few
Salt
Oil – 1 tbsp

Method

Boil potatoes in salted water until done, but still firm. Peel, dice and keep aside. Prepare kale by removing the tough stalks. Chop the leaves into bite sized pieces. Grind roasted gram, coconut, ginger and garlic.

In a kadai or pan, heat oil, splutter mustard seeds. Add urad dal, red chillies and curry leaves and roast till dal turns golden brown. Add kale, turmeric and salt, cover and cook for 10 minutes, stirring in between. When kale is 3/4th done, add potatoes, coconut mixture and continue to cook on low flame, sprinkling water when necessary. After 5-7 minutes, when kale is fully done, check for seasoning and serve with roti or rice.

Indian Spiced Kale With Potatoes

1-in-3 - Western Greens, Indian Style

Growing up in India, I was familiar with few different types of greens, keerai as we call it in Tamil. Right after dawn, our Keera Kaara Amma (translates to ‘old lady selling greens’) used to bring variety of greens, harvested few hours earlier, to our doorsteps everyday. Other than the occasional drumstick leaves, spinach, pennywort (vallarai keerai, for their power to boost our memory retention), my mom mostly cooked only amaranth or mola keerai. Nothing to complain about; those tender leaves and succulent stems were a favourite of mine. I am not exaggerating if I say that I solely grew up knowing only amaranth, as a leafy vegetable.

After coming to the US, I found it very difficult getting to know new greens. Salad greens were totally off limits (who ate salad greens in India? at least I didn’t), spinach did not taste the same and amaranth was nowhere to be found. Unlike vegetables, identifying a green, even if its already familiar, is very confusing to identify, if labeled under a different name. Apparently I am not alone.

Living many months without greens, I timidly put a step forward to try foreign leaves. Swiss chard was to be my first try. Boy, am I glad I did. Chards (Swiss, green, rainbow) gracefully embraced me from my fear of foreign greens, and afterward, there was no looking back. I have tried almost all greens in the market shelves. And I find the best way to try anything foreign, is to prepare it the local way, something you can relate to. And that for me, is Indian style. And that is what this series is about. Allow me to share a few of my favourite Western greens, prepared the Indian way, in this 1-in-3 series.

Mashed Greens – Swiss Chard

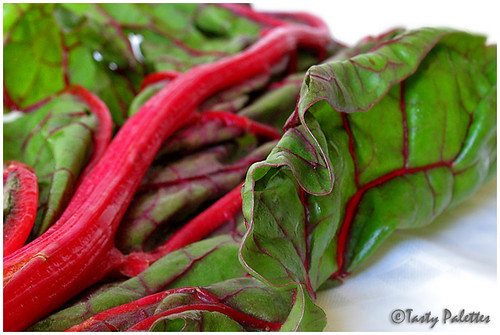
Swiss Chard

As I told you earlier, my mom bought amaranth quite frequently. But there is no complex spice mixture or procedure to cook ‘em. Cook, mash and season, that’s all. This recipe, as with many of the Indian recipes, believes in the flavour of the greens themselves, rather than relying on spice mixtures. So try using the freshest of greens. Since amaranth is not available in my area, I now make this with Swiss chard. Chards are mild, sweet and earthy that suits well with this recipe.

Ingredients

Swiss chard – 1 bunch, cleaned and chopped
Green chilli – 1, split
Tomato – 1, small, chopped (optional)
Mustard seeds – 1 tsp
Cumin seeds – 1 tbsp
Red chilli – 1
Asafoetida – a pinch
Curry leaves – few
Oil – 1 tsp
Salt

Method

Cook chard, green chilli, tomato (if using) in ¼ cup of water. Sprinkle more water if necessary. Chard turns translucent once cooked. Take a stick blender and blend till the greens are coarsely ground. You can also do this in a regular blender after cooling down the greens a bit.

Return the vessel back to heat on low and add asafoetida and salt. In a seasoning pan, heat oil, splutter mustard seeds, then add cumin seeds and curry leaves. Heat through, check for seasoning and serve with rice and sambar.

Mashed Swiss Chard

Mashed Swiss chard served with tomato sambar and radish salad.

This is my entry to Weekend Herb Blogging, Kalyn's brainchild, hosted by Vani of Batasari this week.

Cabbage Mor Kootu and Beet Leaves Thogayal

Cabbage Mor Kootu – Cabbage in Yoghurt

If there is a favourite way to eat cabbage, then this is it, for me. The crunchy cabbage and cool yoghurt in this mildly spiced kootu goes well with almost all of my day-to-day menu. If you are new to Indian cooking, or just want a mild, refreshing side to go with sambar or any other spicy entree, you have come to the right place.

Ingredients

Cabbage – 1, small
Yoghurt – ¾ cup
Grated coconut – 1/3 cup
Green chillies – 2
Cumin seeds – 1 tsp
Mustard seeds – 1 tsp
Curry leaves – few
Oil – 1 tsp
Salt

Method

Slice cabbage into thin, 2 inch long pieces. Cook cabbage with little water and salt. Grind coconut, chillies and cumin seeds to a fine paste. When cabbage becomes soft and not mushy, add the ground mixture. Adjust salt and heat through.

In a seasoning pan heat oil, splutter mustard seeds and throw some curry leaves. Add this to cabbage kootu. Just before serving, mix cabbage with yoghurt.

You can do this kootu in microwave too. Cook cabbage for about 10-12 minutes. After adding the spice mixture, mix well and cook for another 2 minutes. Then follow the recipe as given above.

I like to serve this kootu along with any of the following - mixed rice, thogayal (chutney), sambar, vatral kuzhambu or milagu kozhambu (black pepper gravy).

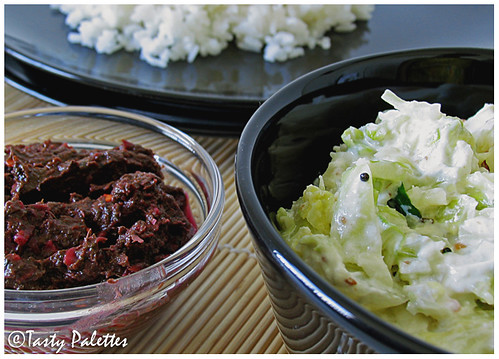
Cabbage Mor Kootu with Beet Leaves Thogayal

Cabbage mor kootu served with beet leaves thogayal.

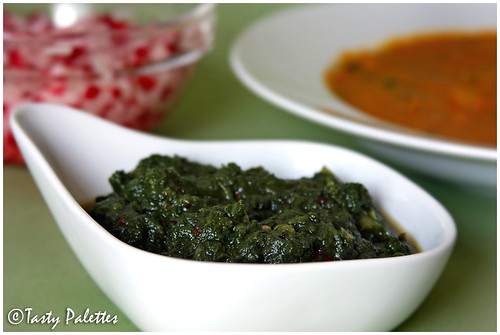
Beet Leaves Thogayal

The beetroots that I got from farmer's market had gorgeous greens, I didn't have the heart to throw them away. But I haven't cooked with them before. So, as a safe measure, I made thogayal, and was pleased with the results. The leaves were mildly beet-y and rendered a beautiful purple colour when mixed with rice.

Ingredients

Beet leaves – 2 cups, chopped
Urad dal – 1 tbsp + 1 tsp
Red chillies – 3
Asafoetida – a pinch
Mustard seeds – 1 tsp
Tamarind paste – 1 tsp
Salt
Oil

Method

In a pan, heat oil, and roast 1 tbsp urad dal, red chillies, asafoetida. When dal turns golden brown, add chopped beet leaves and cook until soft. Cool and grind with tamarind and salt. Season with mustard seeds and urad dal. Serve with rice and a tsp of sesame oil.

Florentine-Style Stuffed Mushrooms

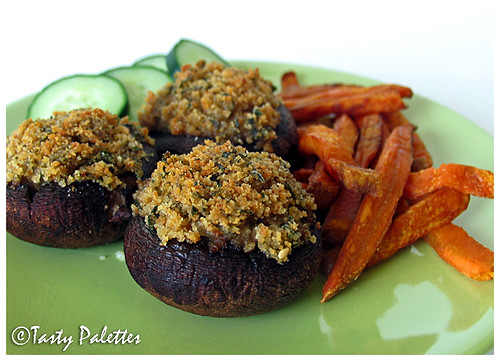
It wouldn’t be fair if I wrote a 1-in-3 series about mushrooms, without a stuffed-mushrooms recipe. They are one of the few vegetables that tastes great when stuffed, not only because of their shape, but also their rich flavour and texture.

The stuffing can be as decadent as a cream cheese or simple as seasoned bread crumbs. Here, I stuff my mushrooms with a layer of spinach, for nutritional value, and bread crumbs, for the crunch. They can be served as appetizers or a light supper with green salad. You can prepare them 12 hours in advance and bake them just before you need ‘em. This is ‘3’ of the 1-in-3 - Mushrooms.

When selecting mushrooms for stuffing, buy ones that are fairly large to hold the filling. I normally buy mushrooms that are labeled as 'Stuffing Portabella'. I find them regularly at Trader Joe’s.

Ingredients

Stuffing portabella mushrooms – 6
Onion – ¼ cup, finely chopped
Garlic – 2 cloves, chopped
Fresh or frozen spinach – ½ cup, cooked, if fresh and squeezed
Oregano –1 tbsp
Red pepper flakes – ½ tsp
Juice of a lemon
Bread crumbs – ½ cup
Thyme or parsley – 2 tbsp, finely chopped
Oil or melted butter – 3 tbsp
Salt
Pepper

Method

Preheat the oven to 375F. Grease a shallow ovenproof dish or a baking pan. The dish should be big enough to hold all the mushrooms in a single layer. Remove the mushroom stalks and using a small spoon, carve the insides of the mushroom caps, to hold stuffing.

In a pan, heat a tsp of oil, sauté onion and garlic. When onions become soft, add spinach, oregano, red pepper flakes and salt. Mix well and take off the flame. Add lemon juice to the mixture.

In a bowl, combine bread crumbs, thyme, pepper and oil or melted butter. Mix until the bread crumbs is moistened.

Arrange the mushroom caps, gills uppermost, in the prepared dish. Drizzle the caps with oil and season with salt and pepper. Divide the spinach mixture among them. Top with the bread crumbs mixture. Bake for 25 minutes, until the mushrooms are tender and the topping is golden brown.

Florentine-Style Stuffed Mushrooms

Stuffed mushrooms served with sweet potato fries and cucumber slices – A simple summer lunch.

Stir-Fried Drumstick Leaves - Murungai Ilai Vathakkal

IMG0044

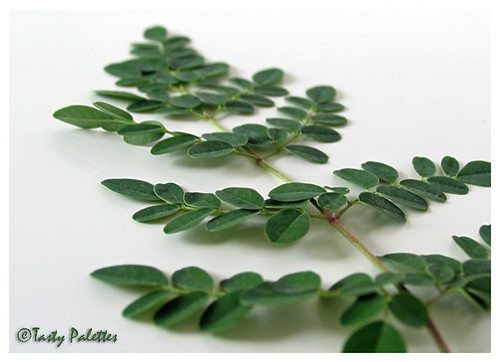
Few days ago, I was lucky enough to find drumstick leaves. In spite of its label (which said yam leaves) and G’s repeated warning, I went ahead and bought a packet. As soon as I reached home I was almost (yeah, almost) sure that it was, indeed, drumstick leaves, Murungai ilai in Tamil. The uncertainty is because its been ages since I have had them. Even in India, I have hardly seen drumstick leaves sold by vendors. It is from those few neighbours who had these trees that we got leaves. But over the years, one by one, all my neighbours got rid of their trees because its a tough job maintaining them with all those caterpillars (eeewww!). When come in contact, these pests will cause allergic reactions to your skin.

Since I was not 100% sure about these leaves, I decided not to top them over adai (which is the classic way of eating these leaves). While I was googling for a recipe, I came across this stir-fry from En Ulagam of Revathi. Not only was it simple but required very few ingredients. The only variation I did to the recipe was to use roasted chana dal instead of plain chana dal. Even though it takes time to separate the leaves from the stalk, the end product is worth the effort. Mixed with rice and a tsp of sesame oil, it was perfectly lite. Did I say Lite? Then it goes to MBP - Going Lite hosted by Coffee.

Ingredients

Mustard seeds – ½ tsp
Urad dal – 1 tbsp
Roasted Chana dal (Dahlia or pottukadalai) – 1 tbsp
Green chillies - 2
Drumstick leaves – 2 cups
Grated coconut – 2 tbsp
Salt
Oil

Method

Heat a tsp of oil in a skillet, add mustard seeds, urad dal and roasted chana dal. After they turn brown, add the chillies, drumstick leaves, ½ cup of water and salt and let it cook for 3 minutes in medium heat. The leaves doesn’t have to turn mushy. Remove the skillet from heat, add the grated coconut, serve.

IMG0055

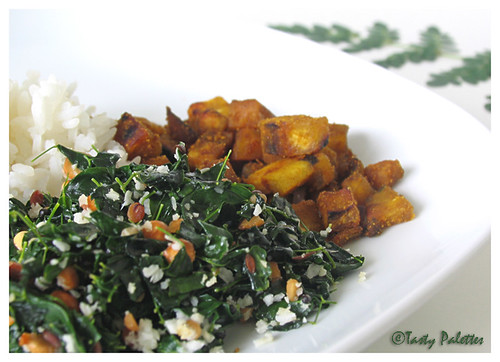
Stir-fried drumstick leaves with roasted plantain. Thanks Revathi, for this simple, light and everyday recipe.

Money Bags Florentine

JFI - I have closely watched this event every month. The talent of the cooks, their ingenuity in using the ingredient in an exotic ooh-aah dish or in a simple and wholesome one has astonished me. So, the first thing I wanted to do after I started my own food blog was to participate in JFI.

I chose spinach for this month’s JFI – Going Green, and Money Bags Florentine is my entry. But why this name? Go on, read ahead.

Catherine de' Medici, the Queen of France, had her cooks prepare spinach in a particular way that she liked. Since these cooks were from Florence, Italy, her home town, any dish with spinach as the key ingredient was referred to as Florentine.

And, since the end product looks like a money bag that people used to carry in old days, I dubbed my recipe as “Money Bags Florentine” - served with lemon aioli.

Money Bags

IMG0060

Ingredients

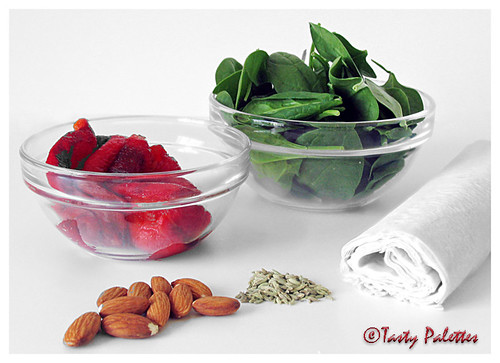
Fresh spinach leaves – 1 cup
Red pepper, roasted and seeded – 1
Fennel seeds – 1 tsp
Almonds, toasted and chopped – few
Phyllo pastry sheets
Bread crumbs (optional)
Oil
Salt
Pepper

Method

Pulse all of the above ingredients in a food processor. The spinach and the pepper should still be chunky. Add breadcrumbs if the mixture is watery.

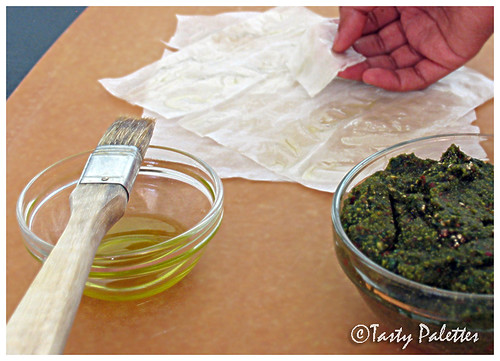
Working with 1 phyllo sheet at a time, cut two 7 inch squares and two 2 inch squares. Brush one of the large piece with oil and place the other large piece at 900 angle to form a star shape. Place one of the smaller square in the center of the star shape and brush with oil. Follow with the second smaller piece. The smaller squares give the pocket a base to sit.

IMG0063

Top with a tsp of spinach + red pepper mixture. Bring the edge of the phyllo sheets together to form a purse. Twist and seal.

Place on a greased baking sheet and bake in a 3750 for 25 – 30 mins, until crisp and golden brown.

I have chosen not to add to cheese as I am serving them with creamy aioli. But if you want to serve them as such, by all means, add any soft cheese like ricotta, gorgonzola, cream cheese or mascarpone.

Garlic Aioli

Mayonnaise – ¼ cup
Garlic – 1 clove
Zest and juice of a lemon
Salt
Pepper

Blend all of the above ingredients smoothly and transfer to a serving bowl.

IMG0099

Money bags florentine with garlic aioli.