Showing posts with label Flat Breads. Show all posts

Vegetarian Phyllo Pizza

A cook can never have too many cookbooks. My bookcase somehow seem to grow and have room for good cookbooks. Vegetarian Meals Good Housekeeping Favorite Recipes is one such cookbook. It is filled with recipes that are quick, easy and fun. A good find, considering that I picked this book in a rush without flipping even a single page, from my local library.

Back at home, when I had the time to patiently flip the pages, vegetarian phyllo pizza caught my attention. A pizza in 20 minutes? Sounds easy. I had to give it a try. And try I did with great results. We were treated with a light and flaky pizza, that we totally loved. Will it replace a traditional pizza in my kitchen? Definitely not. Its not like your usual pizza with chewy crust. But this is definitely a fun idea that’s worth a try. I will definitely make this often for a quick snack or a tasty side.

I have tweaked the original recipe by replacing butter with garlic flavoured olive oil. After being smitten with pepper jack cheese on a pizza, I seldom make pizzas any other way. Sorry mozzarella, you have to take a back seat. You can also add a variety of toppings, provided they don’t mush the phyllo crust.

Vegetarian Phyllo Pizza
(serves 2 as a side or snack)

Ingredients

Phyllo sheets – 6
Olive oil – 2 tbsp
Garlic – 1 small clove, fine grated
Cherry tomatoes, yellow and/or red – 20-25, halved
Pepper jack cheese – ½ cup, shredded
Dried oregano – 1 tsp
Parmesan – 2 tbsp, shredded
Salt
Pepper

Method

Preheat the oven to 450F. In a small bowl, combine olive oil and garlic. Mix well and set aside.

Line a baking pan with parchment paper (I used a 9x12 pan). Lay 2 phyllo sheets on the parchment paper. Brush with olive oil + garlic mixture. Repeat twice to finish layering all 6 sheets. Brush the top with remaining oil mixture. Evenly spread pepper jack cheese and tomatoes. Sprinkle with oregano, salt and pepper. Bake for 12 to 15 minutes. Remove from the oven, sprinkle with parmesan cheese. Serve warm.

I served mine with orzo salad loaded with tomatoes, olives and tons of fresh herbs. A delicious lunch that we enjoyed very much.

‘Shrooms In My Pizza

Pizza – a good canvas for.. whatever. Anything goes on a pizza, as long as you figure out what flavours go well with each other. Pizza base is a crucial factor for a good pizza. Although I have tried various pizza dough recipes, I always, always come back to Slash Food’s recipe. This dough makes for a mean pizza margherita. But it does equally well with other toppings too. Be it a vegan pizza , or a pizzette served on the side with soup/salad, this recipe has withstood all my tests. This is, by far, my favourite pizza dough ever.

I spotted some gorgeous mushrooms in store last week. I bagged some (gosh, the organic ones are very pricey) with wild-mushroom lasagna on mind. After a sumptuous hunter’s omelet, I ditched lasagna and decided on pizza. I am so glad I did. It was The Best pizza we have ever had. The flavors were harmonious and the pizza was just divine.

After so many failures, I have discovered a good way of getting restaurant style sautéed mushrooms. As a rule, I always sauté mushrooms in a dab of butter. I let the skillet get screaming hot, melt a little butter, swirl the pan to coat the fat evenly, lay out mushrooms in a single layer and do not disturb for 2-3 minutes. When it has caramelized on one side, toss and brown the other side. Add salt just before removing from the skillet. I’ve had consistent results with this method and this is the only way I cook mushrooms.

Coming to the pizza, there is not much of recipe, but here’s what I did. Sauté mushrooms (any kind would do) as said above. Roll out the dough thinly, top with sautéed mushrooms, sliced red onions, thinly sliced garlic, thyme, pepper jack cheese and red pepper flakes. Slide into a 500F oven, and bake for 10-12 minutes. If your oven can go to higher temps, bake for lesser time. When browned around the edges, pull the pizza out, top with shredded parmesan and serve hot.

This recipe makes two pizza dough. For the second one, I used leftover eggplant stacks. I scraped off the tomato sauce, brushed the dough, laid the eggplant slices, and topped with feta cheese. I was surprised how delicious and versatile these eggplants were. A keeper, definitely!

Edited to add: This is my entry to Click-Cheese.

Quinoa – Carrot Paratha/Flatbread

There are about 9 kinds of whole grains in my currently-understocked-pantry, as I am writing this post. I barely eat white rice anymore; just twice or thrice a month. No, this is not a fashion statement (unlike the “I don’t watch Indian movies, only ingleeesh” kind), but more of a health-conscious one. Like family heirlooms, both our family trees have generous genetic ailments waiting to be bestowed upon us. No thank you (not so for the diamonds. Am I clear?).

Discovering the world of whole grains and their various cooking methods is such a delight. But once in a while, we do long for our childhood favourites. There are some dishes that we grew up with and the sight, smell and taste bring back a gush of memories from our early days. Now I am learning to incorporate the whole grains in Indian recipes. It doesn’t turn out well all the time. There are some bad days (as with any cooking experiments) and then there are days with outstanding results. Quinoa paratha is one such dish.

Quinoa, the wonder grain

This recipe is an extrapolation of this upma. I kept the seasoning to a minimum just like the upma. Tastewise, these parathas weren’t any different than the usual wheat ones, but the addition of quinoa did make them soft and supple. I am sure there will be more 'whole-grain-flatbreads' from my kitchen.

Before going to the recipe, I am thrilled to announce that Margot at Coffee and Vanilla has nominated me for this month’s Inspiring Food Photography. I have some tough competition with fellow nominees, Michelle of Green Gourmet and Leemei of My Cooking Hut. If you have enjoyed your visits here, please hop over there and vote for me (yeah, shameless self promotion. I know!).

Quinoa – Carrot Paratha/Flatbread
(makes 16-18 medium sized parathas)

Ingredients

Quinoa – ¾ cup, uncooked
Whole wheat flour – 3 to 3½ cups
Carrot – 1 cup, finely shredded
Onion – ¼ cup, shredded
Green chilli – 1, minced
Carom seeds/ajwain – 1 tbsp
Cilantro – ¼ cup, minced
Salt

Oil – for cooking

Method

Cook quinoa with 1 cup of water. You can either do this using a pressure cooker for 2 whistles, or on stovetop. Fluff, and let cool, but not completely.

I made the dough using food processor. Using the shredder attachment, shred carrots, onion and green chillies. Remove the attachment, fit the blade, add warm quinoa and salt, and pulse everything together, until it forms a solid mass. Add 2 cups of flour and pulse until the dough forms into a ball. Turn the dough onto a big bowl or working area, sprinkle cilantro and carom seeds on top of it. Add flour ¼ cup at a time until the dough isn’t sticky anymore. Knead for 5 more minutes until it is soft and elastic.

If you don’t have a food processor, prepare vegetables separately, grind the cooked quinoa coarsely and proceed as mentioned above, until you are left with a soft and elastic dough.

Cover with a moist towel and let the dough rest for 20 to 30 minutes. Prepare vegetables or gravy to go along with the paratha. I served mine with Ashwini's Green Peas Curry. I have made this curry with different legumes. It tastes absolutely fantastic every single time.

When ready, pinch a lemon sized ball of dough, (about 2 inch), dust and roll on a well floured surface, as thin as you can. Cook on preheated flat skillet, with a light drizzle of oil on one side. The parathas are done when they develop light brown spots on both sides.

These flatbreads were naturally soft. But I find cooking any kind of roti/paratha (the non-stuffed kind) over medium-high heat ensures the soft texture. You have to be careful not to burn the roti, by flipping every 30 seconds. These parathas were done just after 2 flips.

This is my second entry for Vegan Ventures, round 2. This event celebrates the National Vegan month, November. More whole grain recipes can be found at JFI - Whole Grains roundup.

Freshly Ground Wheat Berry Flatbread – Gehun Phulka

Good cookbooks meant glossy pages and eye-candy photos to me, in my earlier days of cooking. Lets admit, good pictures do make our heads turn. But, after a while, my infatuation over looks wore off. I took time to go through a book thoroughly, even if it contains just pages of recipes and techniques, before accepting or ignoring it.

One such unassuming, no-pictures cookbook I came across was Lord Krishna’s Cuisine – The Art of Indian Vegetarian Cooking by Yamuna Devi. This book is huge. Neatly divided into various sections like rice, breads, sweets, vegetables, chutneys, salads etc, this book is quite comprehensive. The thing I like the most about this book is, in addition to cooking with Indian vegetables, it also has simple ideas to cook with the Western produce. The other generic observation I made is the recipes are milder, meaning to say, they have been mellowed down to suit the western palette. In short, I feel this book deserves more recognition than it has now.
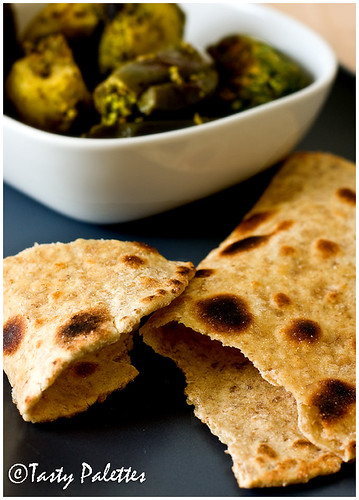
Phulka

The recipe I chose to make is gehun phulka. Whole wheat berries are ground with additional flour and made into phulkas. Frankly, I didn’t expect them to turn soft, but I was glad to be wrong. They rolled out thin and even puffed up. I indulged a bit by slightly brushing them with ghee. Whole grain goodness with a touch of ghee, that’s rustic beauty. This is my entry for Roti Mela, organized by the energetic Srivalli at The Cooking 4 All Seasons.

Gehun Phulka (yields about 20 medium phulkas)

Ingredients

Wheat berries – 1 cup
Whole wheat flour or atta – 3 cups
Curd – 3 tbsp
Skimmed milk – 2 tbsp
Salt – 1 tsp
Oil – 2 tbsp
Water – a sprinkle, if needed

Extra whole wheat flour for dusting
Oil or ghee for brushing on top

Method

Wash and soak the wheat berries for at least 10 and up to 24 hours. Transfer the berries with the soaking water and boil for 10 minutes. Drain and dry berries on a clean kitchen towel. The berries can be prepared up to this stage and refrigerated in an airtight container for 4 days.

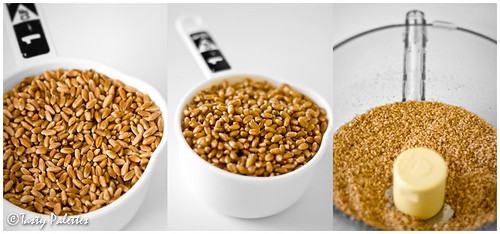
Wheat berries

Wheat berries - raw, soaked and ground

The dough can be made in a food processor. Fit the steel blade and grind the wheat berries with ½ cup of whole wheat flour. The flour makes the grinding easy. Keep grinding until the berries are ground into a fine mixture. Add rest of the ingredients, except water, and pulse to form a dough. Transfer the mixture to a working surface and knead for about 5 minutes, until it forms a lightly loose and smooth dough. Sprinkle water if necessary.

If you are making the dough by hand, grind wheat berries separately with ½ cup of flour, transfer to a working surface, mix the rest of the ingredients as mentioned above.

The dough, initially, is not quite elastic. Also, with time, it absorbs water becoming tighter. So, add a little more water than it needs. Wrap and let the dough rest for at least 30 minutes and up to 3 hours.

When ready, heat a griddle over medium heat. Pinch a walnut sized dough, dust in flour and roll it out into a thin round. Dust the dough in flour from time to time to prevent sticking. Transfer the rolled dough onto the hot griddle. When bubbles appear on the surface, flip to the other side. Cook for a minute , flip and cook for additional 30 seconds. The phulka should have light brown spots on both sides and will slightly puff up. Remove phulka from the hot griddle, lightly brush with ghee and transfer to a vessel lined with a clean kitchen towel. Repeat with rest of the dough and keep the phulkas covered with the towel to keep them warm and soft.

Serve with your favorite curry. Wrap leftover phulkas in a piece of foil and freeze for later use.

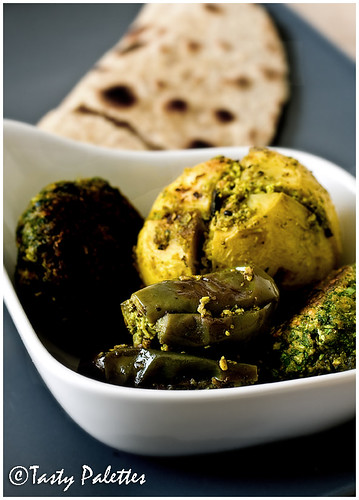
Undhiyu

Gehun phulka served with Nupur's Undhiyu

I served mine with Undhiyu, courtesy of The One Hot Stove. Rightly named, this kitchen has never ceased to whip up delicious creations for more than three years now. The face behind the blog, Nupur, is such a warm being, and is one of my earliest friends in the blogging world. While I was overwhelmed during my earlier blogging days, she was right there to lend me a helping hand. If not for her gentle nudge, I wouldn’t be entering into DMBLGiT at all. Nupur, thank you for whom you are. Your friendship is dearly cherished by me.

Though a bit time consuming, undhiyu is very tasty and uses only those vegetables that are available in rural India. I have made this more than once, and having those darn tasty methi muthias doesn’t hurt either. Zlamushka at Spicy Kitchen invites bloggers to try out recipes from fellow bloggers. Tried and Tested features One Hot Stove this month.

Ragi Dosa – Sweet and Savoury

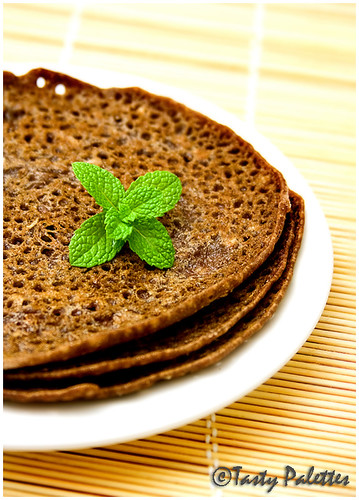
The balloons are gone, and so are the cupcakes. Celebrations are long over and I am slowly getting back to normal blogging. Few blog events were missed as I had been under the weather. Let me break the spell with one, or should I say, two-in-one recipes?

Before going to the recipes, I have something to share with you. Meeta and The Daily Tiffin have graciously accommodated me into their team. I am excited to be a part of this well-respected team of bloggers and will be contributing monthly. Do check out my first article Vegetarianism – An Introduction.

That said, its raining dosas everywhere, thanks to Srivalli who is hosting Dosa mela. I know I am late, but am joining the bandwagon anyway with my ragi dosas, huffing and puffing. Check out the two-part roundup she has done so far.

Finger Millet, known as Ragi or Kezhvaragu (Tamil) is highly nutritious and grows easily in less than perfect conditions. Inexpensive, readily available and quite filling, no wonder its called poor man’s food. But don’t let this fool you, because its quite rich in taste. As with any whole grain, it has a signature nutty taste, which works well in both sweet and savoury dishes.

Sweet and savoury, that’s how my mom served ‘em. She used to treat us with both versions of dosas made with ragi or wheat flour. I recreated the same meal in an effort to relive my childhood. And it worked like a charm. A ballet on the taste buds with salty and sweet notes. Previously, all my attempts have been less than satisfactory. Either the dosas were leathery or doughy. This time I followed Meenakshi Ammal’s recipes and they hit right on spot.

Most of the Indian grocers carry ragi flour. Whole wheat flour can be replaced for ragi flour in both the recipes, to make sweet and savoury wheat dosas (Godhumai dosa). Serves two when served together.

Savoury Ragi Dosa

Ingredients

Ragi flour – 2 cups
Urad dal – ¼ cup
Salt – 1½ tsp
Sour curds (optional) – a ladle full
Oil

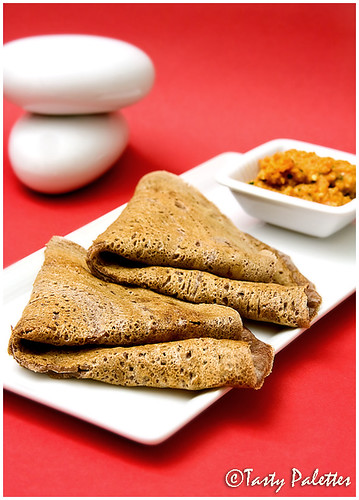
Savoury Ragi Dosa

Savoury ragi dosa served with tomato-coconut-garlic chutney

Method

Soak urad dal for 2 hours. Refrigerate for 20 minutes and grind to a smooth and fluffy batter. Mix ragi flour, salt and water and make a tight dough. To this, add the ground urad batter and mix thoroughly. If you are making dosas the next day, let this batter ferment for 6 to 8 hours. If using on the same day, mix sour curds to the batter. The final consistency of the batter should be thinner than pancake batter.
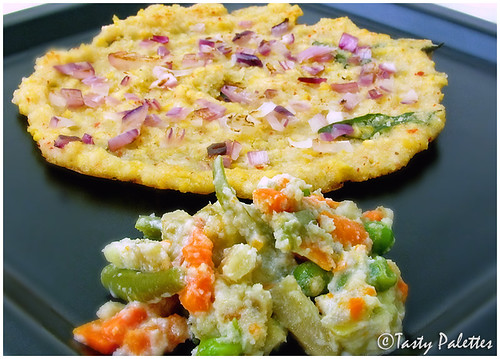
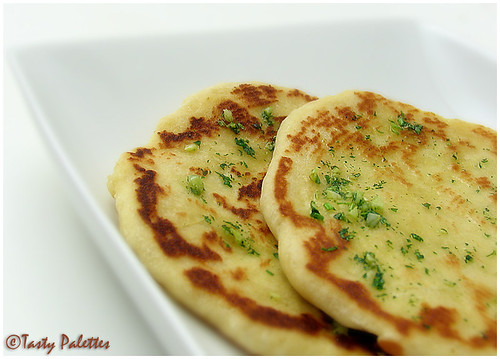
Heat a griddle over medium-low heat. Wipe it with an oiled paper towel/towel. Pour about 1/3 cup of the batter. Drizzle ½ tsp of oil along the periphery of the dosa. Let it cook for a minute, slowly flip and cook for about 30 seconds on the other side. Wipe the griddle with oiled towel between dosas. Serve while hot with your favourite chutney.

Sweet Ragi Dosa

Ingredients

Ragi flour – 1 cup
Rice flour – 2 tbsp
Jaggery – ½ cup
Grated coconut – 1 tbsp
Ground cardamom – 1 tsp
Oil
Butter – to serve (optional)

Method

Boil 1¼ cup of water. Remove from heat, add jaggery and let it dissolve completely. Mix rest of the ingredients except oil and whisk to a smooth batter without lumps.

Over the same griddle on medium-low heat, pour 1/3 cup of the batter. Drizzle ½ tsp of oil along the periphery. Cook for a minute on one side, flip and cook for additional 30 seconds. Wipe the griddle with oiled towel between each dosa.

Sweet Ragi Dosa

Unlike savoury dosa, the sweet ones are lacey and spongy. Serve hot with a dab of butter.

And I surrendered…

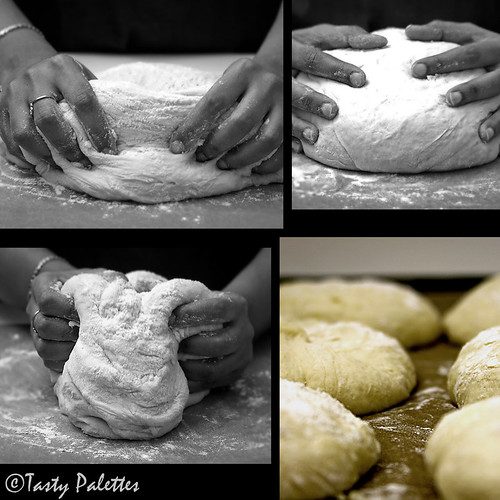
Kneading the dough

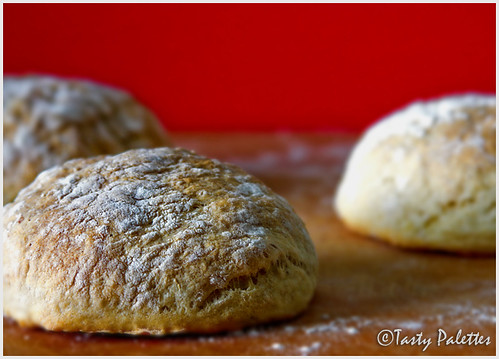
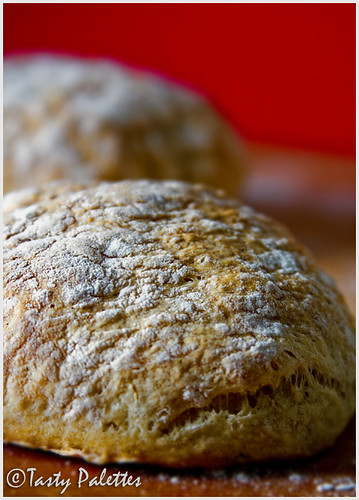
Its raining potato bread everywhere in the blogging world and the temptation was too much. I duly surrendered and set out to make bread from scratch, for the very first time. I have always wanted to try potato buttermilk rolls recipe from this book. So I combined this recipe with Tanna’s recipe and developed my own. The rolls were soft and chewy with a light tang from the yogurt. I am so glad I made ‘em. Served with soup or as a sandwich, potato buttermilk rolls were just right.

Potato Buttermilk Rolls

Ingredients

Russet potato – 2, medium
Yogurt – ½ cup
Yeast – 2 packets
Sugar – 1 tsp
Salt – 1½ tsp
Butter – 1 tbsp
Whole wheat flour – 1 cup
All purpose flour or maida – about 4 cups, plus extra for dusting

Method

Peel and dice potatoes and cook in 4 cups of water, until soft. Drain and reserve the cooking water. Mash the potatoes well and let it cool. When the potatoes are warm and not hot, combine with yogurt, 1 ½ cups of potato water, yeast. Leave for 5 minutes.

Making Potato Buttermilk Rolls

Add sugar, salt, butter, whole wheat flour and 2 cups of all purpose flour to the potato mixture. Mix well until combined. The dough will be very sticky. Turn it on to the counter and start kneading. Keep adding flour until the dough comes together, about 2 cups. Transfer the dough to a well oiled clean bowl. Cover and let rise for about an hour.

When doubled in size, punch the dough and knead again. Divide the dough into two and reserve one half. Shape the other half into 6 rolls onto a baking sheet, lined with parchment paper. Cover and let rise for about 25 minutes. Preheat the oven at 450F. Lightly flour the rolls and bake for 10 minutes. Reduce the oven temperature to 350F and bake for additional 20 minutes, until light brown. Cool on a wire rack.

Potato Buttermilk Rolls

Bhatura

After the dough was done, I feared that it may be too much for just the two of us. I reserved half of it and chose to worry about it later. When the later came and I still had no idea I was a little desperate. Then an idea struck. Anjali of Anna Parabrahma had left a comment on this post, saying that she once made bhature with bread dough. Considering that the ingredients for the rolls were almost the same as aloo bhatura (barring yeast), I decided to give it a try. The bhature were a huge hit. The leftovers were even better. With due credits to Anjali, here is the method for making bhature.

Method

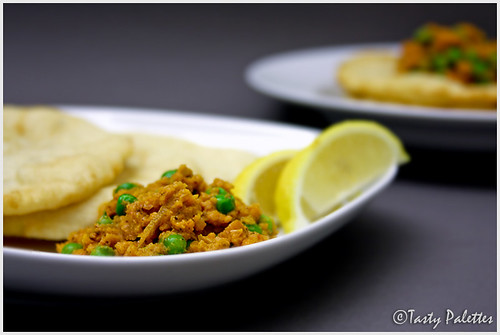
Take the other half, and add equal amount of all-purpose flour. Knead well. Roll out thin small rounds and deep fry. Serve with your favourite curry.

Bhatura

I served mine with Ashwini’s Gobi ka kheema. I have been looking for this recipe for quite some time and this one is spot on. Ashwini, your recipe pleased our palettes just like your pictures delights our eyes.

Adai and Avial

Tamil Nadu and Kerala, being neighbours, share quite a few recipes. Avial being one of them. Though it tastes excellent with rice, I find Adai-Avial combination, quite enticing.

Avial (Mixed Vegetable Stew)

Avial essentially means ‘to be cooked’. Colloquially, it also refers to a mixture of anything and everything. And that is the idea. Any seasonal vegetable other than okra, bitter gourd and colocasia (arbi) can be used. Drumsticks are a favourite candidate due to their aroma. This can be had with rice/sambar/thogayal or adai. Though avial tastes better when fresh, it keeps well for 2 days in the refrigerator, without yogurt. Add yogurt only to the portion that is to be served. This celebration of vegetables is my entry to Vegetarian Awareness Month, hosted by Margot of Coffee and Vanilla.

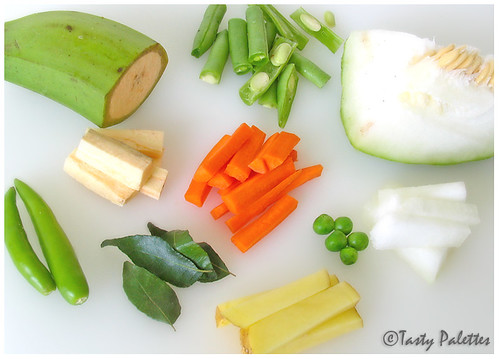
Vegetables for Avial
Left to right, Top: Plantains, Green beans, White pumpkin
Bottom: Green chillies, Curry leaves, Carrot, Peas, Potato

Ingredients

Any vegetables cut into thick matchsticks – 3 cups
Grated coconut – ½ cup
Green chillies – 3
Curry leaves - few
Yogurt – ½ cup
Salt
Coconut oil – a tbsp

Method

Cook all vegetables until done. This can be done using microwave oven or over stove top. They should not be mushy, but slightly crisp on the inside. Grind coconut and green chillies to a fine paste and add to the cooked vegetables along with salt and curry leaves. Gently heat vegetables along with the ground paste until green chillies do not smell raw, about 3 minutes. Take care not to mush the vegetables while mixing. Just before serving, combine yogurt and a tbsp of warm coconut oil to avial and serve.

Avial

Adai (Lentil Pancake)

Avial goes very well with paruppu usili. But the eternal combination is Adai-Avial, which can be seen served even today in many of the South-Indian restaurants. Hearty lentils combined with sweet vegetables and cool yogurt compliment each other.

Ingredients

Par boiled rice – 2 cups
At least 2 types of dal(toor dal, chana dal, urad dal) – 1 cup, combined
Red chillies – 6 or 8
Asafoetida – ½ tsp
Salt
Curry leaves - few
Red onions – 1, medium, chopped finely
Oil

Method

Soak rice and dal mixture separately for at least 2 hours. Grind rice along with red chillies, salt and asafoetida to a coarse meal. Then pulse the dal mixture, barely grinding them. Mix them both along with curry leaves. The batter will be quite thick.

Heat a tawa or griddle. Place some batter in the tawa and spread them to form a circle. Make a dent in the center. Top the batter with chopped onions. Drizzle oil around the adai and in the center. Cook this over medium heat. Flip to cook the other side. Serve with avial, idli podi, butter and jaggery.

Adai and Avial

Few things to be considered are
  1. You can use raw rice instead of par boiled rice
  2. For a crisper adai, do not grind dal to a fine paste. The bigger the better. You can even add a handful of soaked chana dal to the final batter for extra crispiness.
  3. Onions can be topped or mixed into the batter. Cabbage, drumstick leaves are the other usual toppings.
  4. As another variation, omit onion/cabbage and mix a handful of grated coconut to the batter. The adai will be softer.

1-in-3 Amish Friendship Starter

When Nupur sent me that sour-sweet smelling package, I meticulously followed the tradition and baked Pineapple-Cherry Bread. But after working with the starter and understanding how to use it, rather manipulate it, opened a door of opportunities, or recipes, I should say. This 1-in-3 series is about my experiments with the starter.

I am not going to give instructions on how to feed the starter. You can find it here, along with other recipe ideas. If you are looking to make the starter on your own, this recipe may be of help. But I cannot vouch for the recipe as I haven’t tried it.

With many thanks to Nupur for sending me the starter, here is 1-in-3 Amish Friendship Starter.

Garlic-Herb Naan

Most of the recipes I develop are by intuition. Things I strongly believe will work, even though I am trying it for the first time. After observing the active starter, one thought that screamed inside my head was flat bread. Unsure, I set out to make Naan, the Indian flat bread, to be on the safer side. I had no reason to be unsure. The naans were A-Class.

Garlic Herb Naan

Ingredients

Amish friendship starter – 1 cup
Whole wheat flour – about 1¼ cups
Salt – 1 tsp
Garlic – 1 clove, minced
Mint, cilantro – 1 tbsp, finely chopped
Oil – 1 tbsp

Method

Combine starter, salt and flour to form a stiff dough. Add more flour depending on the moisture in the dough. Cover and rest the dough for 6-8 hours. When the dough has risen, punch down, knead well, cover and rest for another 2 hours.

When ready, preheat the broiler. In a small bowl, combine garlic, herb and oil and keep ready. Pinch an orange sized dough, and roll into a tear shape. Place on a hot pan, and cook until both the sides develop light brown spots. Transfer the naans on to a cookie sheet and broil until dark brown spots develop, about 30 – 45 seconds. Brush naans with garlic oil when they are hot out of the oven. Serve with your favourite masala. This recipe yields 7 medium sized naans.

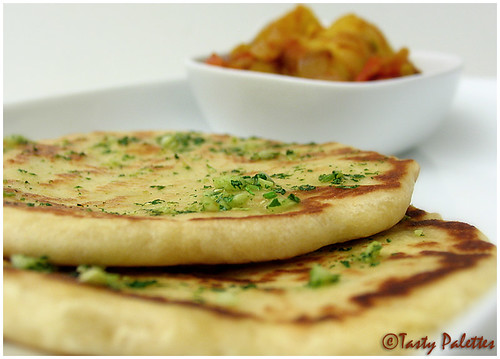
Garlic Herb Naan with Aloo Masala

Naans serve with Indira’s Aloo Masala.

Leek Stuffed Kulcha

I had other plans for the ‘3’ in 1-in-3 – Leeks series, something like a tart. Instead I decided something Indian. Originally these kulchas are stuffed with red onions, so not buying leeks shouldn’t stop you from trying this recipe.

One thing to be noted in this recipe is that the filling should be dry and not soggy. So if your paneer is wet, squeeze the liquid with a cheese cloth and use the liquid to make the dough. Also, try using cottage cheese instead of paneer. Same rule though – drain the cheese well. With cottage cheese you get so much liquid that I find adding curd to the dough unnecessary.

Ingredients

Dough

Wheat flour – 1 cup
All purpose flour/ Maida – 1 cup
Curd – ¼ cup
Water – as needed
Baking soda – ¼ tsp
Salt
Oil

Filling

Leek - 1
Paneer – 1 cup grated
Green chillies – 2
Ginger – ½ inch piece, grated
Cilantro – A handful
Salt

IMG0167

Method

Make the dough by mixing all of the ingredients. Oil the surface of the dough and keep it covered with a damp towel for at least an hour.

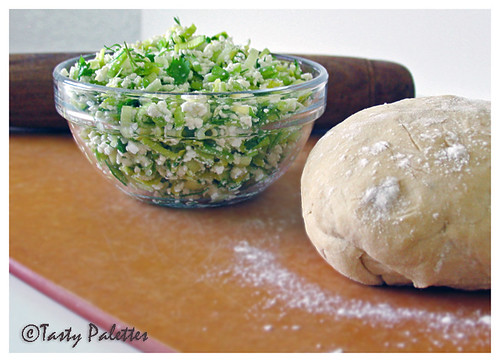
Cut the leeks into small pieces, wash and dry a little bit. Mix with other ingredients.

Take a lemon sized ball from the dough. Roll into thick puris. Place a tsp of the filling. Seal and cover fully. Roll again.

Cook on a tawa over low flame on both the sides. Kulcha is done when it slightly puffs up with brown spots on both sides.

IMG0169

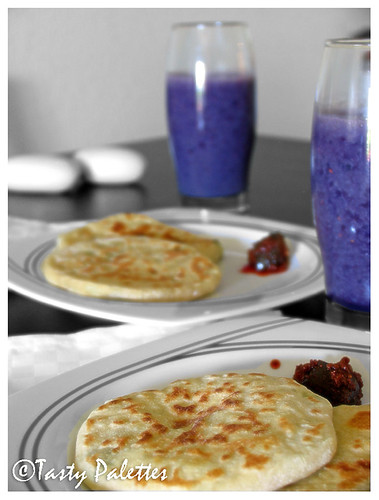
Leek-stuffed kulcha with avakkai (mango pickle) and very-berry smoothie