Showing posts with label Snacks. Show all posts

Fig - Red Onion Confit

I was in the mood for a three course meal the other day. Cornmeal crusted mini-tarts, store-bought mango sorbet (made with alphonso, I can’t get enough of this stuff. Its always in my freezer) were on the menu. I still wanted something to nibble, for starters. Inspired from a meal at Café Flora, I made this onion confit. What’s better? It can be served at room temperature. That is a rule of thumb I follow for entertaining, even its for just the two of us. One make-ahead course, one course to be enjoyed hot and for the other course , a little help from the store. The order doesn’t really matter, but it takes the pressure out of entertaining.

I have used aged, thick and syrupy balsamic vinegar, which is added toward the end. For the price you pay, it’s a crime to boil aged balsamic vinegar, IMO. But if you have the regular kind, go ahead and use it. But add 5 minutes before finishing the dish, to let it boil and reduce. I have also used fig preserves that I found at my local market. But if you can’t find it, soak dry figs in hot water, grind to a smooth paste along with sugar and use in the recipe.

Fig-Red Onion Confit
(makes about 1½ cups)

Ingredients

Red onion – about 3 cups, thinly sliced
Sugar – 1 tbsp
Salt – as needed
Pepper – few cracks
Fig preserves – 3 tbsp
Thick, aged balsamic vinegar – 3 tbsp
Oil – a splash

Method

In a skillet, heat oil over medium-low heat. Add onions, sugar, salt and pepper and cook the onions for about 15 minutes, stirring in between. If they get stuck to the bottom of the pan, sprinkle a tbsp or two of water, vigorously shake and deglaze the pan and continue cooking. Once the onions turn soft and brown, add fig preserves and balsamic vinegar. Remove from heat, mix thoroughly, let cool in the pan and serve cold or at room temperature.

I served the confit in a platter along with olives, capers, toasts and tofutti. Tofutti is cholesterol-free and is as good as its dairy counterpart. It’s a standard spread for my sandwiches. We also enjoyed it cold, on plain toast with coffee, the next day. This is my entry to Heart of the Matter – Finger Foods. HOTM celebrates its second anniversary.

Marinated Feta

What a way to infuse flavor into spoilt milk.. ahem.. cheese? It quickly caught my attention when the uber-talented and famous David Lebovitz posted it. The idea was as delightful as his blog. As simple as it may sound, the tangy feta mellows down after soaking in the fruity olive oil. The herbs add a nice touch and so do the chillies. I too refrained from using garlic due to ill effects as mentioned in his post.

Here's the method. Feel free to be creative.

  • Feta cheese cut into cubes
  • Any fresh herbs like thyme, rosemary, bay leaves, basil, etc
  • Whole or crushed black peppercorns, and/or slit red chillies, and/or red pepper flakes
  • Good quality olive oil

In a clean, non-reactive bowl/jar, stack the feta cubes. Throw in herbs and pepper in between the cheese layers. Fill with olive oil, cover the jar and leave it in the fridge for a few days , to let the flavours develop.

Marinated feta on toasted focaccia

It is plainly divine as such, slathered on a crostini(fancy talk for a thin toast), or as a spread for your favourite sandwich (like I did with this omelet sandwich for lunch today). Kevin adds roasted red peppers and olives to his mixture. Sounds delicious. I will definitely do that next time.

The Drunken Vadai a.k.a Sambar Vadai

How many times has sambar been mentioned in this blog? One too many. And there will be more. I wouldn’t be exaggerating if I say sambar is iconic to Tamil Nadu. Sambar is as Tamilian as marinara is Italian. Breakfast, lunch or dinner, this lentil gravy somehow finds its place on the table. Starting your day with idli, dosa, pongal or upma with a side of steaming hot sambar, is enough boot to get one through mid-day. Or rice mixed with sambar, and eaten with any vegetable is a well-balanced lunch or dinner.

What is the reason for this never dying popularity? Because its simple, easy, tasty and most importantly filling. There are countless ways to prepare it and with readymade sambar powder, it can done in a snap. If you don’t like sambar, chances are, you haven’t tasted the right kind.

Sambar Vadai

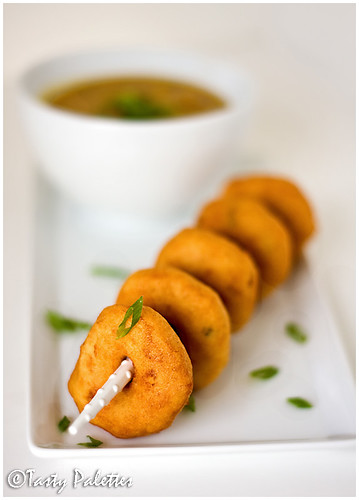
You have seen idli and dosa here. Let me introduce the next in line – vadai or vada. How do I explain it? Lets see, it is a savoury dumpling made out of lentils. Fluffy urad batter is minimally seasoned, fried and served with sambar or chutney.

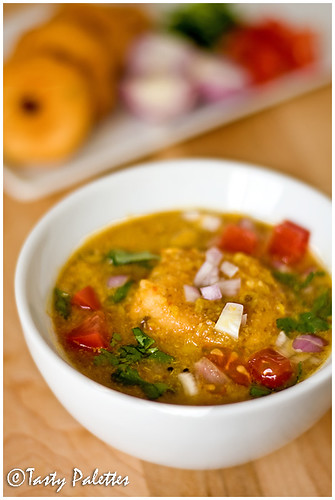
Sambar vadai is a slight variation, where warm vadas are soaked in hot sambar. The crispy dumpling instantly absorbs the gravy like a sponge. Sambar vadai is delicate like a cloud and melts the moment it touches your mouth. Ah! Culinary nirvana.

Ulundhu Vadai (Urad Vada)
(serves 2)

Making vadai is almost straightforward. Almost, because it takes a little practice to shape it properly. The key is to add very little water while grinding. Don’t lose heart if you can’t get it right. Just drop by spoonfuls into the hot oil. Fried dough tastes great no matter how it is shaped.

Ingredients

Skinned urad dal – ¾ cup
Green chillies – 2, chopped
Curry leaves – few, torn into bits
Ginger – 1 tsp, finely chopped
Water – 2 to 3 tbsp
Salt

Plastic sheet or banana leaf for making vada
Oil for frying

Method

Soak urad dal for 1 hour. Refrigerate for 10 minutes and grind with salt to a smooth paste. Add water by tablespoons only if necessary. Add green chillies, ginger and curry leaves.

Heat oil over medium heat in a kadai or a wide vessel. Take care that the oil is at least 1-inch deep.

Making Vadai

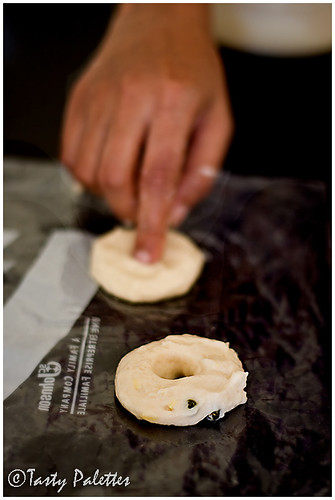
Take the plastic sheet (like Ziploc bag) or banana leaf and wipe with water. Take about ¼ cup of dough on the sheet. Dampen your fingers, slightly flatten the dough and put a hole in the middle. This ensures that the dough gets cooked through. Gently transfer the shaped dough to the oil and deep fry till its golden brown.

Serve warm vadai as such for snacks or soak in hot sambar for 2 minutes and then enjoy, garnished with chopped raw onions, cilantro and/or chopped tomatoes.

Ulundhu Vadai - Urad Vada

Ulundhu vadai, my entry to Click – Beans and Lentils, an event conceived and hosted by the Jugalbandits.

Arachu Vitta Sambar
(serves 4 when served on the side, serves 2 when served as main or when gobbled by the cup)

The recipe for sambar is almost the same as the one here, but for a few changes. Even though the quantity here serves four, make extra. Refrigerate leftovers for up to 5 days. Serve with rice, idli, dosa, upma… well, you get the idea.

Ingredients

Oil – 1 tsp
Mustard seeds – ½ tsp
Curry leaves - few
Quartered shallots or sliced red onions – ½ cup

Toor dal – ½ cup
Moong dal – 1 tbsp
Turmeric powder – 1+1 tsp
Tamarind paste – 2 tbsp
Salt

Cilantro – 2 tbsp, chopped

Spice mixture

Oil – 1 tsp
Coriander seeds – 2 tbsp
Chana dal – 1 ½ tbsp
Dried red chillies – 8
Raw rice – 1 tsp
Fenugreek seeds – ¼ tsp
Grated coconut – 2 tbsp

Red onions – 2 tbsp, chopped
Tomato – ¼ cup, chopped

Heat oil and roast coriander seeds through coconut and grind with onion and tomato to a smooth paste. Alternately, you can grind 2 tbsp of sambar powder (homemade or store-bought) with onion and tomato.

Method

Pressure cook toor dal and moong dal until soft, with 1 tsp of turmeric powder.

In a sauce pan, heat oil, splutter mustard seeds and lightly sauté shallots or red onions with curry leaves. The onions should turn just soft, but still crunchy. Remove and set aside.

In the same pot, boil tamarind paste, salt and the remaining 1 tsp of turmeric powder with 2 cups of water. When tamarind doesn’t smell raw anymore, add the cooked dal, ground spice paste and a cup of water. Simmer for 5 minutes. Remove from heat, add sautéed onions and garnish with cilantro.

Sambar Vadai

For serving sambar vadais, soak warm vadais in hot sambar for 2 minutes. Serve garnished with chopped raw onions, cilantro and tomato. No place for forks here, only spoons to scoop the drunken vada.


TECHNORATI TAGS: , , , , ,

Almond Pâté

Pâté is a spreadable mixture of chopped or ground meat, fat and seasonings, often served with toasts as a starter. It may be cooked in a pastry (Pâté en croûte), or in a mold (Pâté en terrine). But there is no meat in my pâté, but ground almonds. Sounds fabulous? What else do you expect from Tassajara?

We were head-over-heels in love with this spread, to say the least. G, who loves everything almond, has declared that this pâté should always be on hand for a quick fix, anytime. That says it all, I guess.

Almond Pâté

Ingredients

Onion – 1 cup, minced
Butter – 1 tbsp
Green chilli – 1, minced (optional)
Cumin powder – ½ tsp
Mixed herbs (I used parsley, chives and rosemary) – 2 tbsp, minced
Raw almonds – 1 cup
Bread crumbs – heaping ½ cup
Soy sauce – 1 tsp
Garlic – 1 clove, minced
Mayonnaise – 3 to 4 tbsp
Salt
Pepper
Lemon slices
Butter paper – to roll

Method

In a skillet over medium-low heat, lightly toast the bread crumbs. Transfer to a big bowl. In the same skillet, melt butter and sauté onions along with cumin powder and garlic. When the onions are soft, transfer to the bowl with breadcrumbs.

Grind almonds to a coarse meal, like rava or cornmeal. Add to breadcrumbs and onion. Also add fresh herbs, soy sauce, garlic, salt and pepper, and work with your fingers to bring it all together. Add mayonnaise 1 tbsp at a time, until the mixture holds together. Transfer the mixture to a butter paper and roll into a log. Cover well and refrigerate until ready to use.

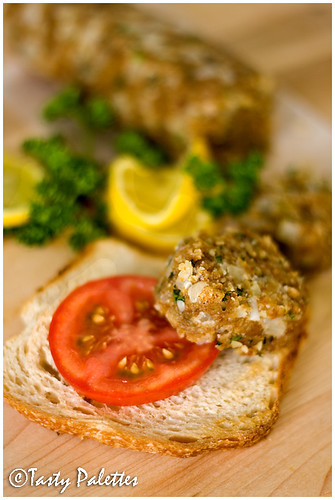
Serve with toasts, lemon slices and tomatoes. Spread pate over a toast, squeeze lemon juice and top with a tomato.

This is my entry to Waiter, there is something in my… Dried fruits and nuts, hosted by Andrew of Spittoon Extra. Since this makes an excellent open-faced sandwich, I am also sending this to Anupama of Food-n-more, who is celebrating Sandwich Festival this month.
My latest post at The Daily Tiffin - Herbs: More Than Just A Garnish.

Pear Crostini

I was left with a stale loaf of baguette as hard as a baseball bat. With a little research and a great recipe, I turned it into a delicious tea-time snack. This is what I did to refresh the stale bread.

Heat the oven to 275F. Mist the loaf with water and heat for 4 minutes. Mist again and bake for another 3 minutes. The bread is now crusty on the outside, soft and chewy on the inside, ready for immediate use.

The recipe given below is adapted from Vegetarian Sandwiches by Paul Mitchell. Though the combination of ingredients sounded a little odd, I decided to follow it. Mainly because, every one of the recipe I have tried from this book is a hit. And so was this. The pear was sweet and soft, with a hint of maple syrup, and the parmesan cheese was a nice touch.

Ingredients

Baguette – 12 slices, 1/3 inch thick
Slightly ripened pear – 1, peeled, cored and sliced thin
Maple syrup – 2 tbsp
Cream cheese – ¼ cup
Parmesan cheese - 3 tbsp, grated

Method

Toss pear slices with maple syrup and let it sit for about 15 minutes. Preheat the broiler.

Generously spread cream cheese over baguette slices, and arrange on a baking sheet. Top baguette with sliced, marinated pear and grate parmesan cheese over the fruit. Broil the crostini 4 to 5 inches from the heat source for about 2 minutes. The pear slices will be tender and the cheese melted and browned. Serve warm or at room temperature.

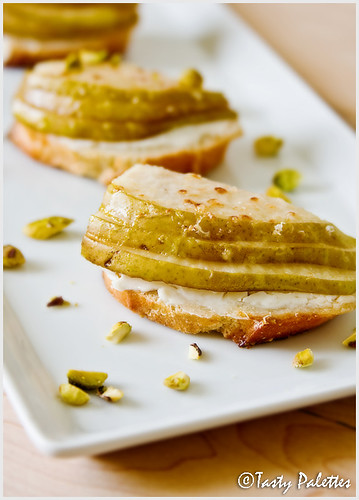
Pear Crostini

Since I used stale bread, I did not toast the slices. If you are using fresh or soft bread, do toast it until golden brown, before assembling the crostini. This goes to Raaga at The Singing Chef, who is hosting AFAM – Pear.

Breakfast To-Go, Granola Bars

Making granola at home, like Meeta says, is not only fun, but unbelievably easy. You can perfectly tailor it to suit your palette. And, best of all, its quite healthy. No funny sounding ingredients in here.

Taking this to the next level, I make granola into bars. They are handy, equally tasty and doesn’t require cold milk to go along, on a chilly morning. A perfect companion for your morning cuppa’ joe. When it comes to bars, Alton Brown’s recipe is my favorite. Its simple, satisfying, flavorsome and flexible. I have made these many times substituting original ingredients with what I had on hand; and it has turned great every single time.

Ingredients

Rolled oats – 2 cups
Raw sunflower seeds – ½ cup
Sliced or slivered almonds – 1 cup
Wheat germ or oat bran – ½ cup
Honey or agave nectar – ½ cup
Brown sugar or jaggery – ¼ cup
Butter – 1 ½ tbsp
Vanilla extract – 2 tsp
Salt – ½ tsp
Dried fruits (apricots, blue berries, goji berries, prunes, raisins, cranberries) – 1 cup

Method

Preheat oven to 350F. Grease a 9x9 glass baking dish. Mix oats, sun flower seeds, almonds, wheat germ on a baking sheet and bake for 8 minutes, mixing once in between. Meanwhile, in a pan, heat butter, brown sugar, vanilla and honey together. After the sugar has dissolved, let the mixture bubble up for a minute. Add oat mixture to jaggery and mix it all together. Transfer the mixture to the greased glass dish and press down evenly with the back of a spatula. Bake for 25 minutes. When cooled, cut into 16 squares.

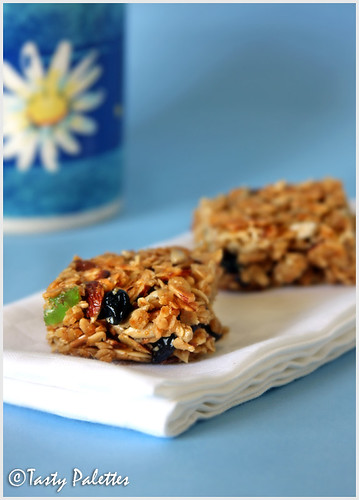
Granols Bars

This is my second entry to Mansi’s WBB – Balanced Breakfasts, an event started by Nandita of Saffron Trail.

Baked Sweet Potato Fries

We first tasted sweet potato fries in a café. This café serves healthy sandwich and rolls, many of them under 300 calories, with a side of 4 grain rice or baked french fries – potato or sweet potato. Adventurous foodies we are, we ordered sweet potato fries. And there started our addiction to sweet potato fries. After our lunch, I walked straight across to a super market and bought some, to enjoy fries at home.

They are mildly sweet and crunchy, most importantly, guilt free. I second Nupur that sweet potato should be given its long due attention. With an impressive nutritional profile, there are more reasons now to consume these dainty tubers than ever. Baked fries are our most preferred choice of eating sweet potatoes. Not a big fan of gravies or dry curries. I have been experimenting with the baking temperature to arrive at the following recipe. But, keep in mind, the baking time depends on the type of tuber and how thin/thick your fries are. Simple as 1,2,3, you are bound to be hooked with baked sweet potato fries. Sia, this is my Ode to Potato.

Cut Sweet Potatoes Ready To Be Baked

Ingredients

Sweet potato – 2, cut into 1/3 inch matchsticks
Olive oil – 1 tbsp
Salt
Pepper

Method

Preheat oven to 425F. Line a baking sheet with foil. Toss sweet potato pieces in oil. You can also transfer fries to the baking sheet and then spray oil, instead of tossing ‘em. It is important to arrange the fries in a single layer for even cooking.

Sweet Potato In A Single Layer

Bake for 20 minutes. Lower the oven temperature to 400F. Turn the fries over gently using a spatula without mashing them. Bake for additional 20 minutes, until the fries are toasty and slightly crispy. Take ‘em out of the oven and immediately season with salt and pepper. You can also season the fries with garlic powder or any other seasoning mix of your choice. Let the fries rest for 5 minutes before serving. Serves 2 as a side.

Baked Sweet Potato Fries

Baked sweet potato fries served with Nupur’s caponata sandwich

No Cinnamon Apple Turnovers

Cardamom-Clove Falvoured Apple Turnovers

Apple-Cinnamon seems to be the most popular combination around here. From pies to cookies, and fresheners to bath soaps, this is one combination that never goes out of style. I understand that apple-cinnamon evokes a festive mood, and reminds us of holiday season. But it gets on my nerves to find the same flavour over and over again. Don’t get me wrong, I do love cinnamon. Only that I prefer using it in savoury dishes than desserts.

To break out from this monotonous practice, I made apple turnovers with cardamom. I grew up savouring cardamom, as most of the Indian desserts call for it. I knew we would love these even before I started, and right I was. The temptation was too much, that two of 'em were gobbled before I could take a picture. If you think apple-cinnamon is the eternal combination, give cardamom a try. You will know what I am talking about.

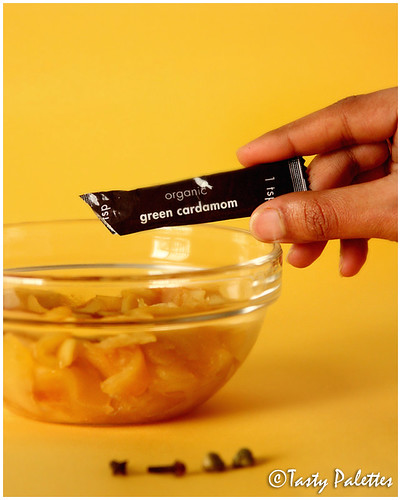
I have already made these turnovers thrice and the last time I made it using tsp spices. Few weeks back, Jaden at Steamy Kitchen, invited fellow bloggers to test this product. tsp spices packages and sells organic spices by the teaspoonful. So every time you open a packet, the rest of the box remains fresh and sealed. I volunteered to test cardamom with this recipe in mind.

The package was too pretty to open. I also found the cardamom seeds were neither whole nor finely ground, which is what I expected. The spice was fresh, aromatic and convenient to use. So if you like a well-stocked spice rack that remains fresh for a long time, tsp spices may be the solution you are looking for.

Making Apple Turnovers

Ingredients

Puff pastry – 1 sheet (I used Trader Joe’s artisan puff pastry)
Apples – 2, medium sized
Sugar – 2 tbsp + 2 tsp
Cardamom – ¼ tsp
Cloves – 2, heads only, crushed
Butter – 1 tsp
Lemon juice – 2 tsp
Egg – 1 (I used Egg Beaters)

Method

Preheat oven to 400F. Thaw puff pastry according to package instructions. Peel, core and thinly slice. If using whole egg, beat the egg with a tbsp of water for egg wash.

In a skillet, melt butter, add apples and sauté until soft, about 5 minutes. Sprinkle 2 tbsp of sugar, cardamom, cloves and lemon juice and stir for another minute. Remove from heat and let cool.

Cut puff pastry into 4 squares. Brush the edges with egg wash. Place 1/4th of the filling in each of the squares and fold over to make a triangle. Press the edges together with a fork to seal. Transfer to baking sheet and brush the top with the remaining egg wash. Sprinkle the rest of the sugar over the turnovers and bake for 10 minutes. Lower the oven temperature 350F and bake for additional 10-15 minutes until the turnovers are golden brown and puffed. When done, cool on a wire rack for 15 minutes and serve warm. The turnovers can be stored at room temperature for 2 days.

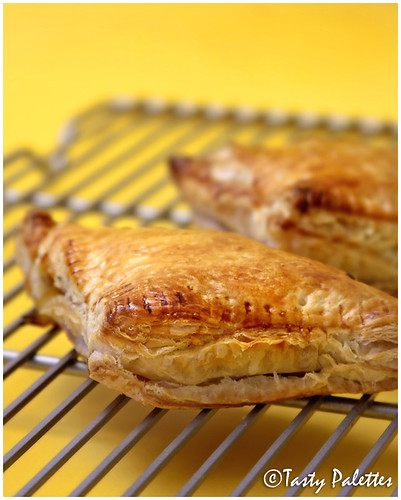
Cardamom-Clove Falvoured Apple Turnovers

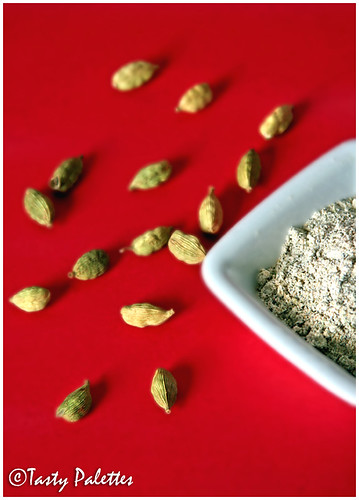
Ground spices can be prepared at home. But with cardamoms, the tough skins are not that easy to crush or grind. Sure you can use and save skins to be used later in tea or curry. But I find this inefficient. Instead, I follow what my mom does. As I said earlier, cardamom is used in many Indian sweets prepared during festivities. Hence, before the start of the festival season, my mom grinds a handful of cardamom with a tbsp of sugar in a spice grinder. The sugar provides enough friction to grind even the skins to a smooth powder. If stored in an air tight container, this remains fresh for 6 months. This way, the cardamom skins are used as efficiently as the seeds. Just a tsp to tea or curry would suffice.

Ground Cardamom

Roasted Chestnuts

I was away from blogging for a week now, but it sure does feel like a long time. Friends visit and an unexpected jaunt are to be blamed at. I did miss participating in few events, but I hope to make up for it with regular posts hereafter.

I have never laid hands on chestnuts so far. But I have longingly looked at Indira devouring them year after year. This year I was lucky to find them at Whole Foods. They were $8 a pound. Ah, what the heck. All in the name of blogging.

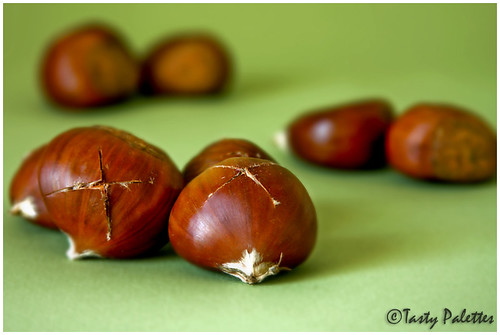
Chestnuts Ready To Be Roasted

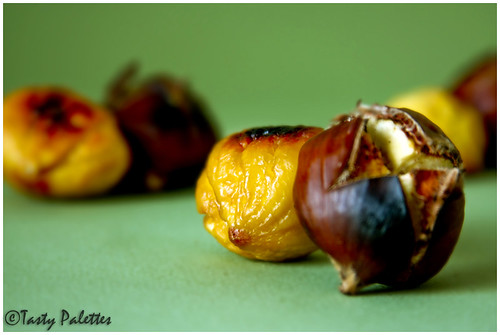
I roasted them like I did jackfruit seeds. But you will have to mark an ‘x’ at the top of the nut, helping steam to escape while roasting. Slowly roast ‘em on a cast iron pan, until the outer layer is dark brown in colour. The shell gently opens like a flower, as they heat through. Let it cool down a bit and enjoy ‘em while they are still warm. I was pleasantly surprised that they tasted more like jackfruit seeds, but moist and subtly sweet. The flesh was smooth and soft.

Roasted Chestnuts

I hope to find more of ‘em throughout this winter and I would be glad to find out any recipes using chestnuts. I should thank Indira for alluring me toward these humble, yet delicious nuts, which, otherwise, would not have drawn my attention with their unassuming looks. I hope you would pay a second look next time you find ‘em at your grocery store or when a roadside vendor is roasting ‘em on an open fire.

Saving Thai Croquettes

One of my favourite bloggers, Susan of Fat Free Vegan Kitchen, invited fellow bloggers to help her save a recipe. November being Vegan month at Tasty Palettes, I couldn’t ask for a better reason to participate. The croquettes being Thai flavoured were also part of the reason for my interest.

When I say Thai, these flavours come to my mind – vegetables, spices and coconut. I improvised the recipe to include all these aspects. Sweet corn tastes great in most of the savoury cake recipes I have come across. So that was to be one of my special ingredients.

After mixing the ingredients, I realised the need for starch. And I quickly microwaved a sweet potato. And the batter was fairly sweet, hence I omitted any sweetener altogether. I was almost done and still had not added coconut milk yet, and the mixture was already moist. Debating over whether to add fresh or desiccated coconut flakes, I decided to go with the drier kind, as there was enough moisture in the batter.

Even though Susan bakes her croquettes, I pan fried them with a quick spray of olive oil. Well, I was not only running late for dinner but hungry too. The croquettes were quite forgiving. They were easy to flip without any additional oil. Now you don’t have to worry about those additional calories.

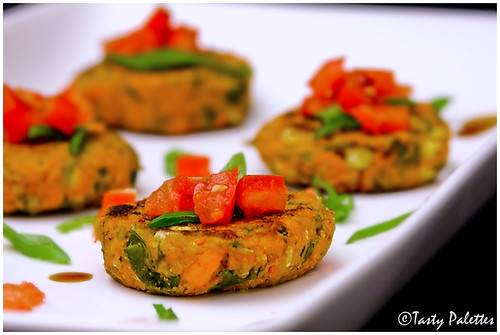
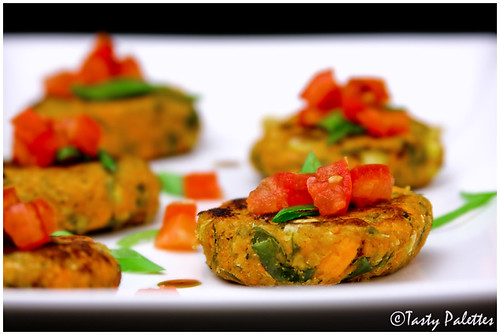
And it was perfect. The corn (I used fresh) was plump and sweet, and the lightly toasty coconut flakes added a mild, but pleasant aroma in the background. Though tomatoes were added as a garnish for their colour, I should say, they are a must, for the burst of freshness they provided complimented the croquettes. Next time, I wouldn’t even mind pulsing the corn, I would add them whole.

Thai Croquettes

Ingredients

Green beans – 1½ cup, chopped
Corn – 1½ cup, fresh or frozen
Sweet potato – 1, medium sized
Red curry paste – 1½ tbsp
Basil leaves – a handful, chopped
Lemon zest – 1 tbsp
Soy sauce – 3 tbsp
Ground flax seed – 1 tbsp
Desiccated coconut – 2 tbsp
Corn flour – 4 tbsp
Salt
Pepper

Method

Blanch green beans or cook them in the microwave for about 6 minutes, until they are half done, but still crunchy. Let the beans cool down a bit and pulse ‘em in a food processor along with corn, 2 or 3 times. Take care the vegetables don’t get mushy. Transfer to a big bowl.

Wash the sweet potato. Pierce them several times with a fork. Microwave for 4 minutes. Turn the sweet potato over and cook for 4 more minutes. Slit the skin and scoop the flesh out in to the bowl with green beans and corn. Add rest of the ingredients into the bowl. Mix well and form patties.

Spray oil over a flat pan and put it on a medium heat. Neatly arrange the patties and cook for about 3 minutes. Flip and cook the other side for another 2 minutes. Garnish with thinly cut scallions and chopped tomatoes. Serve with a dipping sauce.

Thai Croquettes

Susan, I hope I saved your recipe rightly. This is my entry for Can This Recipe Be Saved?

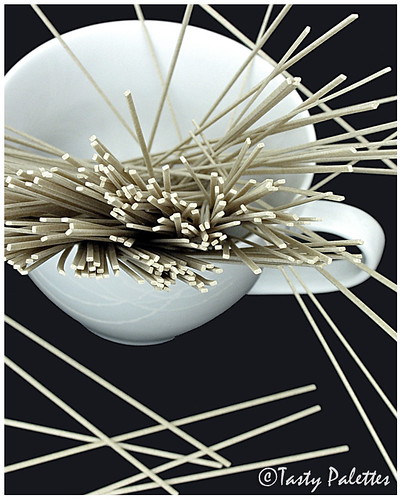
Last, but definitely not least, my Soba noodles entry, for this month’s DMBLGiT, hosted by Jennifer of Bake or Break has been awarded for its originality.

Soba Noodles

Gallery here and winners announced here. My sincere Thanks to all the judges and Congrats to other winners.

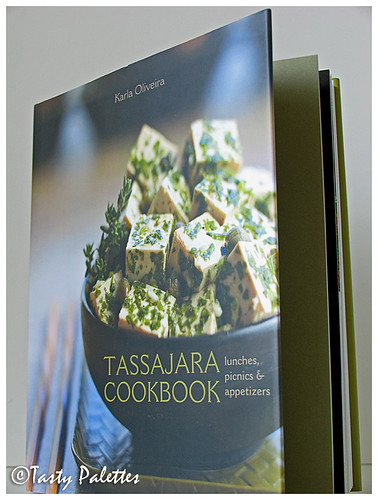
Tassajara Cookbook

Tassajara (pronounced Tass-a-haara) Zen Mountain Center is a Japanese Buddhist Zen monastery located near Carmel-by-the-Sea, California. The center rigorously practices Zen principles and is open for public for a few months in a year. Tassajara is famous for its vegetarian cuisine and has so far released three cookbooks as found here.

I have never been to this Zen center, but one day I wish to. The photos in the book reached out to my soul bringing serenity and tranquility, true to the institution’s name. If you have visited this center, I would like to hear more from you.

Tassajara Cookbook

Now, I have never been to this Zen center, then how did I come to know of it? This book was a thoughtful gift from our friend M, who happened to be at the Zen center, while the author was signing copies. M, Thank you so much for bestowing me with this wonderful gift. I will make the best use of it.

The book, named “Tassajara Cookbook, lunches, picnics and appetizers", includes an array of spreads, pates, sandwiches, chutneys, salads, dressings, pickles, relishes, cookies and sweets. It focuses on pack-n-go meals, than entrées. And best of all, half the recipes are vegan. As if these incentives aren’t enough, the book, apart from eye-popping pictures, has Zen teachings here and there.

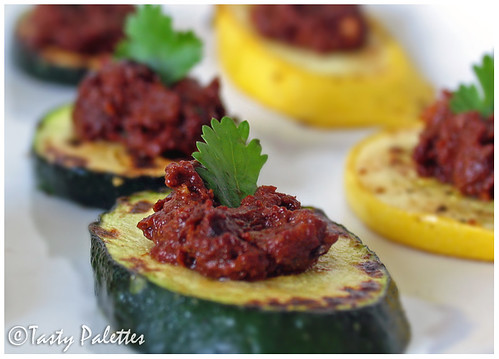
The recipe I chose to prepare from this book is “Sun-dried Tomato Pesto with Walnuts”, because of its simplicity. The recipe as such doesn’t call for any cheese and I find it quite convenient.

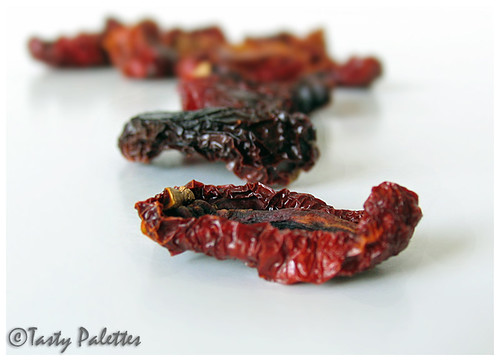
Sun-Dried Tomatoes
Sun-Dried Tomatoes

Ingredients

Sun-dried tomatoes – ½ cup
Walnuts – ¼ cup
Garlic – 1 clove
Lemon juice – 2 to 4 tbsp
Extra virgin olive oil – 4 tbsp
Mixed herbs – 2 tbsp (basil, oregano, dill)
Salt

Method

Simmer the sun-dried tomatoes until soft. Alternately, you can steam the tomatoes with ¼ cup of water for about 15 minutes. Pulse all the ingredients, in a food processor, until smooth.

Refrigerate this in an airtight container with the surface covered by a thin layer of oil. This stays good for at least 6 weeks. With this pesto on hand, the possibilities are endless.

1. Serve with grilled vegetables, like squash and potatoes
2. Spread on a crostini or toast with goat cheese.
3. Combine pesto with chopped basil and parmesan and toss with hot pasta.
4. Serve with pizza.
5. Combine pesto with mayonnaise or cream cheese and spread on bread to make favourite sandwich.

I have showcased the book well enough for Nag’s Show and Tell. This is my entry for Waiter! There’s something in my… Savoury Preserve, hosted by Johanna of The Passionate Cook.

Orange Butter

Flavouring butter is a fun thing to do, if you haven’t tried yet. Depending upon my mood, I sometimes flavour them savoury by mincing together a green chilli, mint and coriander and mixing it with salted butter or butter spread. However its the sweet variety that I have a lot of fun with. Any fruit preserve + unsalted butter = fruit flavoured butter.

My favourite flavour is orange and mango comes to a close second. Using marmalade instead of fruit jelly/jam gives an interesting dimension, every time you bite into the fruit bits. Also, the orange marmalade I use, which I buy from Trader Joe’s, is slightly bitter, cutting into the richness of the butter.

Ingredients

Orange marmalade – 2 tbsp
Unsalted butter – 4 tbsp

Method

Allow the butter to come to room temperature. Take them both in a medium sized bowl and beat with an electric beater for 2 minutes, until they are well combined and fluffy. Transfer to a small airtight container and enjoy with your favourite bread.

Orange Butter

I enjoyed mine with Cranberry-Blueberry bread, which was the bread of the month, from a nearby bakery. A daring baker like Meeta, may be smart enough to cajole the baker to give away the recipe and try at home. But, me, I am just a happy customer who bought this bread thrice last month :).

On a separate note, its recognition time. First it was Manisha, now it is Bharathy, Prema, Srivalli and Viji. Thanks to these bloggers, I was honoured with these awards.

Thoughtful Blogger Award

Rockin Girl Blogger

Schmooze Award

In addition to recognizing fellow bloggers work, these awards also shows we care. Thanking these bloggers for honouring me, I am passing them to others. I know most of you have been recognized, so here are a few that I am passing on to. If you have already received this award, then you deserve it more than once.

Thoughtful blogger – Indira, Arundati, Susan, Menu Today, Nupur, Nandita, Trupti.

Power of Schmooze – Priya, Sandeepa, Shyamala.

Rockin’ Girl Blogger – ISG, Shn, Smita.

Rockin Guy Blogger

Since Bee has rightfully modified the Rockin’ Girl Blogger to suit guys too, the Rockin' Guy Blogger award goes to Jai and Anthony.

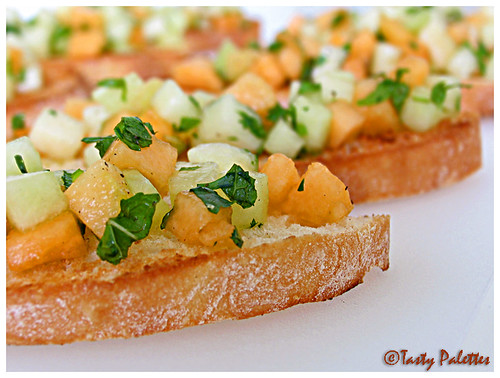
Melon Bruschetta

What better way to beat the heat than taking refuge in juicy, refreshing melons. Usually, bruschetta is served spicy, but for a hot summer afternoon, crusty bread with juicy fruit, is a perfect snack with tea. This is more than a recipe, its a method. Play with the combination of fruits until you find what you like the most. Pineapple, persimmons, grapes are some other candidates. Mint and rosemary go well with most of the fruits.

Ingredients

Crusty bread – sliced to ½ inch slices
Cantaloupe – 1 cup, diced
Honey dew – 1 cup, diced
Mint – 2 tbsp, finely chopped
Salt
Pepper
Olive oil

Method

Drizzle the bread slices with oil and toast them in a 350F oven for 8 minutes. Season them with salt and pepper when they are hot.

Combine cantaloupe, honey dew and mint together. Top over the toasts and enjoy.

Melon Bruschetta

Roasted Jackfruit Seeds

After having cooked with ripe jackfruit and green jackfruit, the next obvious thing to do was to roast the jackfruit seeds. Typically, the seeds are roasted in a charcoal grill called kumutti (I tried searching for a picture of this, but surprised to find none). The charcoal imparts that signature smoky flavour to the seeds. Juggling those hot seeds right off the grill and eating them with cousins is fun.

IMG0208022

IMG0203017

Since I don’t have the privilege of having my own charcoal grill, I sought after the next best method, cast iron pan. The continuous and consistent heat from these pans aids in the uniform roasting of the seeds. When they are roasted right, the seeds pop-out their skin, bringing out their creamy inside.

IMG0039

Jackfruit seeds ready to pop-out.

Check out JFI – Jackfruit round up at Jugalbandi. Thanks Jai & Bee for this wonderful job!

Plantain Chips

I don’t get plantains so often in my city. I will have to drive for an hour to an Asian store to get ‘em. And naturally that doesn’t happen very often. But I had to visit the store this week (You should have guessed it by now. Yes, I was on a jackfruit hunt :-D) and I grabbed a few firm, big plantains.

Even though we are not big fans of deep fried foods, this one is an exception. Even the sight of potato chips is tiring these days. The recipe is fairly simple and doesn’t require double frying. Slicing them paper thin is the only requisite to attain store-bought crunch.

IMG0275

Ingredients

Plantains – 2
Chilli powder – ½ tsp
Asafoetida – ¼ tsp
Turmeric powder – ¼ tsp
Salt – 1 tsp

Method

Slice plantains paper thin using a mandoline. Separate each slice before frying, else they will clump up and not crisp in the oil. Mix dry powders together and keep it handy in a bowl.

Take about 2 cups of oil in a skillet on a medium-high flame. Fry plantains in batches, taking care not to overcrowd the oil. As soon as one batch of chips come out of oil, season them with the above prepared spice mixture, while they are still hot.

Allow them to cool and transfer to an airtight container.

Money Bags Florentine

JFI - I have closely watched this event every month. The talent of the cooks, their ingenuity in using the ingredient in an exotic ooh-aah dish or in a simple and wholesome one has astonished me. So, the first thing I wanted to do after I started my own food blog was to participate in JFI.

I chose spinach for this month’s JFI – Going Green, and Money Bags Florentine is my entry. But why this name? Go on, read ahead.

Catherine de' Medici, the Queen of France, had her cooks prepare spinach in a particular way that she liked. Since these cooks were from Florence, Italy, her home town, any dish with spinach as the key ingredient was referred to as Florentine.

And, since the end product looks like a money bag that people used to carry in old days, I dubbed my recipe as “Money Bags Florentine” - served with lemon aioli.

Money Bags

IMG0060

Ingredients

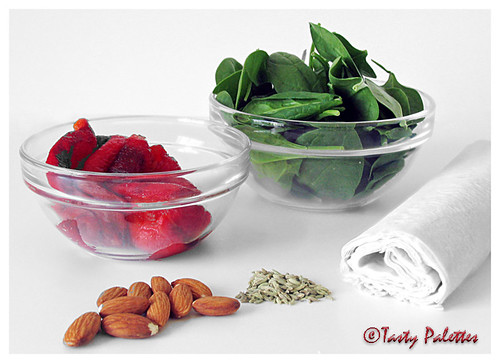
Fresh spinach leaves – 1 cup
Red pepper, roasted and seeded – 1
Fennel seeds – 1 tsp
Almonds, toasted and chopped – few
Phyllo pastry sheets
Bread crumbs (optional)
Oil
Salt
Pepper

Method

Pulse all of the above ingredients in a food processor. The spinach and the pepper should still be chunky. Add breadcrumbs if the mixture is watery.

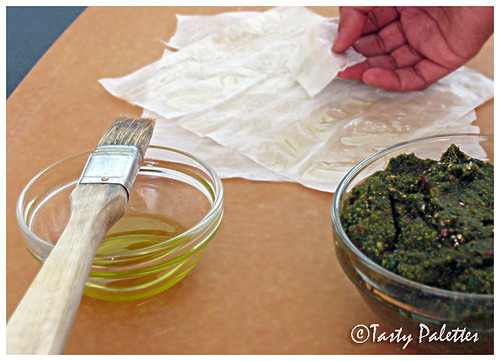
Working with 1 phyllo sheet at a time, cut two 7 inch squares and two 2 inch squares. Brush one of the large piece with oil and place the other large piece at 900 angle to form a star shape. Place one of the smaller square in the center of the star shape and brush with oil. Follow with the second smaller piece. The smaller squares give the pocket a base to sit.

IMG0063

Top with a tsp of spinach + red pepper mixture. Bring the edge of the phyllo sheets together to form a purse. Twist and seal.

Place on a greased baking sheet and bake in a 3750 for 25 – 30 mins, until crisp and golden brown.

I have chosen not to add to cheese as I am serving them with creamy aioli. But if you want to serve them as such, by all means, add any soft cheese like ricotta, gorgonzola, cream cheese or mascarpone.

Garlic Aioli

Mayonnaise – ¼ cup
Garlic – 1 clove
Zest and juice of a lemon
Salt
Pepper

Blend all of the above ingredients smoothly and transfer to a serving bowl.

IMG0099

Money bags florentine with garlic aioli.