











Cornmeal Crusted Tomato Tarts

Cornmeal Crusted Tomato Tarts
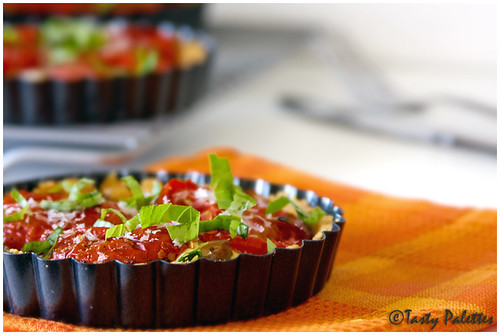
So I bought these new tartlet pans. Who can resist tarts after seeing Tartelette’s eye-popping creations. I couldn’t wait to create a fabulous tart. But all the recipes for the tart dough called for at least one stick of butter. As if there isn’t enough indulgence already (all in the name of holiday baking), I searched for a low-fat, more-sensible recipe. I landed on Ellie Krieger’s page. I like her recipes from her show Healthy Appetite. Instead of substituting full fat cream cheese with a low-fat one, she talks about portion control and other sensible ways of eating right. I have tried many of her recipes and am happy with every one of ‘em.

I used her recipe for making the crust, but made the filling with what I had on hand. The original recipe looks equally good, which I plan to try out some day. As said in the reviews, the crust is a bit dry and crumbly. With more butter, it may be one of those melt-in-your-mouth tarts. But, hey, am happy with the recipe as-is. Also, I have used marinated mushrooms from the olive bar, which already had garlic and red peppers. You may want to add these separately if you are using fresh mushrooms. I have used sun-dried tomato pesto, you can use any pesto you have on hand.

This is my first time baking tarts, and the lesson I learnt is, the filling shrinks a little bit after being baked. So its better to slightly overfill them. This recipe makes four 4-inch tartlets that serves two.
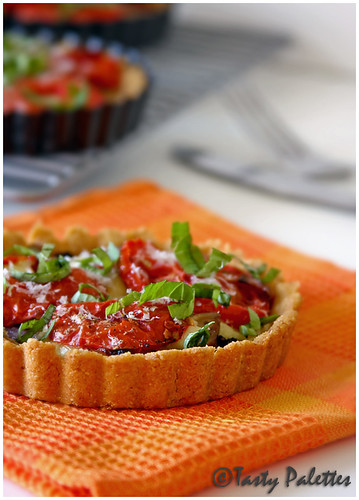
Cornmeal Crusted Tomato Tarts

Ingredients

Crust

Cornmeal – 2/3 cup
Whole wheat pastry flour – 1/3 cup
Butter – 2 tbsp
Vegetable oil – 2 tbsp
Salt – ¼ tsp
Water – 2 to 3 tbsp

Filling

Red onion – 1, small, sliced
Tomato – 2, firm and medium sized, thinly sliced
Marinated mushrooms with roasted red pepper and garlic – 1 cup
Mozzarella and/or Boursin cheese – ½ cup
Pesto – 4 tbsp
Basil – few leaves, shredded
Parmesan – 1 tbsp

Method

Pulse the first five ingredients in the food processor until the dough form pea sized lumps. Gradually add one tbsp of water at a time and pulse until everything comes together. The dough for the crust can also be done by hand. Transfer the dough onto a working surface and knead for 10 seconds. Divide the dough into four equal parts and press each portion onto a 4 inch tart pan. Transfer the tartlet pans onto a baking sheet, prick a few holes on the crust with a fork and bake for 10 minutes at 350F oven. Rotate the baking sheet and bake for additional 5 minutes. Remove and set aside.

Meanwhile, prepare the filling by sautéing red onions until brown. Sear any other thinly sliced vegetables, if using, on both sides, seasoned with salt and pepper. Slice the marinated mushrooms along with roasted red pepper and garlic. Shred mozzarella cheese.

Assemble the tart by brushing a tbsp of pesto at the bottom. Spread caramelized onions, mushrooms, garlic, red peppers, and other vegetables if any, one above the other. Sprinkle shredded mozzarella and/or Boursin. Place tomato slices on the top. Season with salt and pepper and bake at 350F for 20 minutes.

Take the tarts out and let it cool for 5 minutes. The edges pull away from the pan as they cool. Remove ‘em from the mold, grate parmesan over the tarts and garnish with basil. Serve warm with a side salad or flavoured yogurt.
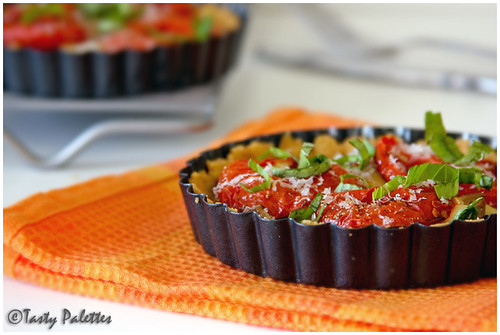
Cornmeal Crusted Tomato Tarts

These mini tarts are on their way to The Mini Pie Revolution hosted by Karyn and Ann at The Mini Pie Revolution Headquarters. Ann, Thank you for graciously accepting my tartlets.


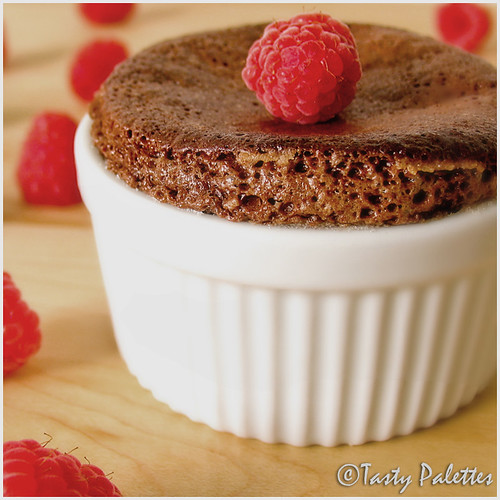
Individual Chocolate Cakes

Individual sized desserts are attractive, in my opinion. On the table or in a picture, they have an appeal that I find irresistible. They have their advantages too. You don’t have to share it with anyone and enjoy all by yourself. You can even go for a second helping saying that it was too small. At least that’s what I do.

There is a very good reason for this post today. An elation that is to be shared with something sweet. My entry was announced as one of the winners in this month’s DMBLGiT hosted by Zorra, for originality.

Egg In A Whisk IV

Of course, you all chose one of the photos in that series as a winner already. Many congratulations to all the other winners and many thanks to the judges.

Ingredients

Bittersweet chocolate – 4 oz (about ¾ cup)
Butter – 4 tbsp
Eggs – 4, separated
Sugar – 2/3 cup
Vanilla extract – 1 tsp
All purpose flour – 1 tbsp
Salt – ¼ tsp

Method

Melt chocolate and butter together in microwave or in a double boiler. Whip eggs yolks, sugar, vanilla and salt vigorously together for about 2 minutes, until well combined. Combine melted chocolate with the egg mixture. Whip egg whites until soft peaks form. Sprinkle flour over the chocolate-egg mixture and add the egg whites. Gently fold everything together until well combined. Butter and flour four ramekins and spoon the mixture into the ramekins. Bake at 450F oven for about 8 minutes, until the top is set. Serve warm or at room temperature with berries and whipped cream. Serves 4.

Individual Chocolate Cake

Lolo at VeganYumYum has a mouth-watering array of small sized desserts. I am a big fan of her creations. This is my entry for JFI-Chocolate, hosted by Deepz of Letz Cook. JFI is Indira's brainchild.

And I surrendered…

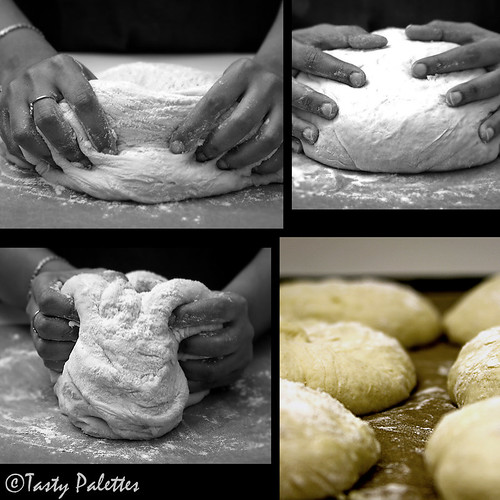
Kneading the dough

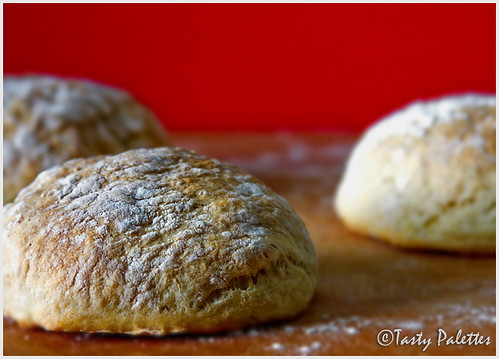
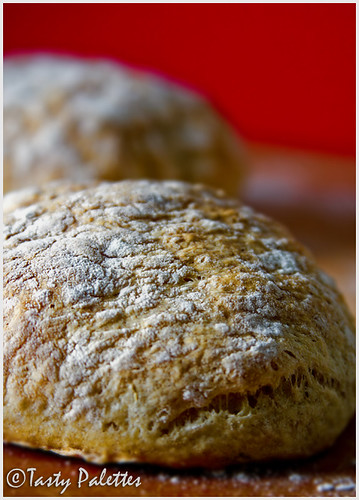
Its raining potato bread everywhere in the blogging world and the temptation was too much. I duly surrendered and set out to make bread from scratch, for the very first time. I have always wanted to try potato buttermilk rolls recipe from this book. So I combined this recipe with Tanna’s recipe and developed my own. The rolls were soft and chewy with a light tang from the yogurt. I am so glad I made ‘em. Served with soup or as a sandwich, potato buttermilk rolls were just right.

Potato Buttermilk Rolls

Ingredients

Russet potato – 2, medium
Yogurt – ½ cup
Yeast – 2 packets
Sugar – 1 tsp
Salt – 1½ tsp
Butter – 1 tbsp
Whole wheat flour – 1 cup
All purpose flour or maida – about 4 cups, plus extra for dusting

Method

Peel and dice potatoes and cook in 4 cups of water, until soft. Drain and reserve the cooking water. Mash the potatoes well and let it cool. When the potatoes are warm and not hot, combine with yogurt, 1 ½ cups of potato water, yeast. Leave for 5 minutes.

Making Potato Buttermilk Rolls

Add sugar, salt, butter, whole wheat flour and 2 cups of all purpose flour to the potato mixture. Mix well until combined. The dough will be very sticky. Turn it on to the counter and start kneading. Keep adding flour until the dough comes together, about 2 cups. Transfer the dough to a well oiled clean bowl. Cover and let rise for about an hour.

When doubled in size, punch the dough and knead again. Divide the dough into two and reserve one half. Shape the other half into 6 rolls onto a baking sheet, lined with parchment paper. Cover and let rise for about 25 minutes. Preheat the oven at 450F. Lightly flour the rolls and bake for 10 minutes. Reduce the oven temperature to 350F and bake for additional 20 minutes, until light brown. Cool on a wire rack.

Potato Buttermilk Rolls

Bhatura

After the dough was done, I feared that it may be too much for just the two of us. I reserved half of it and chose to worry about it later. When the later came and I still had no idea I was a little desperate. Then an idea struck. Anjali of Anna Parabrahma had left a comment on this post, saying that she once made bhature with bread dough. Considering that the ingredients for the rolls were almost the same as aloo bhatura (barring yeast), I decided to give it a try. The bhature were a huge hit. The leftovers were even better. With due credits to Anjali, here is the method for making bhature.

Method

Take the other half, and add equal amount of all-purpose flour. Knead well. Roll out thin small rounds and deep fry. Serve with your favourite curry.

Bhatura

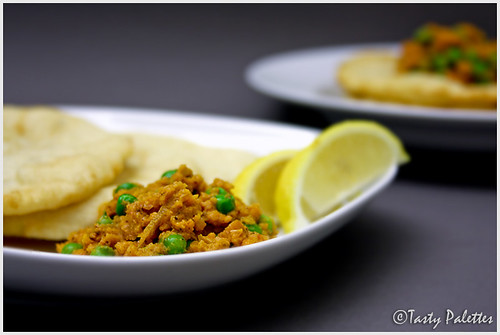
I served mine with Ashwini’s Gobi ka kheema. I have been looking for this recipe for quite some time and this one is spot on. Ashwini, your recipe pleased our palettes just like your pictures delights our eyes.

Vegan Ventures Roundup

Phew! Hosting an event is not a simple task. This being the first time, I learnt quite a bit. I was also introduced to many blogs and bloggers. On the whole, it was a fantastic ride from the start, thanks to you all. I was hesitant about announcing Vegan Ventures, not sure how it will be received. But gracious bloggers, as you are, played along well to make this event a success. Bloggers from varying food groups participated with equal enthusiasm. And some of you (Asha, Siri, Sea, Nags, Meera, The Cooker, Sarah, Sia, Mansi, Rina, Latha & Lakshmi) even sent two entries each. A big ‘Thank You’ to all the participants for sending in a total of 56 entries.


Vegan Ventures Logo


Although we (myself and ‘G’) have been vegetarians all our life, the concept of Veganism is quite new to both of us. Up until recent times, we always had thought being Vegan was just about not consuming any dairy, meat or any animal based products. Boy were we wrong.

Veganism is a lifestyle, a choice, a pledge to live free of cruelty to other living organisms that inhabit this planet and to live in harmony with nature. The concept of Veganism does not stop at the table, but extends to every other aspect of our modern lifestyle ranging from cosmetics, medicines etc.

Being Vegan is not an easy task and cannot be taken lightly. It’s a lifestyle, so changes will need to be done gradually in small steps. Cruelty-free living can start at home and in small simple steps
  • Reducing consumption of dairy, meat & animal based products
  • Using products that are not tested on animals and those which are not harmful to the environment.

In today’s age, it may not be entirely possible to live 100% free of cruelty. Knowingly or unknowingly we all consume a variety of animal based or derived products. Accepting this fact and increasing our awareness lets us do the best we can. I hope that Vegan Ventures in its own small way, has contributed to spreading this awareness. It was also an opportunity for us to expand our knowledge and awareness of this unique lifestyle. For further reads follow these links – Living cruelty free, Factory farming, Vegan Society.

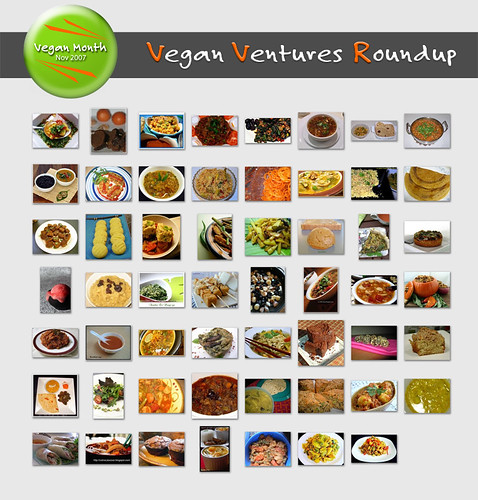
With that thought, I leave you with a gorgeous array of vegan recipes, each unique and different, as their creators. In addition to the 56 entries I received, you can find 8 of my entries too. The picture below will take you to the gallery.

Vegan Ventures Roundup


Entries at a glance

  1. Tasty Palettes – Mixed vegetables with coconut-black chickpea rice
  2. Aroma – Zucchini Bhaji
  3. Aroma – Brussels sprouts stir-fry
  4. Tasty Palettes – Marinated cauliflower in coconut-chickpea flour gravy
  5. Siri’s Corner – Thai rice and beans croquettes
  6. Nourish Me – Shallot and prune confit
  7. Culinary Bazaar – Bean noodles
  8. Siri’s Corner – Mixed vegetables dipped in tomato sauce
  9. Tasty Palettes – Thai croquettes
  10. Samaikalam Vaanga – Tomato soup
  11. Book Of Yum – Tofu quiche
  12. Tasty Palettes – Lemon poppy seeds cookies
  13. The Art And Science Of Food – An article about vegan gelatin and Sambai on peuga-ga
  14. My diverse Kitchen – Tomato chutney
  15. Book Of Yum – Twice baked spinach garlic stuffed potatoes
  16. For The Cook in Me – Kara kozhumbu and beans parippu usili
  17. Smita Serves You Right – Quiche and tell
  18. One Hot Stove - Chili and cornbread
  19. Habeas Brulee - Quince cranberry sorbet
  20. Cooking 4 All Seasons – Jahangiri
  21. Enjoy Indian Food – Methi na muthiya
  22. Never Trust A Skinny Cook – Tempe skewer
  23. Ranchikud , A Goan’s Kitchen - Batatyache kalvan
  24. Tasty Palettes – Oatmeal with dates and pistachios
  25. The Cooker – Chocolate cake
  26. Jugalbandi – Thai yellow curry with black rice and baked lotus root
  27. The Singing Chef – Mixed vegetable curry
  28. Meera’s Weblog – Sprouted green gram sabzi
  29. Red Chillies – Garden vegetables-navy bean soup
  30. Meera’s Weblog – White beans sabzi
  31. What Smells So Good – Slow it down Mediterranean soup
  32. What Smells So Good – Low fat coffee cake
  33. Monsoon Spice – Tome yum soup
  34. Monsoon Spice – Jasmine rice soup
  35. The ‘Yum’ Blog – Chocolate Truffles
  36. Tasty Palettes – Tofu Sandwich
  37. Zlamushka’s Spicy Kitchen – Chili brownie muffins
  38. Spice ‘n Flavours – Baigan ka bhurr-taah
  39. Canela & Comino - Moroccan garbanzo soup
  40. Curry In Kadai – Ridge gourd in spicy tamarind sauce
  41. Tasty Palettes – Taco party
  42. Spicy Chilly – Stir-fried green papaya
  43. Fun And Food – Rice paper rolls
  44. Fun And Food – Hot and sour soup
  45. Food, In The Main… - Amiri khaman
  46. Evolving Tastes – Oven cooked baby potatoes in tomato gravy
  47. Ahaar - Slow cooker black bean and vegetable soup
  48. Vegan Visitor - Roasted chestnut and persimmon stuffing
  49. The Cooker – Nankatai
  50. Sunita’s World – Split red lentil soup
  51. Valli’s Kitchen – Quinoa with asparagus and chickpeas
  52. Indian Food Rocks – Udon noodle curry
  53. Fusion – Soya lollipops
  54. The ‘Yum’ Blog – Thalara karamedu
  55. Greedy Gourmet - French bean, tomato and pistachio salad
  56. Rina’s recipe – A simple toor dal and a vegan meal
  57. The Well Seasoned Cook – Indian Fried Okra
  58. Global Vegan – Rice kheer
  59. Finger Licking Good – Spicy Dosas
  60. Hunger Pangs – Get vegasconed
  61. Veggie Platter – Peanut butter
  62. Tasty Palettes – Vegetable potstickers
  63. Cooking From A To Z – Almond orange chocolate cake
  64. Mediterranean Cooking In Alaska - Wild greens with celery-mint tomato sauce

The entries are in the order in which I received them. If you don’t find your entry or is there a correction to be made, please let me know, I will rectify it. For quick reference, the event logo on the left pane will bring you to this roundup on your future visits.

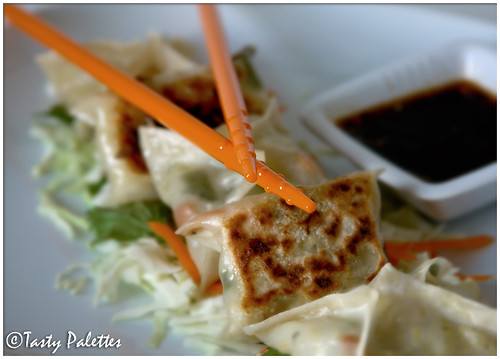
Vegetable Potstickers

Vegetable Potstickers

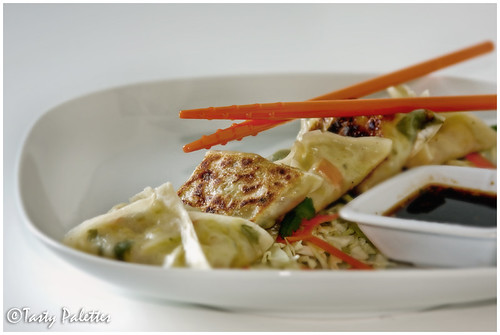
When given an option between steamed or pan-fried dumplings a.k.a potstickers, I always go for the pan-fried ones. They stick to the pan while cooking, and hence the name. Contrary to the term fried, they are not that fatty. For an extra spritz of oil, the dumplings are crunchy on one side, adding a new dimension. Having said that I still like steamed dumplings. This is just for a change.

Since there is not a whole lot of flavour going on with the wrapper, I kept the filling fresh and crunchy. The veggies are barely sautéed, and the cabbage is added at the last minute. The residual heat is just enough to cook it. The filling is mildly seasoned and hence the flavour comes from the veggies only.

They look and taste delicious and you can gulp down a dozen of ‘em in one sitting. But this is not one of those recipes that you do when it is almost meal time. It requires some planning and assembling, because shaping the dumplings takes some time. You can definitely make ahead and freeze ‘em and cook just before serving.

Ingredients

Cabbage – 2 cups, shredded
Carrot – 1 cup, shredded
Bell pepper – 1 big, shredded
Green chilli – 1, minced
Ginger – 1 inch, grated
Lemon grass – 1 tbsp, grated
Soy sauce – 2 tbsp
Salt
Pepper
Sesame oil – 1 tbsp
Wonton wrappers – 1 packet

Vegetable Potstickers

Method

Reserve some shredded cabbage, carrots and bell pepper for plating. Put a wok on high heat. Add oil and quickly stir fry carrot, bell pepper with green chilli, ginger and lemon grass, for about a minute. Season with soy sauce, salt and pepper. Switch off the flame and mix the shredded cabbage. Mix thoroughly and set aside.

Take 6 wonton wrappers at a time and form an assembly line. Brush the edges with water, place a tbsp of filling in the center, and fold as a square or a triangle. Pinch the edges and transfer the finished wontons onto a baking sheet and keep them covered with a kitchen towel. Proceed to finish the rest.

Take a flat pan with lid and put it under medium heat. Spray the pan with a tsp of oil and place 5 or 6 filled wontons without crowding the pan. Don’t disturb the potstickers for a whole minute. After they have crisped on one side, gently pour ¼ cup of water in the pan and close the lid. The steam from the evaporating water will cook the potstickers. When all the water has dried and the wonton wrappers are transparent, they are done. Gently transfer onto a platter prepared with the reserved vegetables and serve immediately with your favourite dipping sauce.

If you would like to send in your entries for Vegan Ventures, hurry up, there is only a day left for submission.

Vegan Ventures Logo

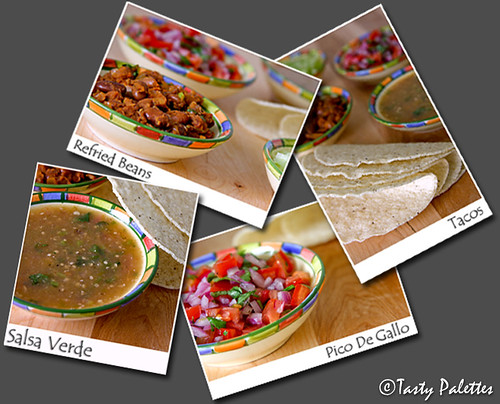
Taco Party

Who said a party always means lot of people and loads of dishes? Few weeks back we had a taco party, on a weekday, just the two of us. I spiced up a so-so meal into a celebration. Celebration of… well, nothing; barely making through the work week. Though it may sound crazy, it did lighten our spirits. No dishing out dinner course after course, no trouble getting dressed and looking civilized. A casual party in our PJs did make us feel ‘special’. It worked out so well that I am planning to do it more often.

It is totally stress free and you can prepare whatever you are in the mood for. This can be served for 2 or 20. You can make it vegan or vegetarian. It can be healthy or indulgent. Towards the end, I even gathered everything in one bowl, crushed few taco shells and made myself a big bowl of salad; crunchy, tasty and bold. Well, you get the idea.

Taco Party

1. Refried beans

Ingredients

Pinto beans – 1 can, drained and rinsed
Onion – 1/2 , chopped
Bell pepper – 1/2 , chopped
Tomato paste – 1 tbsp
Garlic – 2 cloves, minced
Cumin powder – 1 tsp
Chipotle chili (in adobo) – 1, minced
Adobo sauce – ½ tsp
Oregano – 1 tsp
Salt
Oil

Method

Chipotle in adobo sauce is available in small cans. Chipotle is smoked jalapeno and is sold in a preserve called adobo sauce, which is ketchup, vinegar and other seasoning depending on the brand. I have used the adobo sauce for heat, omit if you cannot handle much heat.

Heat oil and sauté onion and bell pepper until soft. Add all other ingredients with ½ cup of water and bring it to a boil. Simmer until everything comes together.

2. Pico De Gallo

Ingredients

Ripe tomatoes – 3, seeded and chopped
Red onions – ¼, chopped
Jalapeno – 1, minced, seeded if desired
Cilantro – a handful, chopped
Juice of a lemon
Salt

Method

Mix all of the above and let it sit for the flavours to develop.

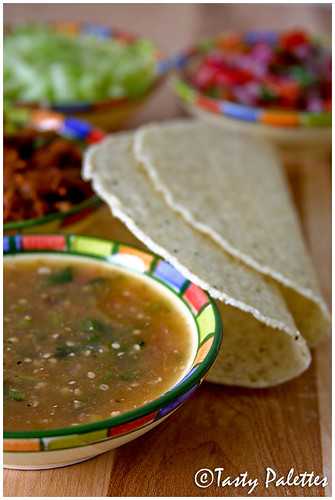
3. Nupur’s Salsa Verde

Follow the recipe blindfolded. It works every single time.

4. Shredded Lettuce and Taco Shells

Shred lettuce as needed. Slightly warm the taco shells by microwaving 'em for 30 seconds. Use tortillas for soft tacos or fajita party.

Taco Party

For more ideas visit Nupur’s taco party.

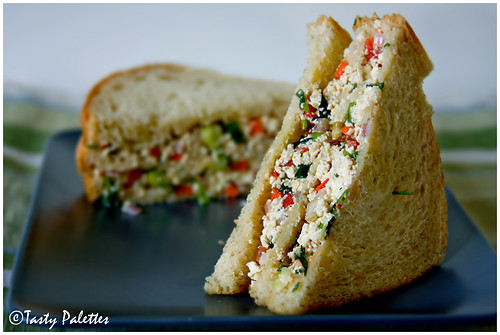
Tofu Sandwich

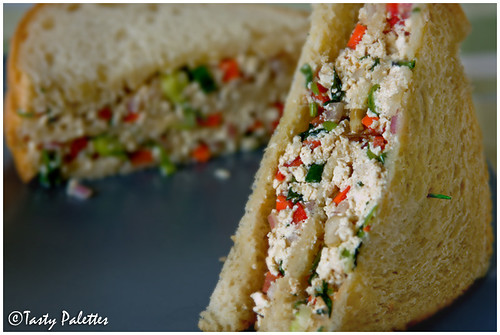
I am not fussy about eating raw tofu. It is bland, but I compensate for it by marinating in a flavourful marinade. This recipe, which is inspired from Tassajara, impressed me, partly because it calls for so many vegetables and partly because it is so darn simple.

Tofu Sandwich

Even if you are a tofu hater, you will love this, because you cannot taste the tofu; well, almost. The tofu, when let to sit for 30 or more minutes, keeps absorbing all the flavours. The leftovers are even better. You can have it as such as a cold salad or make a sandwich. Since it gets better with time, this is an ideal lunch box mate. If your bread is not crusty, toast it lightly to avoid a soggy sandwich.

Ingredients

Firm tofu – 1 lb
Red bell pepper – ¼ cup, finely diced
Celery – ¼ cup, finely diced
Carrot – ¼ cup, finely diced
Red onions – 2 tbsp, minced
Scallions – 2, both green and white parts, finely chopped
Any mixed herbs like mint, cilantro, thyme, parsley – 2 tbsp
Ginger – 1 tsp, grated
Green chilli – 1, minced

Dressing

Sesame oil – 4 tbsp
Dijon mustard – 1 tbsp
Red wine vinegar – 1 tsp
Soy sauce – 1 tbsp
Salt
Pepper

Method

Take all the dressing ingredients in a large bowl and whisk vigorously to combine.

Crumble the tofu block and place it in a clean dry kitchen towel, bring the ends together and squeeze to remove all the water. Add this to the dressing. Add all the vegetables, herbs, ginger, green chilli and lightly mix with a fork. Let it sit for about 15-20 minutes. Serve as a cold salad or spread on a crusty bread and skewer with a toothpick for a sandwich.

Tofu Sandwich